
Wordless Wednesday inspired by Suzanne (midwesterngoneidahoan.blogspot.com)
|
I don't have what you would call a green thumb. In fact my friends and family often make jokes about my 'black thumb'. Whenever I get a plant for a gift, it usually dies within a week. Yes, I water it. Yes, I put it in sunlight. Often I put it directly outside (like many people have suggested I do). And still: dead. *sigh* It's gotten to the point that if I get a plant from a student as an end of the year gift, I just drive it straight over to my Mom. But something changed... It all started with a couple of herbs. I had grown weary of paying top $$ for fresh herbs at the grocery store that only lasted a week or so. So I decided to give herb growing a shot. I found a big planter, filled it with dirt and headed out to buy some herbs. Cilantro of course. Basil, rosemary, thyme, sage. And for our gum-sniffing cat; peppermint. While we're there, we decide to pick up a few little flowers for the light-post planter out front. And since the store we visit is having an anniversary event, they are giving out tiny tomato plants. Great, another thing to watch die... But it's free, and I'm trying something new, so why not. A few weeks go by and all is well! I have successfully kept a plant (many plants!) alive for more than a week! 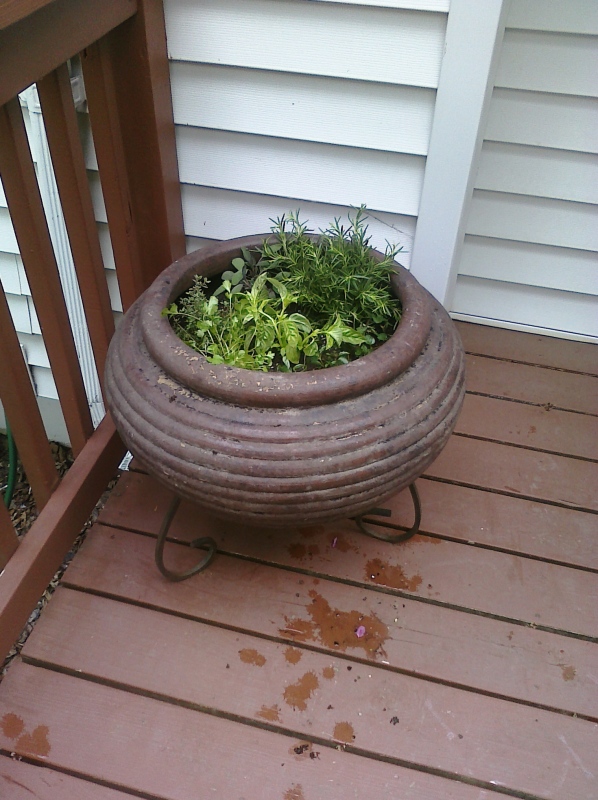 But then the peppermint. The #$*% peppermint. Apparently, it grows like crazy and crowds out anything else near it. Over the course of the next month, the tender basil is the first to go. Then the (admittedly over picked) cilantro. Then the tiny thyme. The rosemary, being a hearty plant is holding it's own, but the sage is holding on by a thread. ... The tomato plant is miraculously growing fast! I've had to re-pot it into a much bigger planter and add a wire cage-holder-thing. But then the storm. The #$*% storm. It's so bad that several streets nearby are severely flooded and my poor tomato plant is torn apart. I prune it back without high hopes for it's future. ... The flowers out front are thriving. The buds are opening and new ones are growing and our yard looks less wild. 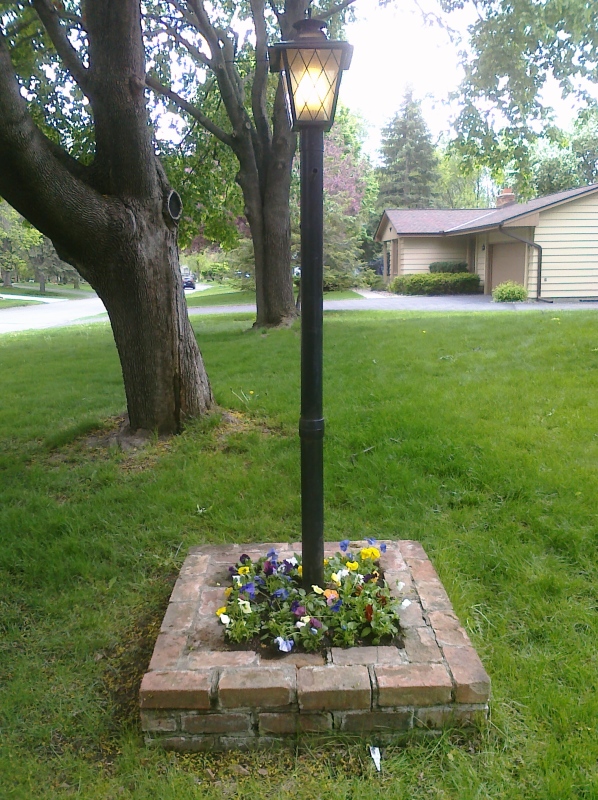 But then the rabbits. The #$*% rabbits. They are in love with the flowers. So they eat them. All. ... So now I have dominating peppermint (which my cat doesn't even like by the way!), shriveling herbs, a broken tomato plant, and headless flowers. Not to mention a front garden with a few tiny plants clinging to life among all manner of overgrown, unsightly weeds. My black thumb is rearing it's ugly head. It's time to do something. So. I take the peppermint out of my herb planter and re-pot it in the small planter I never expected the tomato plant to grow out of. I buy replacement basil and thyme (on super sale cause it's so late in the season). Sadly, everyone is out of cilantro. 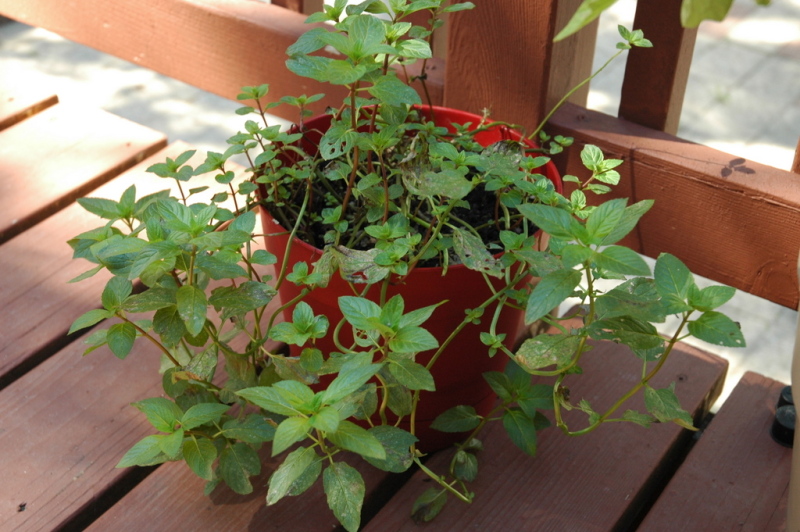  A few of the flowers on my tomato plant survived the storm and have grown into real tomatoes!  There's nothing I can do about he headless flowers. But the plants are still green, which is better than empty brown dirt. 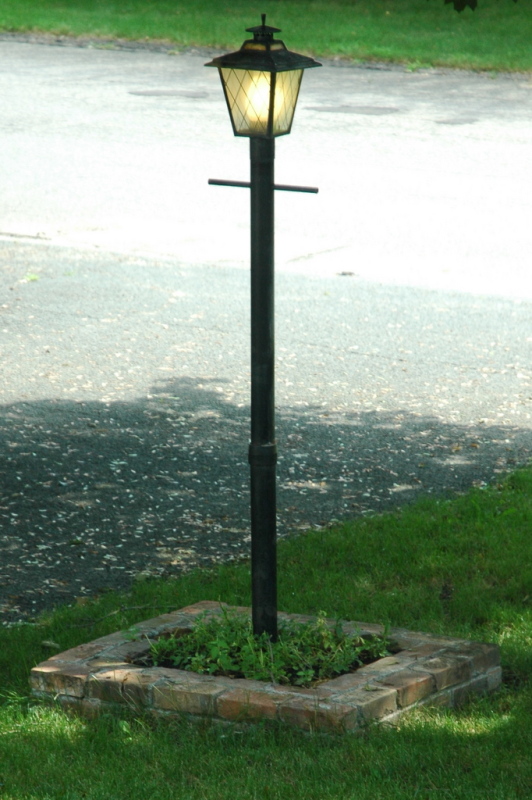 But there is something I can do about the front garden. Hubby and I head to the garden store and pick up 2 new shrubs and in the span of a muggy, sweaty Thursday afternoon, we rejuvinate our garden. I pull out all the overgrown, stubborn, ugly weeds while hubby digs holes for the new shrubs. Then we mix up all the packed soil to give it a fresh look. Give it a good water and voila! Beautiful garden (or a start of one anyway)!  We still need a few smaller plants to fill in the front, and the new shrubs need a couple years to fill out, but it's soooooo much better than it was before!
So maybe I don't have a vibrant kelly-green thumb, but I think I've evolved to maybe a deep mustard yellow. Hey! At least it's not black anymore! And my yard doesn't look so neglected anymore! And that's fine by me! As a scrapbooker, I never had much use for stamps, they were too narrow in their application and I enjoyed making each of my scrapbook pages a unique piece of art. Since I began seriously making cards 3 years ago, I have found great use for stamps. Especially decorative scrolls, sentiments, and alphabet sets. My collection has grown and I find myself forgetting what I have. Not that I would buy duplicates, but I forget to use what I have and I go back to the same few stamps over and over again. To alleviate that problem, I decided to make a stamp catalog. I spent an afternoon sorting out my wood-mounted stamps into categories (I will do my smaller collection of acrylic stamps another day). Then I stamped each onto their category page and put them together into a binder (that also holds other reference materials). Behold, my stamps: 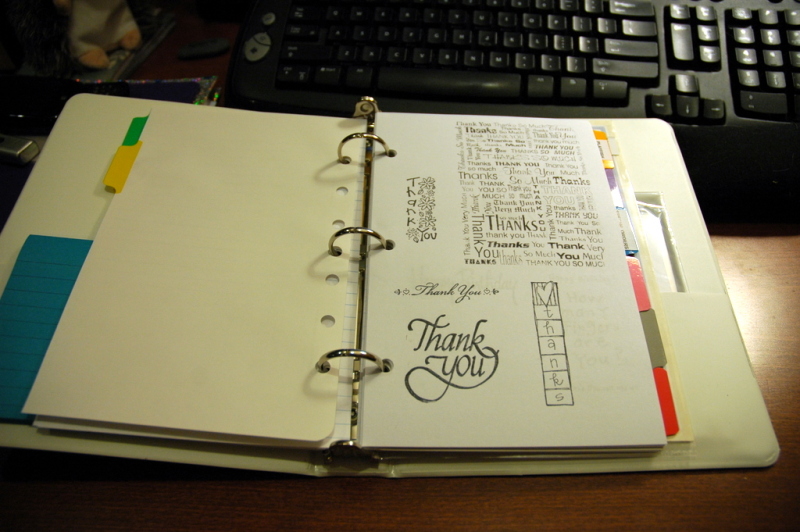 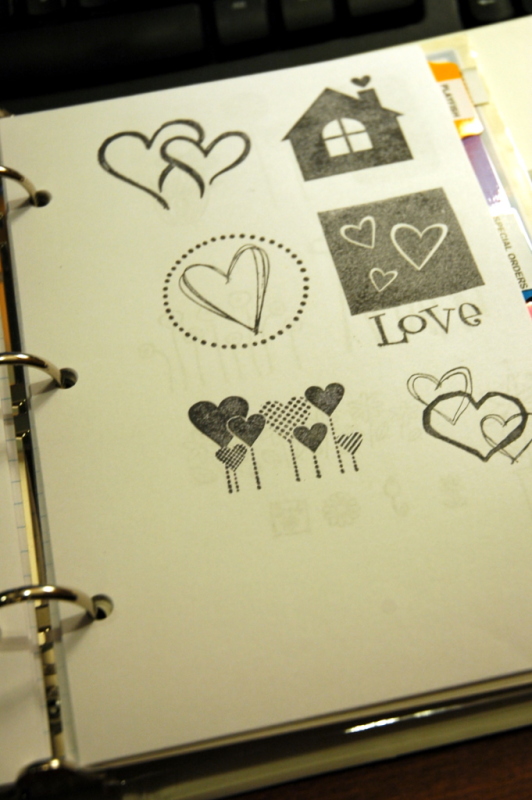 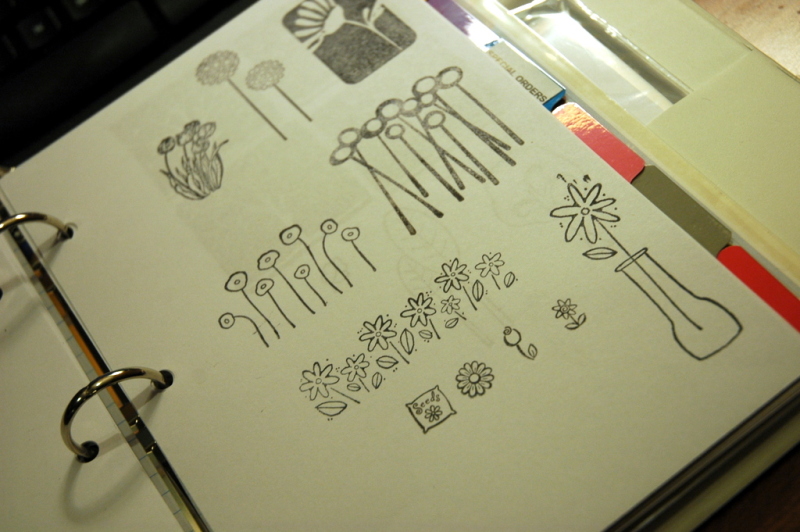 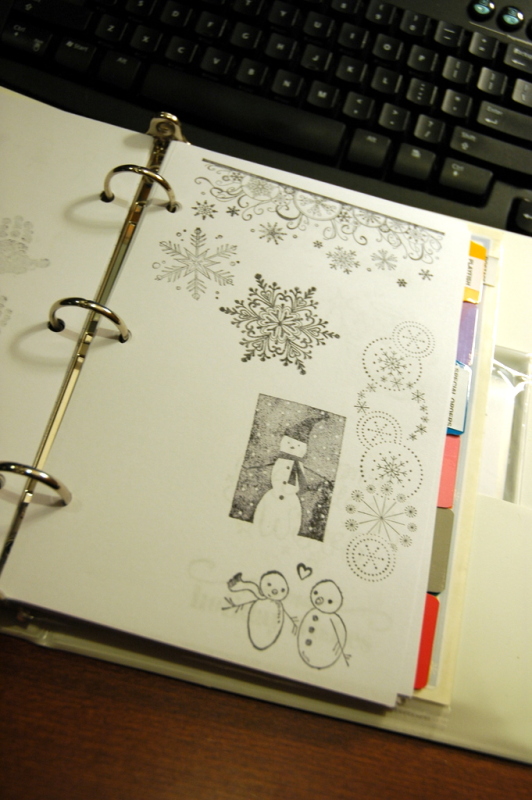 Not all of them, obviously. I just took photos of my favorite groups.
Now I just need to flip through these pages of stamps to get inspired and see at a glance what I have to use. I get my stamps from 3 main sources. Michaels or Joannes (mostly from the dollar bin at Michaels, but if it's a regular stamp, I always try to use a coupon), garage sales and thrift stores (my guilty pleasure of treasure hunting), and from other people (my mom mostly, but my coworkers all know that I'm always looking for crafty castoffs). I have only purchased a very small number of stamps at full price. That's the main reason my collection has not gotten out of control- stamps are expensive!!! So: Where do you get your stamps? How do you organize them? Do you have a stamp catalog? Let me know! I've been keeping myself busy with a few projects this weekend. First, I got an order for one of the coupon holders I wrote about last week. One of my coworkers loved how organized all my coupons looked and immediately pulled out her old trapper-keeper-pencil-case that had coupons crammed in & spilling out of every part of it. Those poor, crumpled, unused coupons! Her only request for color was, "Bright, so I can find it in my dark purse". Here's what I came up with: 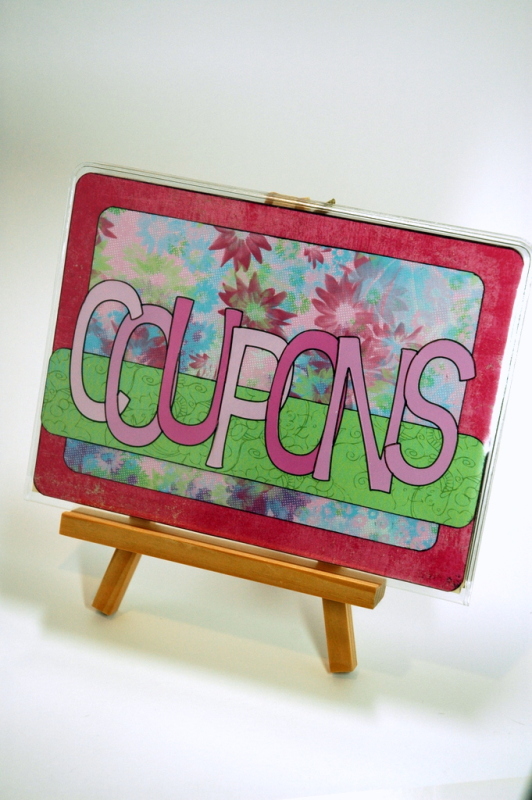 I also made a few more holders while I was at it, including a couple in a smaller 4.5x6 size. 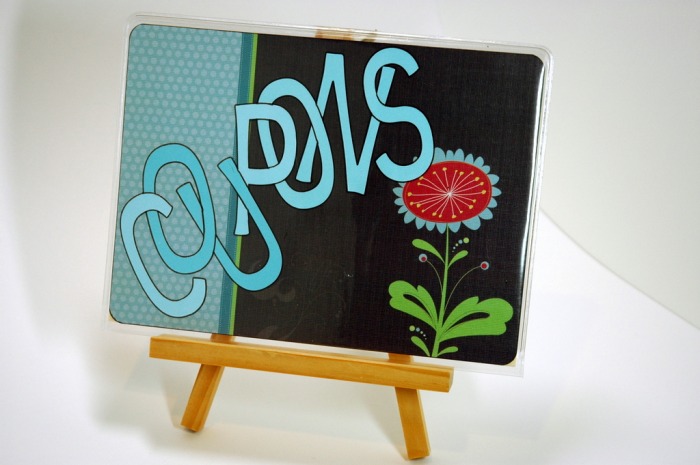  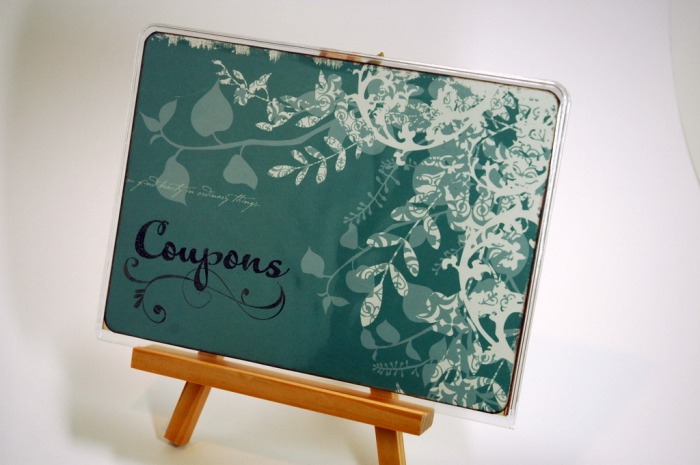 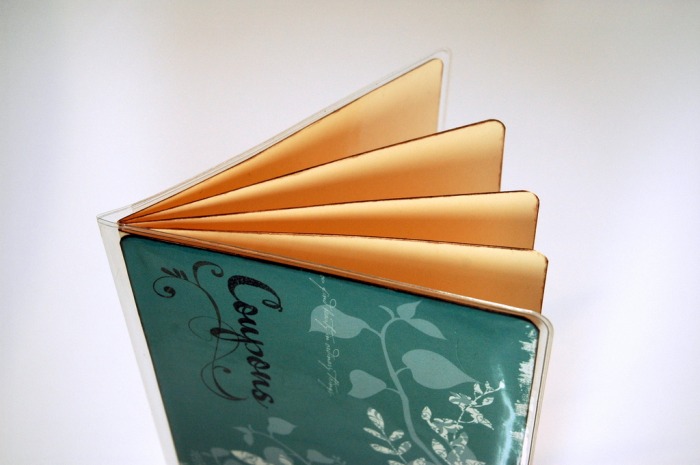 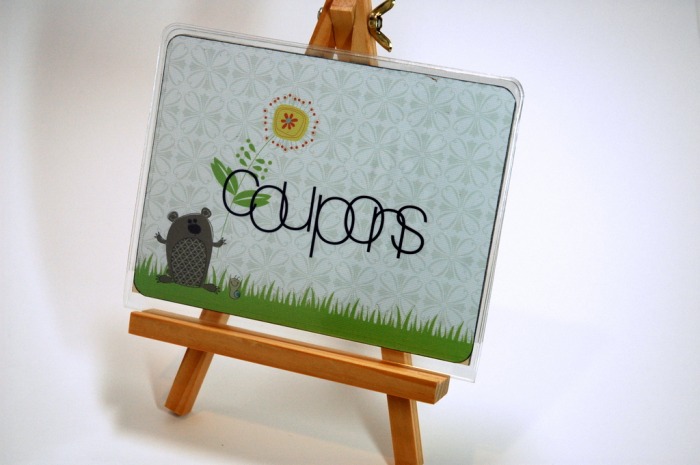 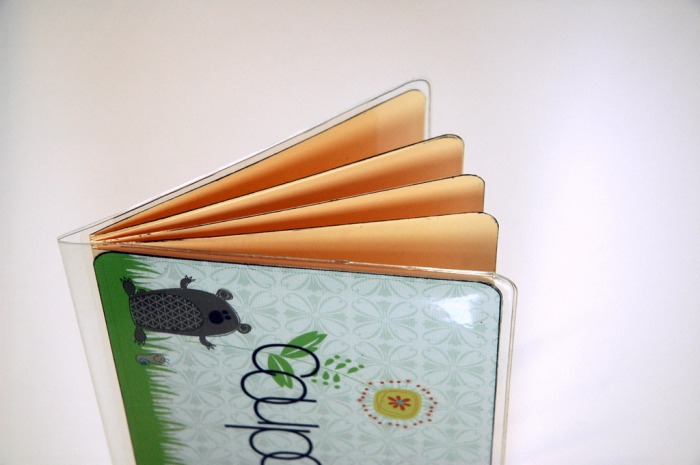  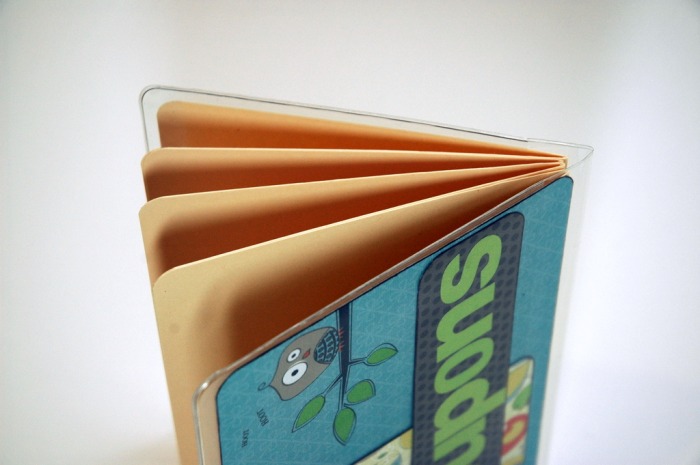 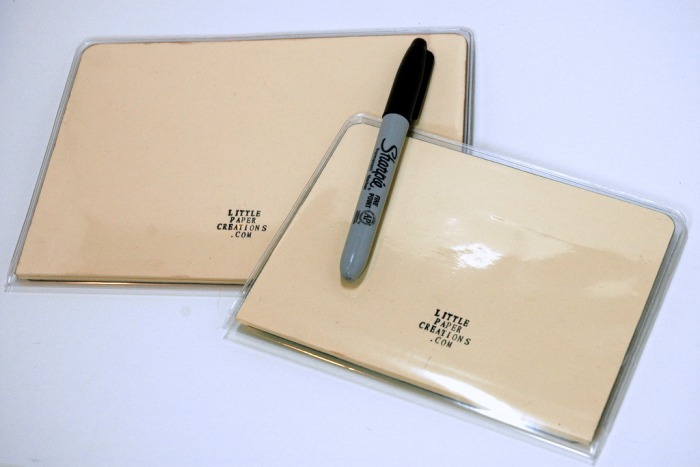 The first 2 (Blue/brown with red flower and blue with white leaves) are the larger 5.5 x 7.5 size and the next 2 (beaver holding flower and owl on a branch) are the smaller 4.5 x 6 size. The last picture shows the sizes relative to a Sharpie marker. Cause everyone knows how big Sharpies are!
I have put these in my Etsy store, and for only $8.00 (large) or $7.00 (small), you too can be the proud (and organized) owner of a Little Paper Creations coupon organizer! Each holder has 4 sections to sort your coupons into. I have left the sections un-labeled so you can either label them yourself or let me know what 4 labels you want and I'll label them for you before I ship it off. I also spent my weekend working on another organizational project, but I'll write about that tomorrow. Happy Creating! Remember my creative field trip to Mosaic-on-a-Stick? Well, my mom finished grouting the mirror we started!  I think it looks great! Mom said the grout was gritty and hard to get into all the cracks, but it turned out so nice and she polished it up beautifully. Now she just has to decide where to hang it!
Happy Creating! Sundays have crept up on my "favorite days of the week" list for one simple reason; I get the Sunday paper now. And that means coupons! I'm having a major love affair with coupons right now. It's not so much the saving money (though that is pretty nice), and it's not trying new things (though I have done that, too), it's the hunt. It's the game of finding the best deal, the best combination, the best sale. I have always just put all my coupons in a single folder or pouch in my purse or just crammed them in (and was saddened when they disintegrated into nothing at the bottom of my purse). I don't like the usual coupon accordion folders for a few reasons: 1) They are really thick on their own before you even add the coupons. 2) The coupons are hard to access without taking the folder all the way out of my purse. Which I don't like doing. 3) They have a lot of spaces that I never use. 4) They are stiff and I have cut myself on them. Oww! 5) They are ugly! So I finally decided to take matters into my own hands and make a coupon holder that suited my needs. And here's what I came up with:  It measures 7.5 x 5.5 and is housed in a durable, clear plastic cover. The inside is split into 4 sections with labels telling what belongs in that section.  Have I mentioned before how much I love to organize? So it should be no surprise to you that I also love my label maker! My four sections are: Groceries (food), Household (pretty much anything that's not food), Around Town (restaurants, services, store specific coupons like Michaels or Staples) and Receipts (because I always keep receipts). When it's empty, this folder is pretty flat, but it can easily expand when things are in it. Here it is all filled up and fanned out:  And closed, like it will be in my purse: 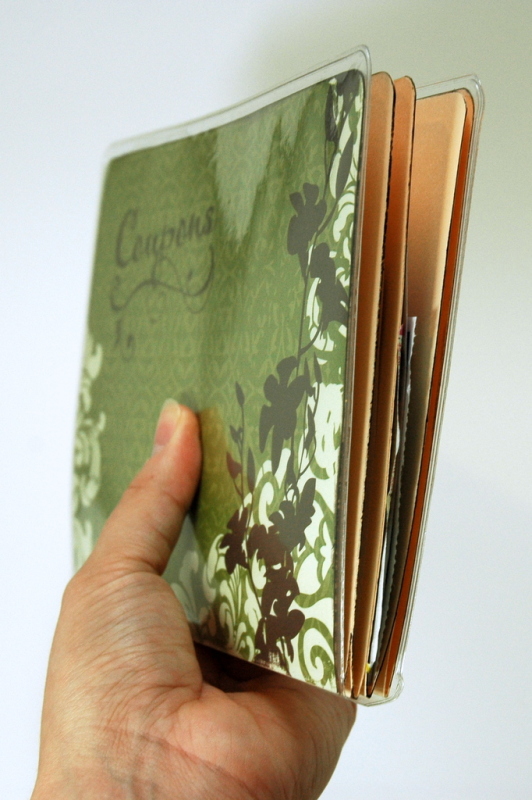 I love that it's open at the top and sides so it's easily accessible without taking it out of my purse and it's pretty!!
Here are a few sites I use to print out coupons, in case you wanted to get started: KouponKaren.com DealSeekingMom.com Coupons.com RedPlum.com SmartSource.com So, how do you organize coupons? Would you use an organizer like I made? Where do you get your coupons? Happy Creating! And couponing! Momentous day! I woke up this morning to find an email telling me an item in my Etsy account had sold. My first item!  A gift card holder. A small sale, but a sale none-the-less!
I'm so happy. What a great way to wake up on a Saturday! Happy Creating (and selling!) Way back in 2006... I know, ages ago, right?... I decided that since I was newly engaged and all, I should send out a proper Christmas card to friends and family. I had made Valentines cards for 2 years already, but for some reason, I had never tackled Christmas cards. I think it was because I could never get my act together till the new year, then it was too late; hence Valentines cards! I kept going back and forth between making one design or making each one unique. Once I counted up the number of people I would potentially be sending them to, I realized that even though the number was relatively low (I think it was around 20 or 25), there was no way I could make that many unique cards. Also, it was Halloween, so I was running out of time. I had way too much fun shopping for the perfect paper and stamps for my First! Christmas! Card! and finally settled on simple snow and 2 adorable snowmen. 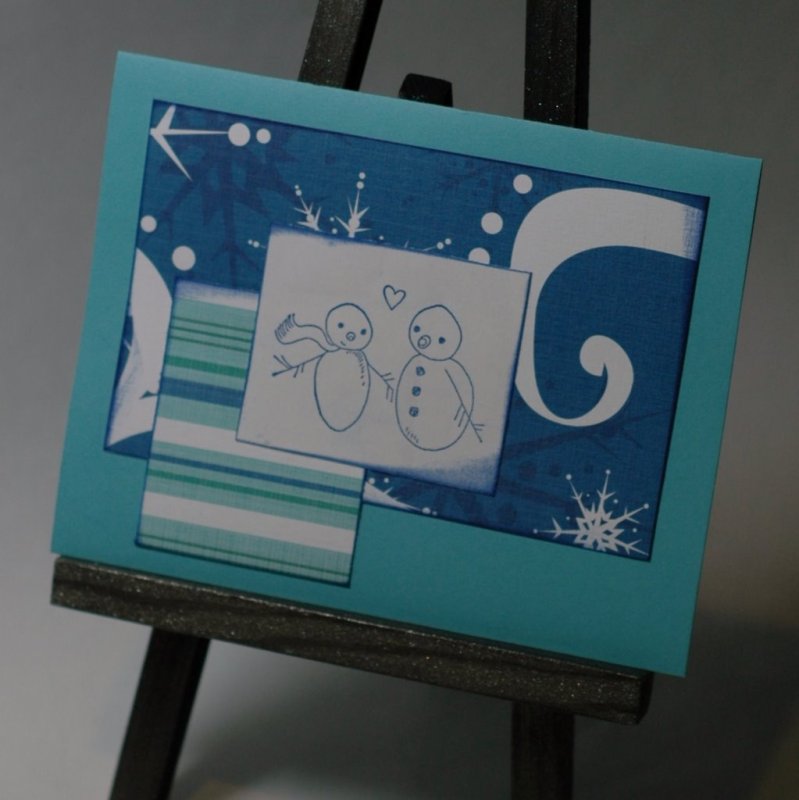 I set up an assembly line, and away I went! Cut, ink, stamp, tape, sign, stuff, address, mail, done! It didn't take all that long because I didn't have all that many to make and the cards were pretty simple. And I didn't do anything to the inside other than sign them.
I was very proud of myself for finally getting my act together and sending out cards before Christmas (ok, like 3 or 4 days before, but still... before!!!) Plus, it was good practice for all the wedding invitations and thank you cards I was soon to make! Your turn! Do you make Christmas cards? How many do you make? When did you start? Please share! Happy Creating! My mom has always encouraged my creativity (Hi, Mom!) and has dabbled in quite a few creative endeavors herself over the years. Macrame, scrapbooking, watercolor painting, interior design, and now; mosaics. She knows that any time she wants to go do something creative, I'm her go-to person. So when she called me up the other day and asked if I wanted to go to Mosaic-on-a-Stick (no joke, it's actually called that - it's a Minnesota thing), of course I said yes! 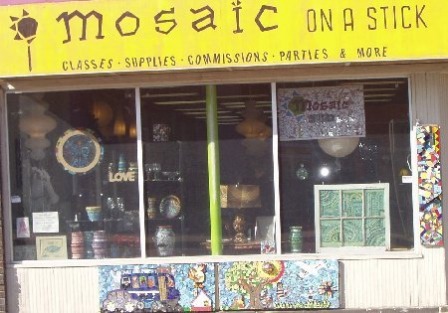 Photo from their website - click to visit Before heading out to St. Paul, we stopped at the Arc's Value Village store by my house and picked up some cheap, beautiful pottery that we could smash up and create with! Armed with $10 worth of pottery, excitement, and no idea what we were doing (!), we entered Mosaic on a Stick and were floored at the plethora of beautiful pieces that adorned the walls, tables and floor of the store. Even the outside was covered in mosaic-y goodness! We quickly wrangled an employee to show us what to do. She was very helpful and friendly and we were soon smashing and gluing to our hearts' content! I really wish I had taken photos of the smashing process, but it was so fun and went so fast, I didn't even think of it! The pieces we ended up using were all from 2 painted candle holders. Some pieces even had a little wax left on them. My mom had the best time arranging all the pieces onto the simple square mirror frame she chose. And I kept busy snipping her pieces to fit. Check out our creation! 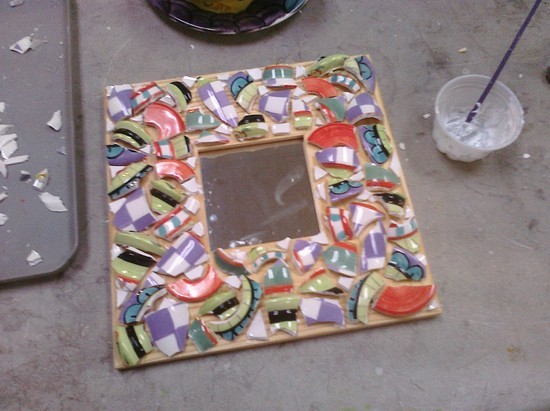 The glue has to dry overnight and then it has to be grouted and dried for about 24 hours. We had the choice of coming back in a day or 2 and grouting at the store or taking the mirror and some grout mix home and doing it there. Mom chose to take it home. We decided black grout would make all the colors stand out more.
She promised to take a photo and send it to me when it's done and I will post an update of the final product! See that, Mom? You have to do it now! (hehehe!) And thus ends another creative adventure! Happy Creating! (with or without moms!) I love the 4th of July for one simple reason: FIREWORKS! I don't like to light them (MN ones are dumb anyway - the only legal ones are the ones that don't leave the ground) and I only kinda like to just sit and watch them. But I LOVE taking pictures of them! I've been experimenting with firework photography since 2006 and I think I'm getting better every year. Granted, there's only one chance to practice every year, but still! I do a lot a research before the 4th every year and I study my photos to find what I like, what worked well and what didn't. I also familiarize myself with my camera's settings (again!) because I don't use these settings very often and I need to be able to change them quickly and mostly in the dark. This year, I felt like I was able to better anticipate the fireworks and get good photos of them right from the explosion.  Here are a few silly fireworks - I love it when they do shape ones!  Smiley Face!  Heart! There were also several fireworks that featured unique, new colors. Including teal, purple, and orange. I have not seen many fireworks in those colors before. They were beautiful and added good variety to the regular red, white, blue, and gold.  I will leave you with my favorite photo of the night; the finale!  Happy 4th of July, everyone! |
Blogs I read:
Becky Higgins Bits & Pieces KWerner Designs Jennifer McGuire Ink I Could Make That Linny's Vault Pintester Categories
All
Archives
February 2016
|
 RSS Feed
