Little Paper Creations
  • Blog
  • About
  • Portfolio
  • Etsy Store
  • Quest for Kisses

Storage Solutions: Distress Inks

3/15/2016

1 Comment

 
I'm back once again with another peek at my ever-evolving storage solutions. This time, we're talking ink. Specifically - Distress Ink.
Picture
I don't have a lot of regular ink pads - maybe a dozen or so. But I have every color of the Distress Inks in the mini size. And as you can tell from my many posts about them, I love them!

When I first starting buying the minis, I was able to keep them easily filed in rainbow order in one or two of the storage tins that are made for this particular product. However, as my collection grew, so did the need to keep them more organized and more easily accessible.

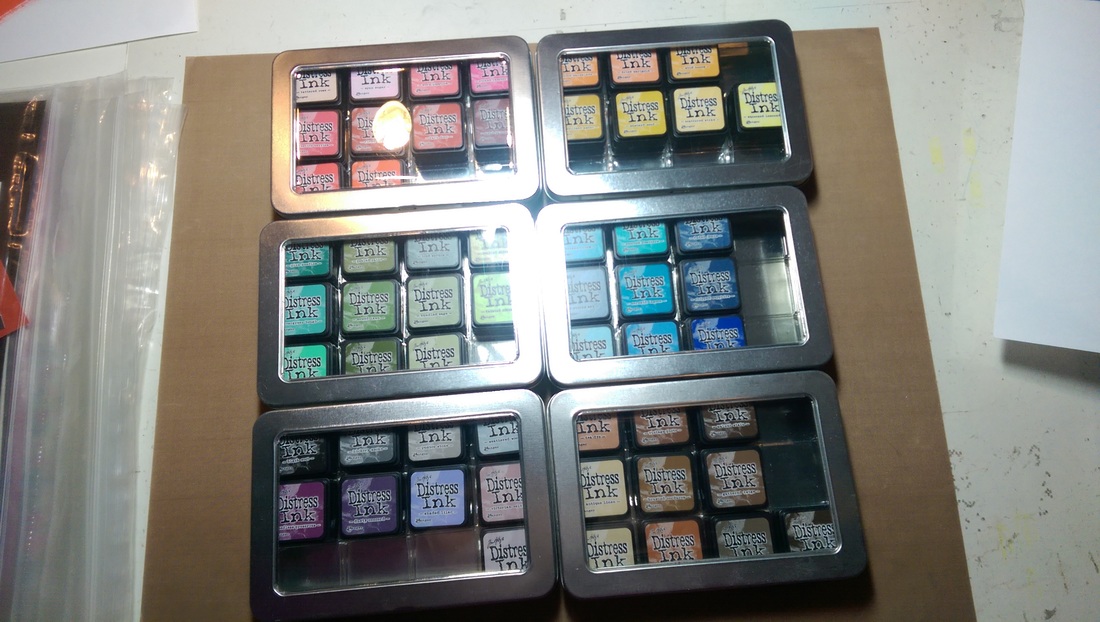
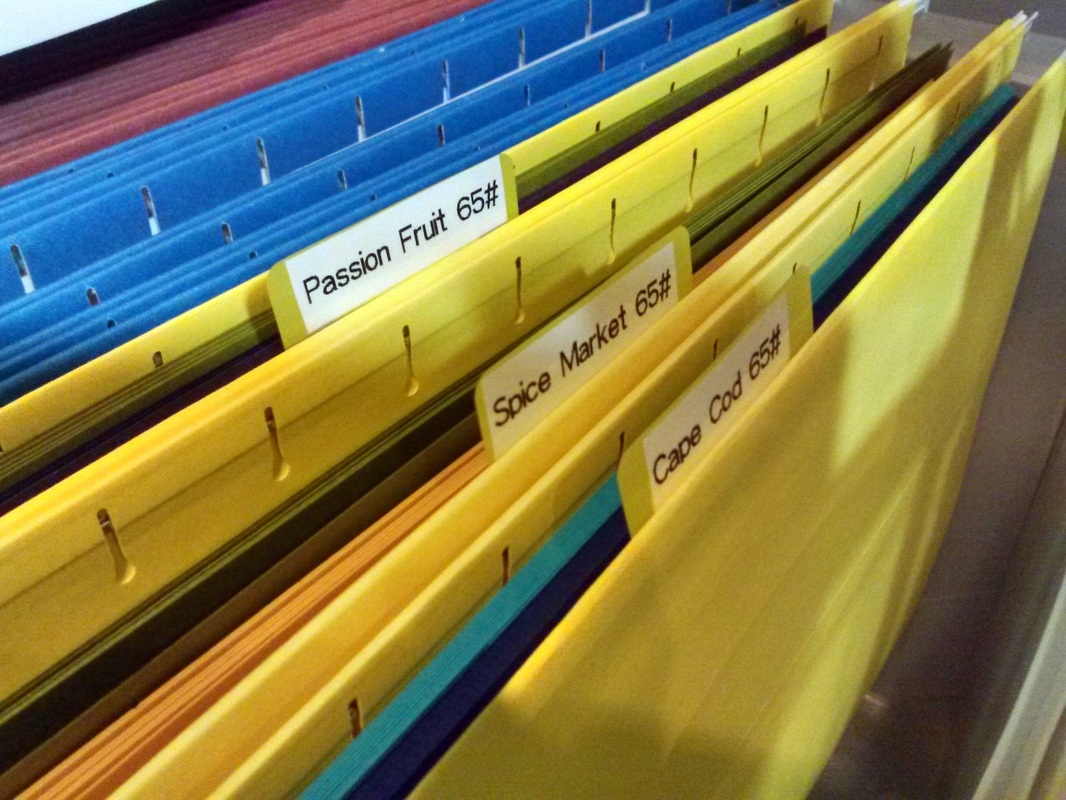
I decided to split the tins into color families. My first order of business was to sort out all the minis to see how many of each color I had. I decided that as long as the color family was together, it could share a tin with another family - if they were both small enough. So pink and red share, as do yellow and orange. Purple and black/grey also share as they are both very small families.

As you can see, there are spaces left in the tins - enough that I could get rid of a whole tin, but I want the colors grouped together, so I decided a few dollars for another tin was worth it. Plus, I've got room to grow now, if Ranger ever decides to come out with more colors!
Picture
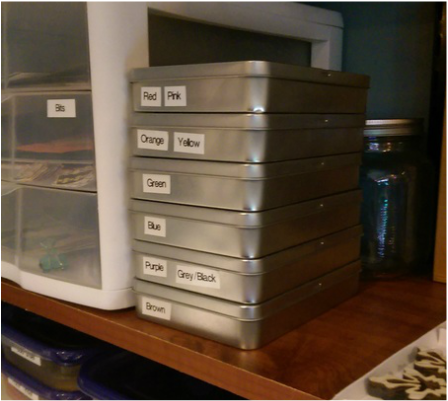
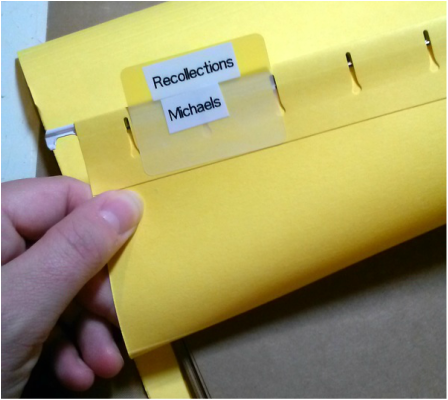
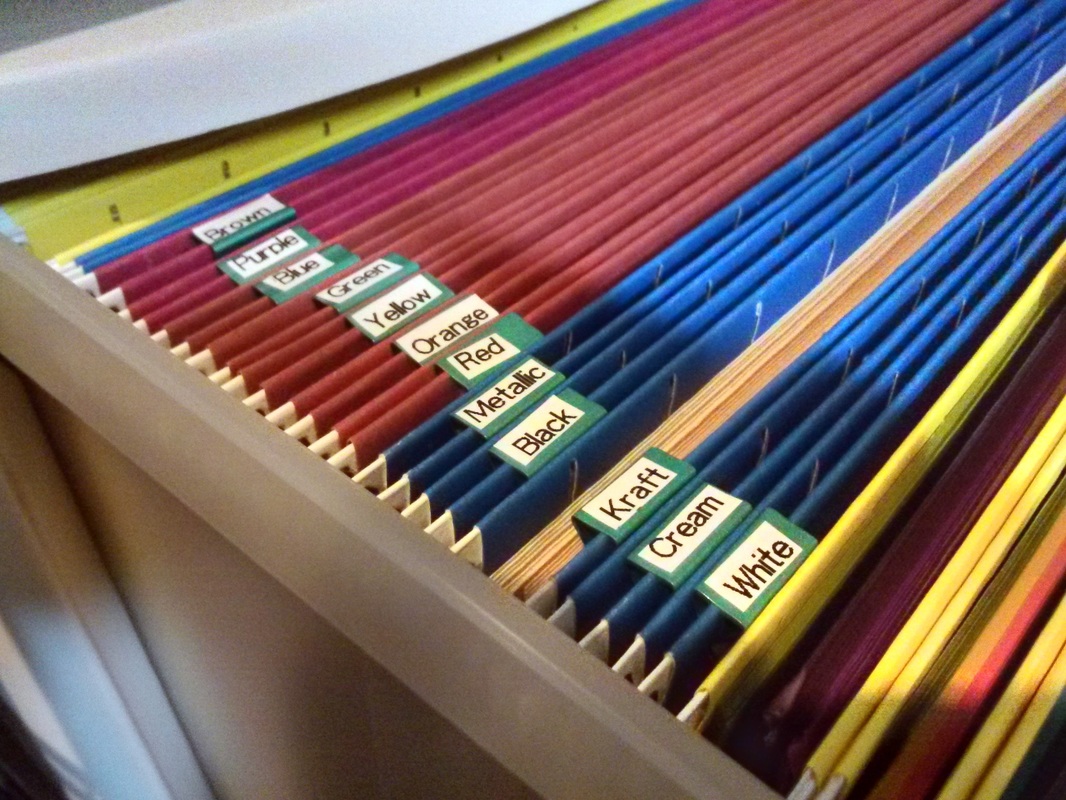
Since I store the tins stacked on a shelf, I used my label maker to label the sides of the tins with the colors inside. I made sure that each color had it's own label, in case I ever have to re-arrange the minis into different tins.
Picture
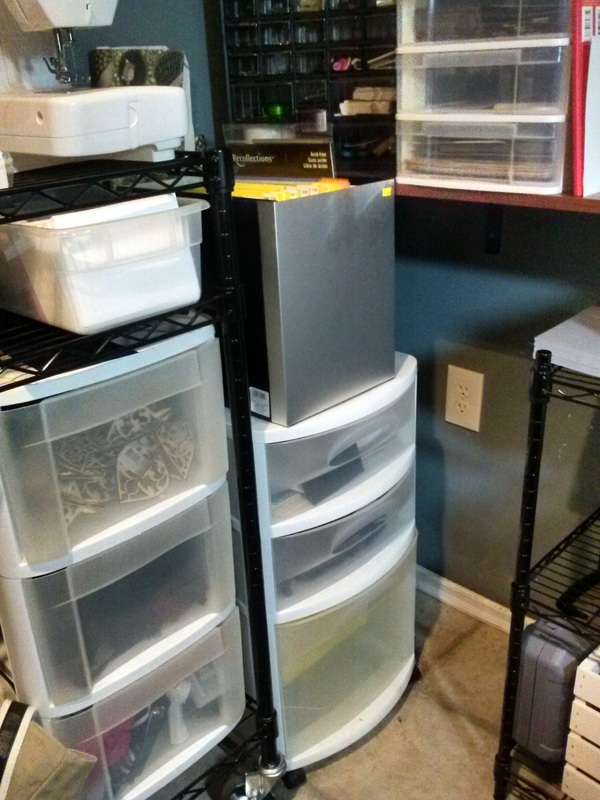
All-in-all, this is a pretty simple solution. After all, I'm using the tins that are meant to store these mini ink pads. It's not like I came up with a whole new system, I just spread out the inks over multiple tins. But it works for me, and that's all that matters when you organize craft supplies. Do what works for you!

Happy Crafting (and Organizing)!
1 Comment

Storage Solution: Clear Stamps

9/29/2015

0 Comments

 
A few months ago, I shared with you my solution for wrangling my wafer-thin dies. I have been loving my mini binder idea for my dies, so I thought it would be a perfect solution for my clear stamps as well!
Picture
Supplies: half-size binder, half-size page protectors, white cardstock cut in half, and a label maker. Put it all together and you get a super easy, super accessible storage solution for clear stamps!
Picture
The stamps stay in the page protectors well and slide out easily when I need them. I have each page labeled with the name of the stamp set and the company so I can reference them later if I need to.

The only problem I ran into is that my mini binder is too full! I don't have that many stamp sets, so I thought they would all fit, which they technically do... But it looks like I'll have to get another binder and split them up.
Picture
The binder fits nicely on my hanging file shelf in my craft room right next to my die binder.
Picture
I do still have a few stamp sets that I did not put into the binder. One Stampin' Up set I just bought for Christmas and a couple alphabet sets that I put into CD cases years ago. As I rarely use these stamps, I figured a few in boxes on my shelf is no big deal.

I'm hoping that by having the stamps accessible and visible, I will take them out more often instead of reaching for the ones I always reach for.
Picture
How do you store your clear stamps?

Happy Crafting and Happy Organizing!
0 Comments

Storage Solution: Recipes

9/1/2015

0 Comments

 
Like any good crafter, I jumped on PInterest early. I loved having craft ideas at my fingertips. Then I started finding non crafty things. Like recipes. And pretty soon I had a bunch of recipes stored up to try out, but what good were they on my computer? I don' have a computer in the kitchen, so I had to print them. But what to do with a bunch of printed recipes? Put them in a binder!
Here's my recipe binder:
Picture
I actually have 2 binders now. One for sweets and one fore everything else. I have a lot of sweets recipes...

Moving on...

I sorted my recipes into different categories, then used some tabbed page protectors and my label maker to label the categories.
Picture
I wanted to decorate the tabbed page protectors, but I didn't have a lot of time or money, so I dug into my stash and came up with a whole set of old K.I. Memories paper. I used one color on each page, cut out randomly-sized rectangles and adhered them onto some black cardstock. I love that I was able to use so much of the paper that I had been hoarding for so long.
Picture
Picture
Once the title pages were done, I started sliding in my recipes. I try to take a photo of each recipe when I make it so I can see what the dish looks like when I'm flipping through.
Picture
Sometimes, I make notes on my pages so I can keep track of what has worked or what to try. Here is my Thanksgiving turkey recipe with notes on how big the turkey was each year and how long it took to make. That way I can plan the timeline each Thanksgiving.
Picture
When I get a new recipe, I put it in the front of the binder till I actually make the recipe, then if I like it, it gets a page protector. If not - trash! There is no special order to the recipes within the categories - none of them are big enough that I cannot find what I need.

How do you store your recipes?

Happy Crafting (and cooking!)
0 Comments

Storage Solutions: Tool Carousel

7/28/2015

0 Comments

 
Crafters have lots of tools, and I am certainly no exception. I've spent many years being frustrated with options for storing those tools. If they were out on my desk, they were often taking up way too much room, but if they were neatly sorted into bins, I would never use them!

Then one day, I was browsing Michaels (like you do), and I found this amazing and adorable lazy Susan/carousel thing!
Picture
I immediately brought it home and started playing. I have collected many little buckets and jars over the years, so I just popped some of them onto the carousel and started organizing.

One bucket holds all the adhesive I use on a regular basis; tape runners, glue pens, liquid adhesive, and a small roll of foam tape. Specialized adhesive (like glue dots and my sticker maker) are in bins on my shelf - if I need them, I know where to find them.

Another bucket holds all my crafting tools. Several scissors, a bone folder, hole punch, poke tool, Quik-stix, X-acto knife, tweezers, and a brayer. These are tools I reach for very frequently. Again, the tools that I don't use often or that have a very specific purpose (like eyelet setter or a stapler) are in bins on my shelf.
Picture
Turning the carousel a bit, I get to my paint brushes. I put them in a small mason jar so they'd stand up straight. I know I'm not supposed to store wet brushes pointing up like this (the water can seep down and rot the wood from the inside), but I only put them in here when they are dry. I let them dry on their sides on my desk. I just don't want the brush tips to get bent if I put them into the jar pointing down.

I also have a mason jar with pens and markers. I don't have a lot of markers, so I only need the one jar.
Picture
The back of the carousel holds some misc items that I use regularly, but have never found a good place for. My branding stamp, some post-it notes, my CM corner rounder, some business cards, and my small lenses for my phone camera.
Picture
I love this carousel! I love the color and the little birdy in the middle, even if I don't see him that often because he's hiding behind all my tools.
Picture
It holds a ton, but because it's raised off the desk on a small foot, it doesn't take up that much real-estate. Check out how clean my crafting desk is! What you don't see is the pile of work that got put on the floor for this photo. :-)
Picture
I got the carousel at Michaels, the buckets at Target, and the mason jars from my local grocery store.

So how do you store your tools? Is it working for you?

Happy Crafting (and organizing)!
0 Comments

Storage Solutions: Cardstock Paper

6/2/2015

0 Comments

 
For years, I didn't care about cardstock. I cared about patterned paper; followed certain companies, hoarded my favorite patterns, envied those that could afford entire lines. But cardstock? Who cares? It was just there to mat my photos and provide a base for the pretty patterned stuff anyway.

But now that I've grown away from patterned paper, now that I've gotten into stamping and card making, now that I need consistent quality and exact matches for my invitations, now I care. A lot. And now I realize that my method for storing my cardstock was poorly lacking.

My method for storing cardstock in the past was basically a bin with all the paper thrown in. If I needed white, I'd shuffle through till I found some. Black? Same thing. I usually only had 1 or 2 sheets of specialty colors on hand, which meant when I made a card or invitation, I would have to go out and try to find the paper again in order to make more. And of course nothing was ever labeled, so it was a pain in the you-know-what to try and find that particular paper again.

But I've learned. And I've developed a method that works for me now.

Storage Solution: Cardstock Paper Edition
Picture
I use hanging file folders to store my cardstock. I label each folder with the color and weight of the paper on the front and the company and store on the back, so it's always easy to go buy more.
Picture
I keep the paper I use most (and have the most of) on top of a set of drawers in a filing box. These are the papers that I know brands and stores for, the ones I reach for on a daily basis or the ones I'm using for a special project.
Picture
In the bottom drawer of the cart, I keep miscellaneous colors of cardstock. This is paper that I have only 1 or 2 sheets of and I may or may not know the brand or store. These are the paper I reach for when I'm just making a fun card or other project that I will not have to duplicate.
Picture
I also keep my sets down here. Michaels has packs of papers with a variety of colors that all go together very nicely. I use these for cards when I'm looking for a lot of color. Since the packs are already matched so nicely, I don't want to break them up, so they go in one folder together. Besides, they don't list the individual colors!
Picture
So there's a quick look at my cardstock storage system! It may change in the future as I collect more colors and brands, but for now, this works for me! Now I just have to figure out how to store my patterned papers...

How do you store your paper? Is it working for you?

Happy Crafting!
0 Comments

Storage Solutions - Wafer Dies

2/24/2015

1 Comment

 
I love binders. I really do. Someday I will write a post sharing all the binders I have at my house and at school. The number is firmly in the double-digits, I assure you.

But today, I want to show you one particular binder.
And I just finished setting it up!
Picture
It's my wafer-thin die storage binder!
It's a mini binder, which means it's 8 1/2 x 5 1/2 (half-sheet size), which means it's the perfect size for most dies and stamps!
Picture
As I started collecting more dies, I realized that if I had no way to organize and access them efficiently, I would soon lose track of what I had, or worse, lose the dies themselves! Some of them have very small pieces. Plus, I wanted to be able to keep some stamp and die sets together. I searched online and came across several crafters that use magnetic sheets for die storage and while I loved that idea, I did not love the price of the magnetic sheets that were sold for that purpose. So I did some digging and found magnetic vent covers at my local hardware store!
Picture
They come in packs of 3 sheets for $4.47. The sheets measure 8x15 inches, so I cut them up. They cut very easily with a paper trimmer.
I was able to get 2 large pieces of 8 x 5 1/2, one medium piece of 5 1/2 x 4, and one small piece of 4 x 2 1/2.

I use the large pieces as full magnet sheets for large sets or multiple sets.
Picture
Picture
Picture
Picture
I use the medium and small pieces for sets of small dies.
These two sets have matching stamps, so I made sure to store the stamps and dies together. The Hedgehugs stamp set is taped onto the paper next to the dies so they stay in place together and the Carnival Cupcakes stamps just slide into the back of the pocket on the left.
Picture
All the magnetic pieces can slide in and out of the pockets easily so I can just take what I need when I want to work on a project.
Picture
I used my label maker to label each die/set on the magnetic sheets. I didn't want to put the labels on the page protectors because I didn't want to worry about getting everything back exactly where it needed to. And I want to be able to change the order of things when I get new dies. Labeling the magnet sheet keeps it flexible. I make one label for the company and one for the name of the die/set.
Picture
I love having everything in one place and easily accessible!
I love my binders!

Do you use binders in your craft storage? What do you use them for?
If you don't use a binder, how do you organize your dies?

I'll be adding more Storage Solutions posts over the next few months. I know storage and organization are a big topic among crafters (and others) and I hope that my solutions inspire you to get your supplies more organized. Is there something in your craft area (or kitchen, or classroom, or office, etc) that is unorganized? Something that you need a solution for? Let me know and it may be the next Storage Solutions topic!

Happy Crafting!
1 Comment

    RSS Feed

    Blogs I read:

    Becky Higgins
    Bits & Pieces
    KWerner Designs
    Jennifer McGuire Ink
    I Could Make That
    Linny's Vault
    Pintester


    Categories

    All
    #30DaysofCreativity
    Baby
    Baby Shower
    Binder
    Calendar
    Cards
    Christmas
    Coupons
    Craft
    Distress Ink
    Etsy
    Fabric
    Family
    Feedbackplease
    Field Trip
    Flashback Friday
    Food
    Gift
    Haul
    Home
    Inspiration
    Internet
    Invites
    Magnets
    Organization
    Paint
    Photos
    Planner
    Project
    Project Life
    School
    Scrapbook
    Special Order
    Special Order
    Storage Solutions
    Thinking Of You
    Tips And Tricks
    Top5friday
    Tutorial
    Wedding


    Archives

    February 2016
    January 2016
    November 2015
    October 2015
    September 2015
    August 2015
    July 2015
    June 2015
    May 2015
    April 2015
    March 2015
    February 2015
    January 2015
    September 2014
    August 2014
    April 2014
    February 2014
    January 2014
    August 2013
    July 2013
    August 2012
    July 2012
    June 2011
    January 2011
    December 2010
    August 2010
    July 2010
    June 2010
    May 2010

Powered by Create your own unique website with customizable templates.