Little Paper Creations
  • Blog
  • About
  • Portfolio
  • Etsy Store
  • Quest for Kisses

Wedding Invitations: Katie & Peder

2/9/2016

0 Comments

 
Last August was full of weddings for me. My husband and I went to 3 weddings in the span of 4 weeks! You may recall a couple of the cards I made for them.

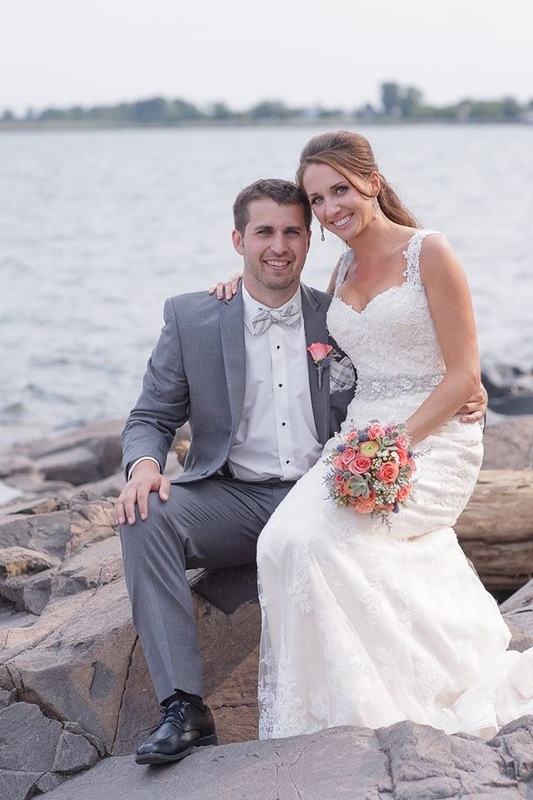
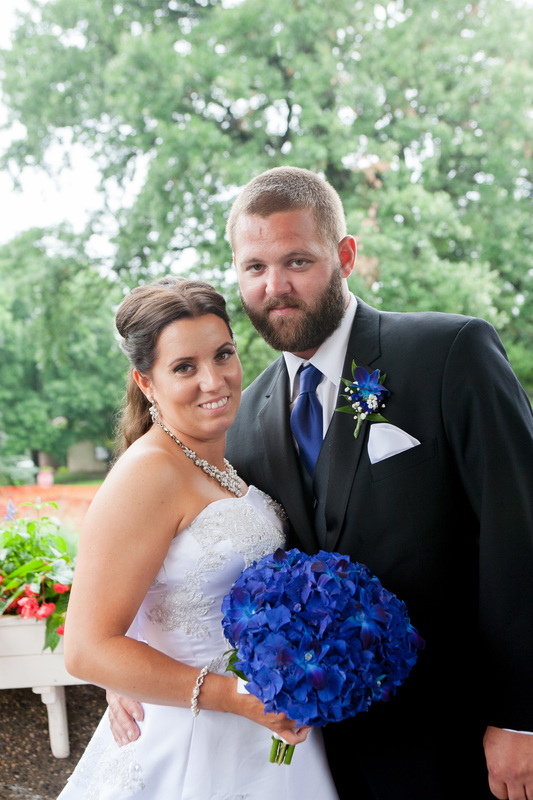
One of the weddings was for Katie and Peder. I've known Katie since I was 10. My family moved into a new house and pretty quickly met Katie and her 2 sisters who lived next door. She and my younger sister became close friends and have stayed in touch all these years. So of course we were all ecstatic when she announced her and Peder's engagement!
Picture
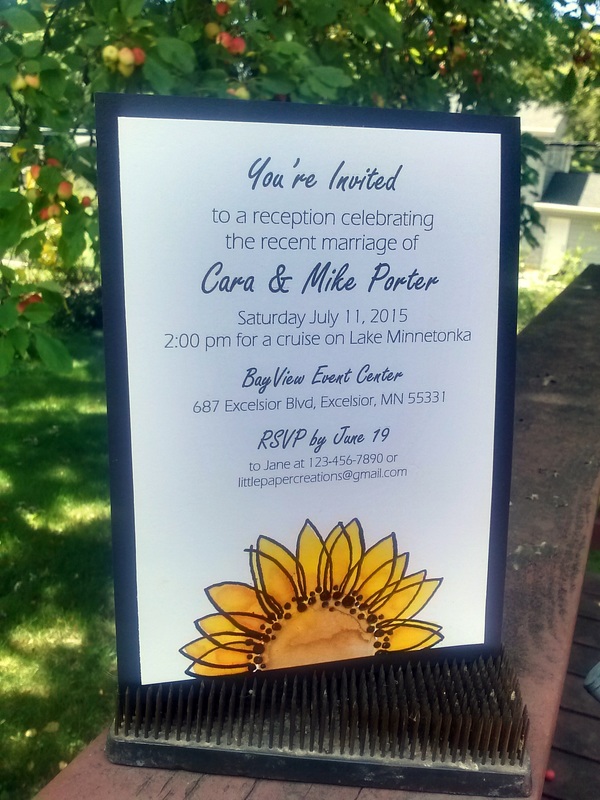
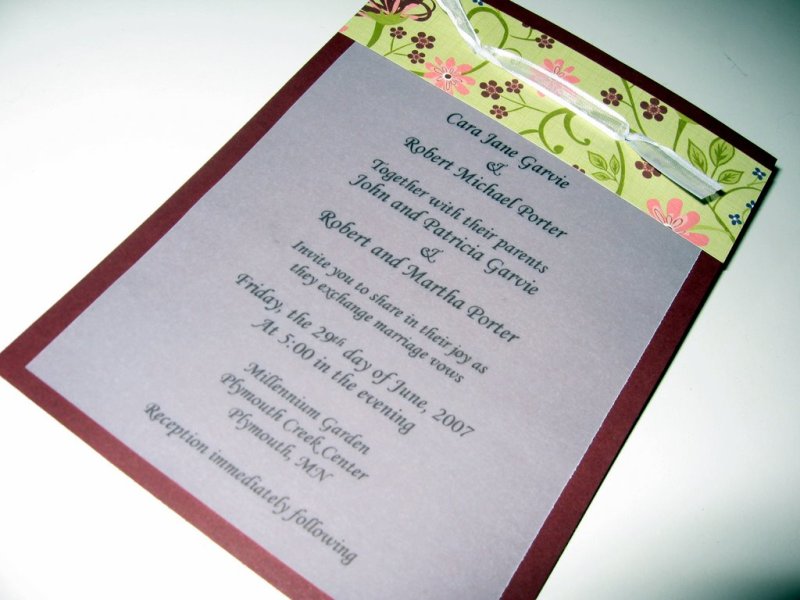
Shortly after she got engaged, Katie got in contact with me and told me that after seeing the invitations I made for my sister's wedding in 2014, she knew that I had to make her invitations, too! Of course I said yes!

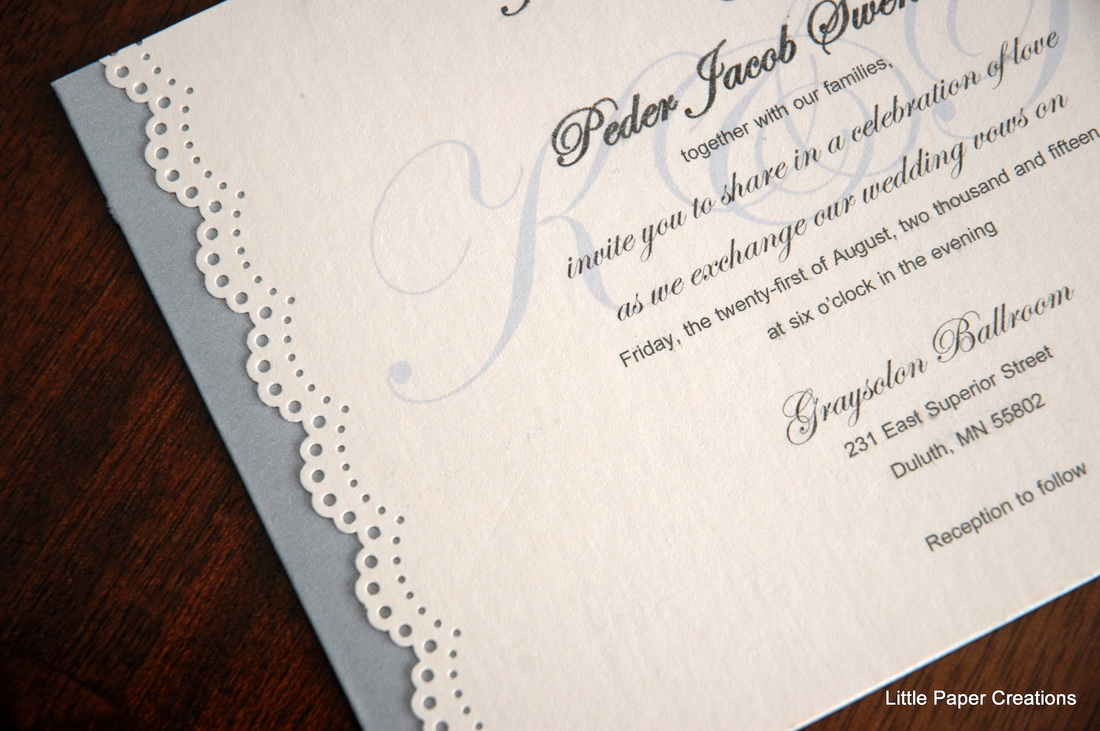
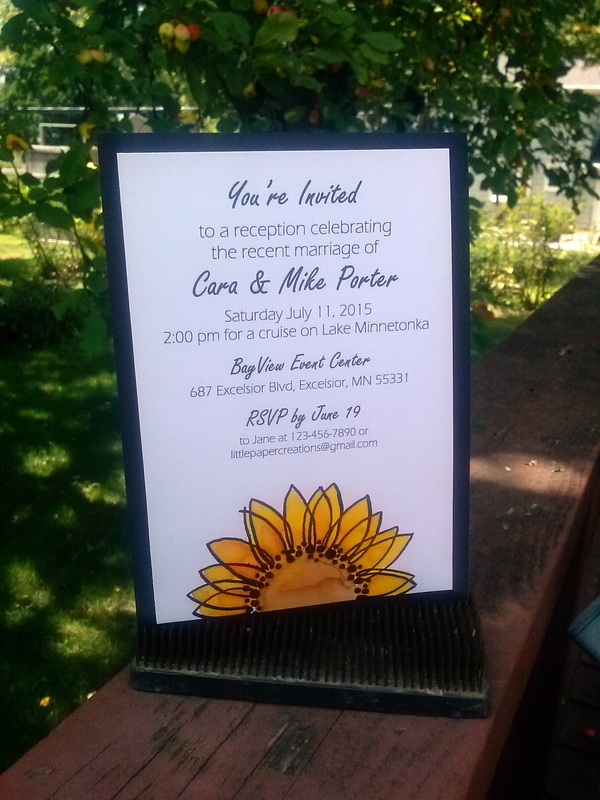
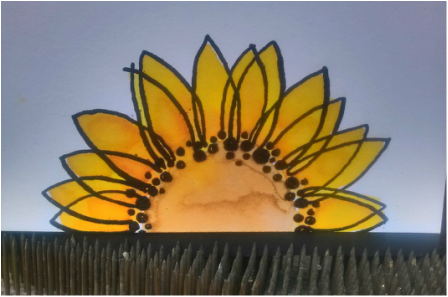
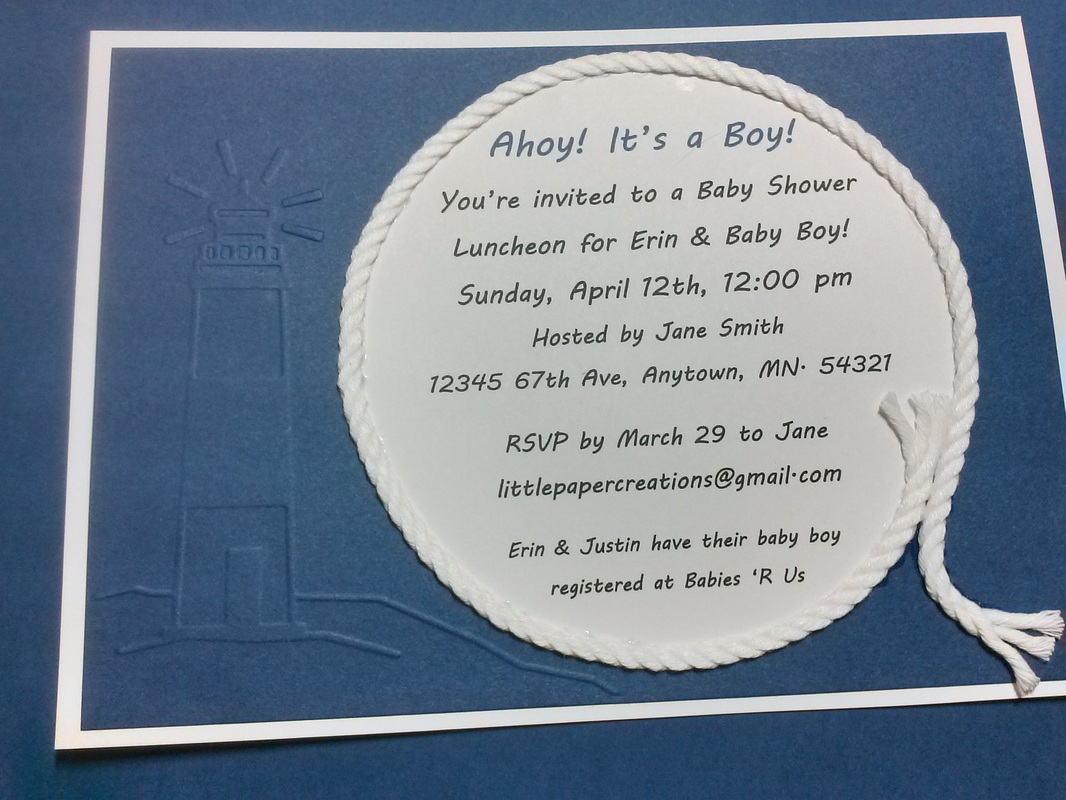
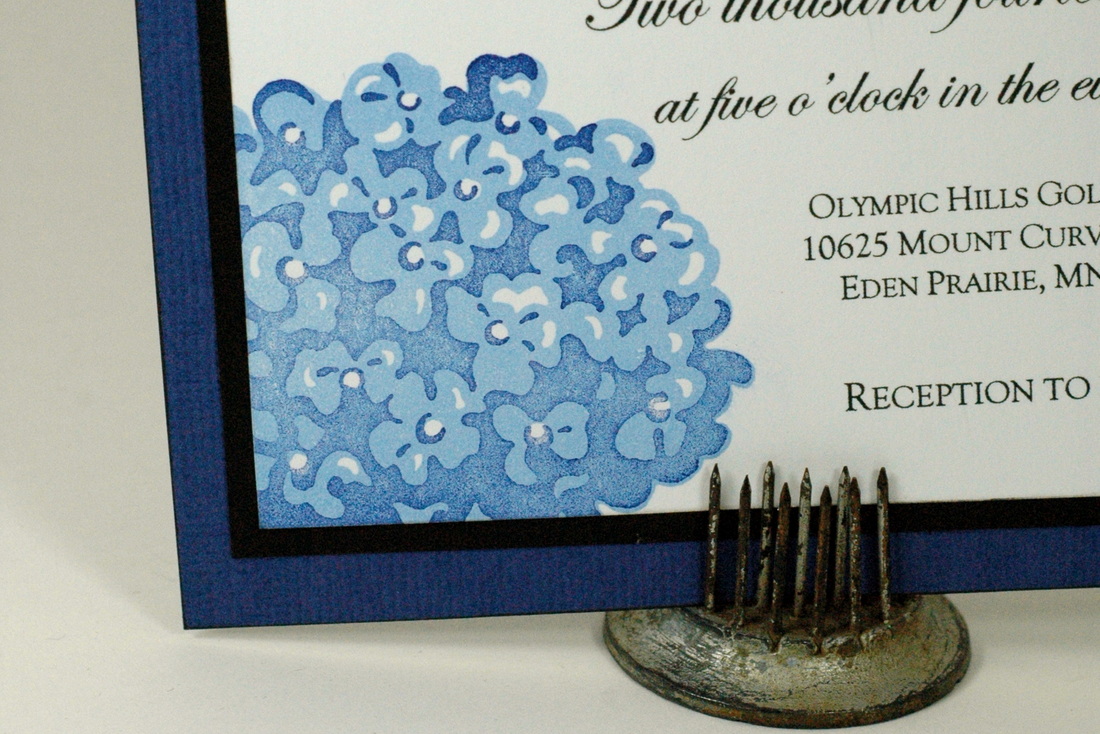
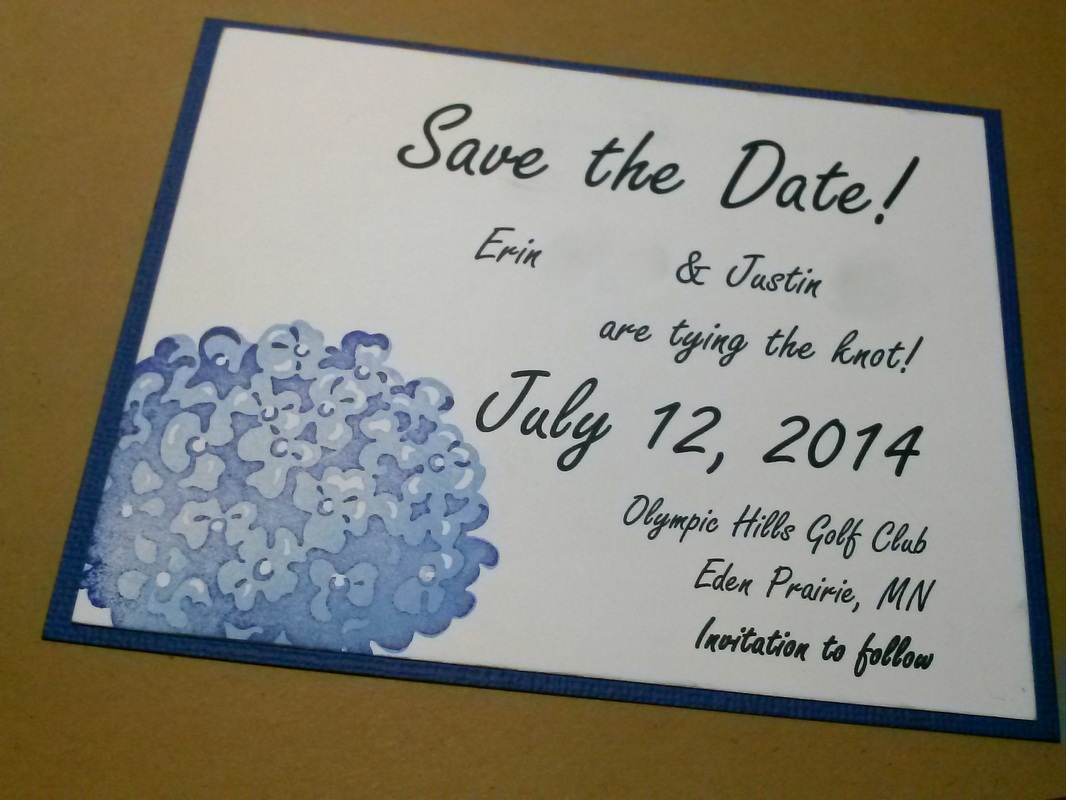
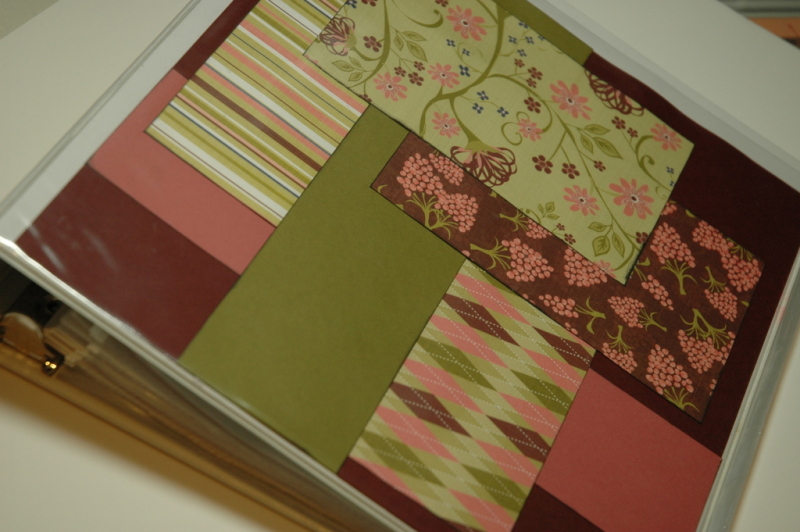
The wedding colors were pink, coral, and yellow, with grey for the boys, so I found a pale grey and pale coral for the invitations.
Picture
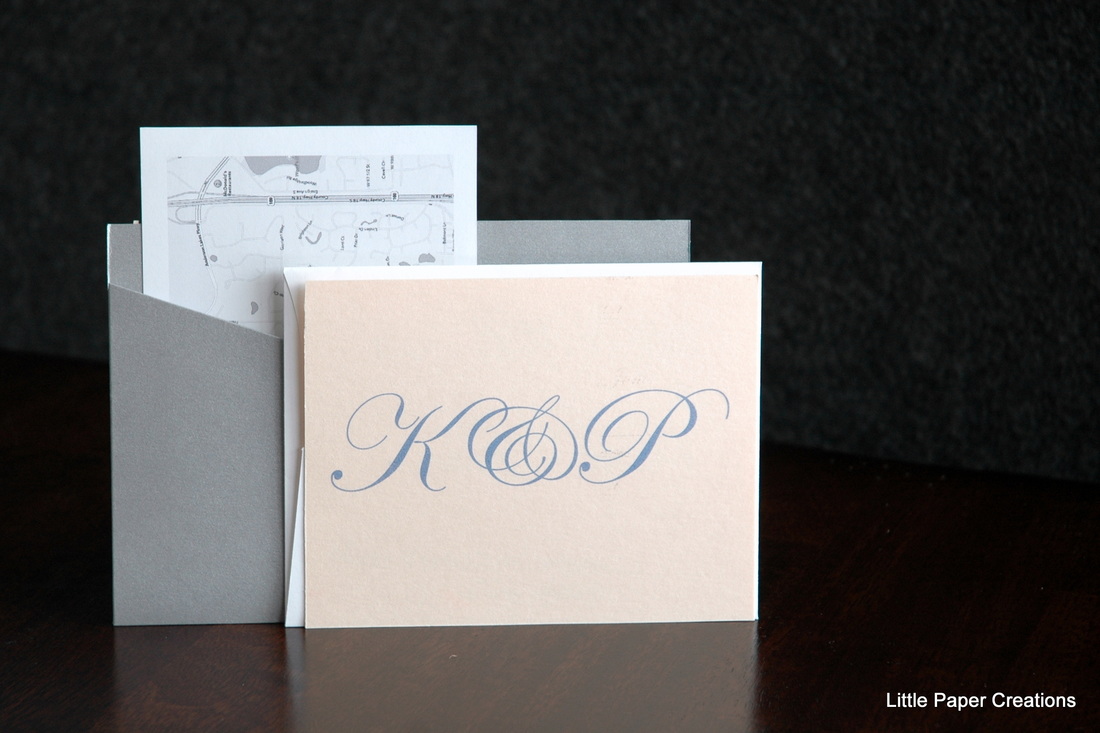
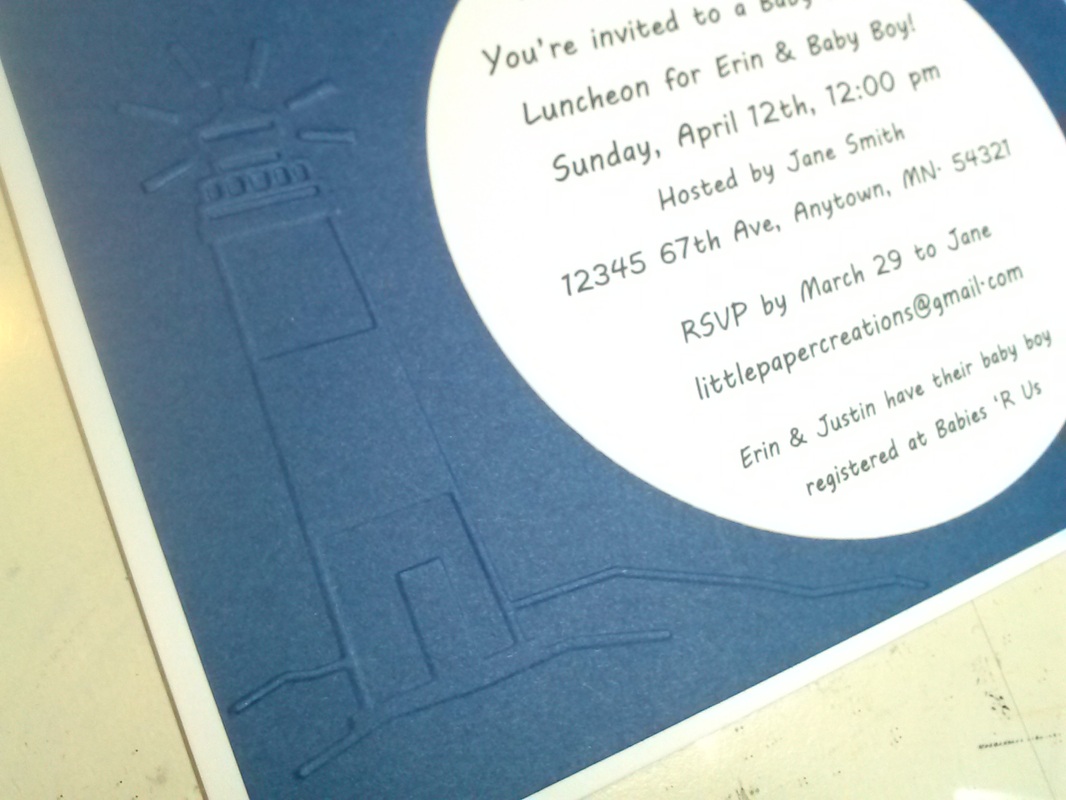
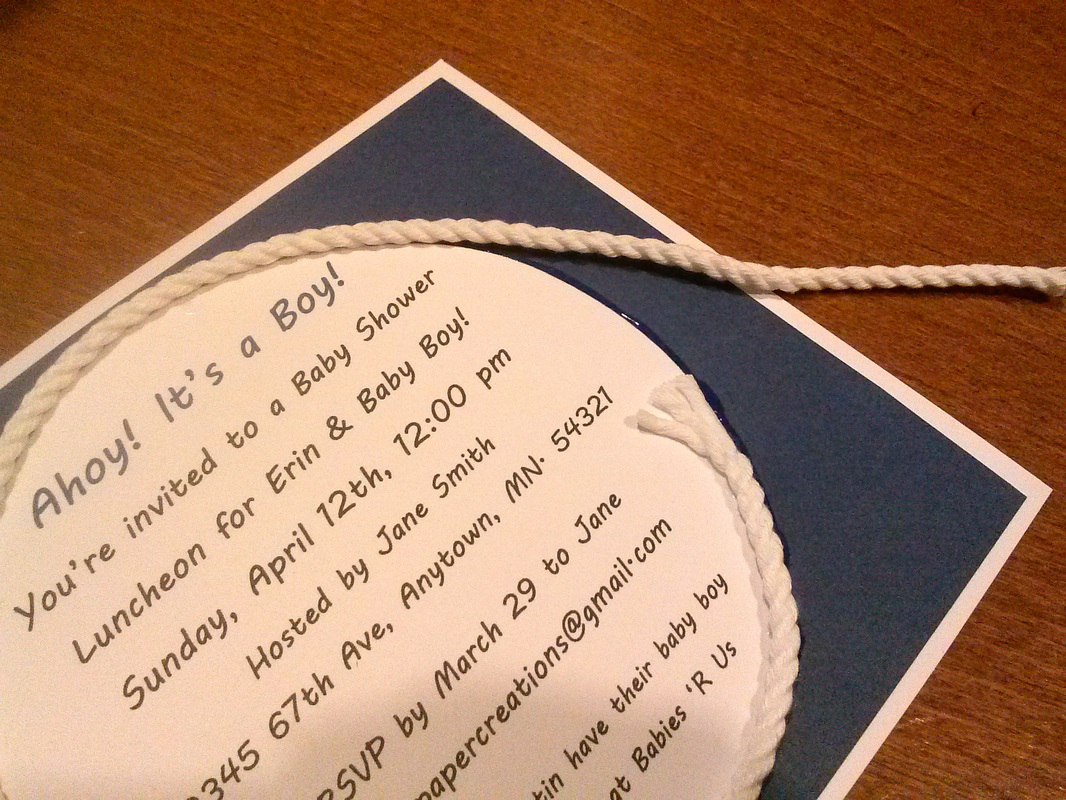
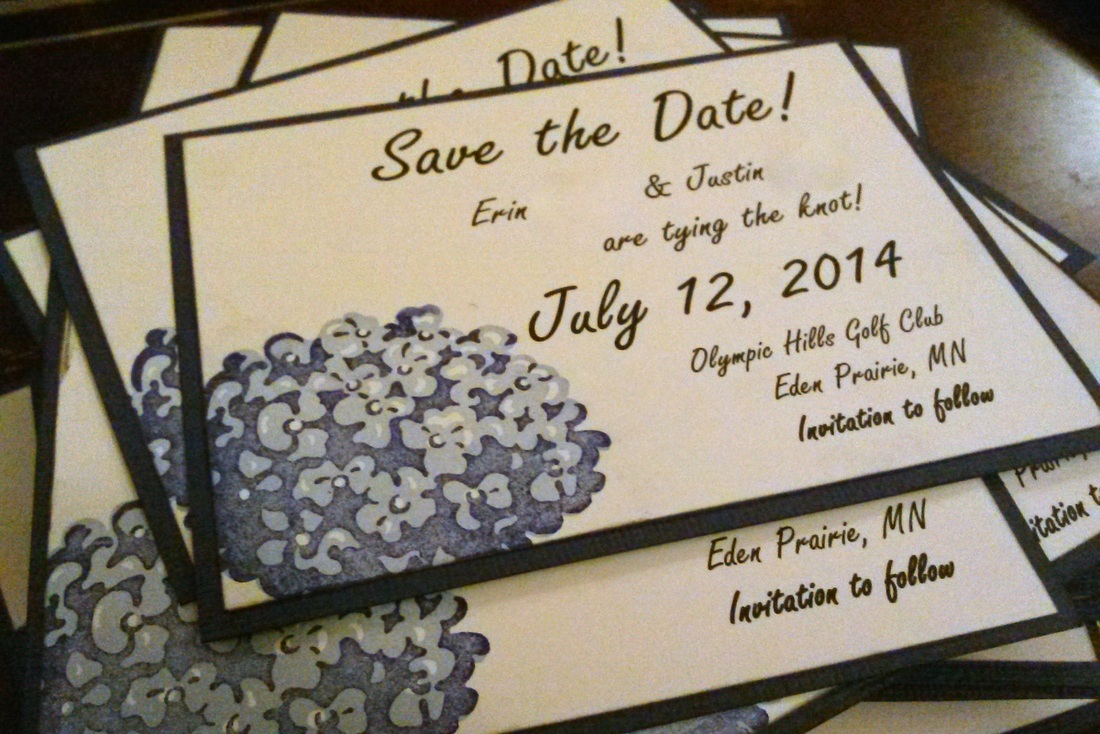
Katie chose to go with a paper-lace design with K&P watermarked behind the text. It is difficult to see in the photos, but it shows up better on the RSVP back.
Picture
The back of the invitation featured a pocket to hold the RSVP, envelope, and insert card with map and directions. Everything tucked neatly inside so nothing got lost when you opened the envelope.
Picture
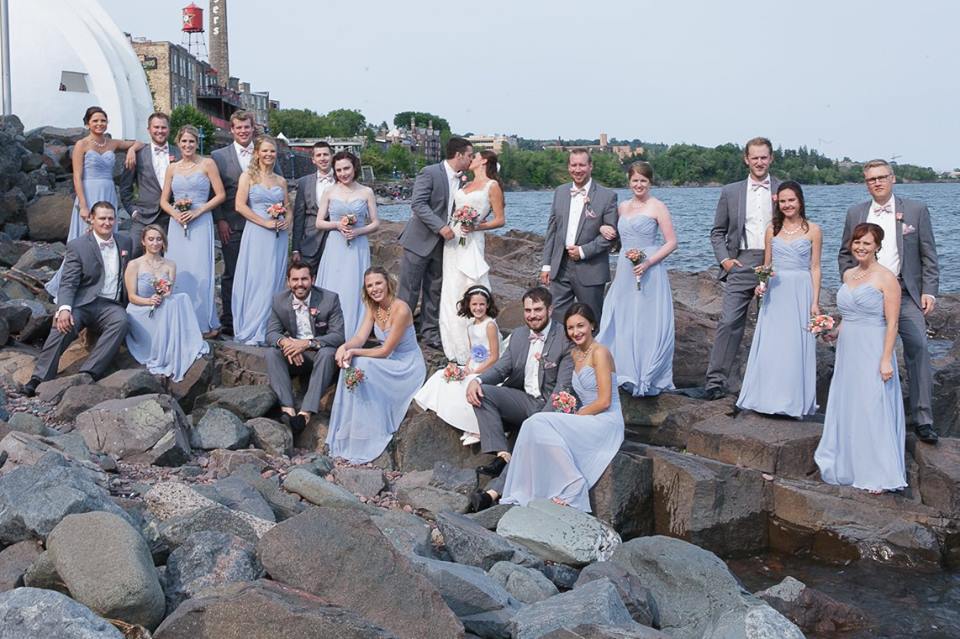
Katie and Peder's wedding was gorgeous! The ballroom was so elegant, the decorations were fun and colorful, and the dancing was highly entertaining! And I wouldn't have expected anything less from such a fun-loving couple. Especially since their wedding party had 22 people in it!
Picture
Congratulations to Katie and Peder!
And thank you for letting me be a part of your special day!

Happy Crafting!
0 Comments

A Reverse Invitation

1/13/2016

0 Comments

 
I've done several invitations over the last few years, and an invitation order usually involves at least a few dozen invitations, if not over 100! Imagine my surprise when a friend asked me for just one invitation!

She has a friend whose husband planned a Vegas getaway for her 40th birthday! And not just for him and her, but for 3 other couples! And she had no idea! What an amazing gift, right? So my friend and the other 2 couples decided to make the weekend extra special and plan a special dinner, a spa afternoon, and a show.

Since the husband and friends planned the whole weekend, they didn't need invitations, but the birthday girl did, so that's what I got to make! A reverse invitation. And what better colors to use for a Vegas getaway than gold and black?
Picture
I stamped the band holding it all together with some gold embossing to give it a bit more shine.
Picture
I made the invitation a tri-fold invitation with two pockets so the show tickets and a birthday message could be tucked into the pockets.

The center panel outlined the schedule of events for the weekend as well as a description of the spa treatment.
Picture
I am told the birthday girl was thoroughly surprised and the weekend was amazing. And I am super jealous.

Happy Crafting!
0 Comments

Sunflower Wedding Invitations

8/11/2015

1 Comment

 
A wedding doesn't always have to be a big, expensive, extravagant event. One of my brides, Marie, chose to do a small destination wedding and have a local reception a few months later. Her mother (who is a friend of my parents) contacted me last spring about making the invitations for the local reception. Of course I jumped at the chance!

Marie had sunflowers at her wedding, so I wanted to find a way to incorporate those into the design of the invitation without getting too 'theme-y'. Is that a word? It is now!

The mother of the bride and I settled on this design; bold and elegant, but simple and fun. I love it!

(Names and contact info have been changed on the invitation to insure privacy)
Picture
As you should know by now, I'm slightly obsessed with distress inks. I was so excited to be able to incorporate them into this project to create a soft watercolor look. I heat embossed the sunflower stamp with black embossing powder, then used the distress inks and a paintbrush to paint the sunflower with bright yellows and oranges.
Picture
A few things I learned from this project:

1) Watercolor paper is really the best thing to use with any technique that uses water. Unfortunately, I haven't found a watercolor paper that goes through the printer and shows the printing well, so I used a heavy cardstock. It worked well and they looked great, but I'd love to find a 'printable' watercolor paper.

2) Along those lines - don't overwork the colors. I had to be careful with my brush to avoid the paper from pilling with the amount of water I was using, which was good because the more I messed with the colors, the less I liked the outcome. Less is more!

3) If you are using black embossing powder, do yourself a HUGE favor and use an anti-static powder tool. For some reason, black embossing powder sticks to EVERYTHING!!! Another option is to use black ink and clear embossing powder.

4) If everything is not dry before you start to assemble, it will smear and you will have to do it over. Ask me how I know...
Picture
Congratulations to Marie and Matt on their wedding, their reception, and beginning their life together!

Happy Crafting!
1 Comment

Sneak Peeks!

5/19/2015

0 Comments

 
I've been hard at work lately on some exciting projects! I have 3 weddings this summer that I have the privilege of designing for. I can't reveal their designs yet, but I can offer a great big CONGRATULATIONS to the newest Little Paper Creations couples.

My sister-in-law Emily and her fiance Lindsay are getting married this August. I made their save-the-dates a few months ago, and now I'm hard at work on their invitations. Here's a sneak peek at their design:
Picture
A childhood friend is also getting married this August, and I was flattered and thrilled when she said she wanted me to design her wedding invitations! Katie and Peder are having a large wedding, so I'm working really hard on their many, many invitations, but I'm having a blast! Here's a sneak peek at their design:
Picture
The third wedding I'm creating for is actually a reception, not s full wedding. The couple was married a few months ago out of state and they are having a local reception, so they asked me to create some invitations for that. It's coming up soon, so I'll have a full post on the invitations later, but until then, here's a sneak peek of their design:
Picture
For every event I am asked to create for, I make 3-5 samples for the client to choose from. When they choose a design, we tweak it so it's perfect and then I can make the entire order. I really enjoy making a unique, personal design for each person. And every time I make a new design, I learn something new. I love to learn, I love to create, and I love to share my creations with the world.

I'll have more details about these invitations as they happen. I do not post about one of my designs till they are in the hands of the guests or the event has happened. The guests should always see them first.

Do you have any big events coming up this summer? We've got 3 weddings, our anniversary, 5 family birthdays, Father's Day, and 4th of July, plus whatever else comes up. And oh yeah, we have full time jobs too. Wow, this is going to be one busy summer!

Happy Crafting!
0 Comments

Ahoy, It's a Boy!

4/14/2015

0 Comments

 
A few weeks ago, I posted about my sister's first baby shower, and last weekend, she had her second! My mom hosted a nautical-themed shower for her because she's decorating her nursery with nautical decor. When mom told me the theme, I was super excited because nautical items are really hot right now! I thought, "Oh! It will be super easy to find nautical supplies!"

Wrong.

The home decor world is filled with nautical items, not the craft world. Or at least, not the paper craft world. So it was fairly difficult to find supplies for this invitation at first!

I finally came across a lighthouse embossing folder, and with some deep blue cardstock, I created the base.
Picture
I wanted to add some detailing to the circle, so when I found this white cord, I was very happy!
Picture
Unfortunately, when I attached the cord to the invite, it was very thick. I knew that it might not make it through the mail without getting damaged and it may require more postage if it was too thick.
Picture
I ran it through my die-cut machine to flatten the cord and it worked perfectly!
Picture
I love these invites. They are simple, elegant, and unique. And don't you just love the phrase "Ahoy! It's a Boy!" So cute! Plus, I had to be creative to solve some practical problems. Those projects are usually the most rewarding!
Picture
Have you ever had to solve a practical crafty problem? What did you do? Did it work? Let me know in the comments, I love to hear about other people's triumphs!

Happy Crafting!
0 Comments

Teddy Bear, Teddy Bear, Turn Around!

3/24/2015

0 Comments

 
I feel like I was just writing about my little sister getting married and now here I am announcing that she's pregnant! She's due in May, which means baby showers are coming soon! My mom's friends are throwing her a shower and they came to me for invitations. The only request? Teddy Bears.
Picture
Teddy bears? I can do teddy bears!

I found a stamp set and matching die set at Mama Elephant and got to work right away.

First, I printed and die-cut the text part of the invite.
Picture
Then I stamped and die-cut dozens of adorable little bears.
Picture
Then I was on to assembly.
Picture
Picture
Picture
The thing I like best about these invitations is that they are not all the same! I made 10 invitations and while the colors, style, and layout are all the same, the pattern combinations are all different!
Picture
These were so much fun to make! I got to use the die-cut machine I got (from my sister!) for Christmas, I had complete creative control over the design (thanks Carol!), and I got to use tons of patterned paper! I love patterned paper!
Picture
So what do you think? Are these bears adorable or what?

Happy Crafting!
0 Comments

Erin's Wedding Stationary Extravaganza! Part 1

3/3/2015

0 Comments

 
My sister got married!
The wedding was in July and it was so amazing!
Picture
Picture
My mom and I helped Erin with a lot of the wedding prep, including decorations, organization, vendor details, and of course wedding stationary! I made her save-the-dates, invitations, thank you cards, programs, seating cards, table signs, candy table signs, and guest book/advice cards.

By the time I was done with everything, I was kinda tired of looking at periwinkle and hydrangeas. Which is why it has taken me this long to get this post up. But now that I've had some time away from periwinkle and I've done some other projects, I am excited to show you my largest (and most fun!) project to date.

Presenting...

Erin's Wedding Stationary Extravaganza!
Part 1: Invitations and Wedding Thank You cards
Since I had already made her save-the-dates, I kind of knew what layout I would use for the invitations. I printed the text, stamped the double-stamp hydrangea in the corner, matted on black cardstock, and attached stamped vellum over the top.
Picture
Here's a close-up of the double-stamped hydrangea. I go over the details of the double stamping in my save-the-dates post. I had to print out a lot of trials before finding the exact right curve for the text to go around the stamp.
Picture
The vellum overlay had hydrangeas stamped with clear ink. It made a watermark image on the vellum that looked really neat in person, but would not photograph for me! I had to really distort the colors in this picture so I could show the slight watermarked image on the vellum. I then attached the vellum to the invitation with small silver brads.
Picture
The RSVP cards are almost identical to the save-the-date cards, and the direction cards are just printed on white cardstock.
Picture
Erin and I had similarly-sized weddings, and I did make all the invitations for my own wedding, but oh my, this was a big project! I made 145 invitations and RSVPs when all was said and done, and I only have 2 left over for my portfolio!
Picture
It wasn't until I had finished all 100 save-the-dates, 145 invitations, and 145 RSVPs that I had the genius idea to scan the stamped hydrangea and just print it on the paper with the text.

*face palm*

So that's what I did for the thank you cards. Which made it a million times easier, especially because I had to make 100 of those! I enjoyed adding a little bit of digital design into some traditional paper cards. It let me get the exact look I wanted without worrying about variables like ink coverage and user error lining up the images.
I used the same periwinkle and black cardstocks from the invitations, but I added some silver cardstock as well.
Picture
Erin loved how her stationary turned out and I am pretty pleased as well!

Check back next week and I'll have Part 2 of Erin's Wedding Stationary Extravaganza!

Until then, Happy Crafting!
0 Comments

Party on, party people!

9/14/2014

0 Comments

 
My mom has a group of really close girl friends from college. 
There are 8 of them. 
It can be quite intense when they are all together.

The great thing about having a bunch of friends like that is that there is always something to celebrate! Most of their kids are around marriage and baby-having age, so there are lots of showers to plan and attend. They all take turns hosting bridal and baby showers for each others' kids. 

Whenever my mom hosts, she comes to me for the invitations (DUH!), and now one of her friends has also started coming to me first for her invitations, too! This summer alone, I've made 3 sets of invites for Carol; one set for my sister's bridal shower, one set for another daughter of 'The Girls' (it sounds like a cult!), and one set for her daughter's friend.

I've really enjoyed making all these invites because it gave me a break from the pile of periwinkle products I had to make for my sister's wedding this summer (another post later - I'm still recovering and taking photos).

When I make invites as a commission for someone, I find out what theme, colors, or preferences they have in place for the event so I have a direction. Next, I create 3-5 prototypes using different papers and designs and send photos of these to the buyer. Once they choose a design (or tweak/combine one), I get crafting!

Here's the invite I made for Carol for my sister's shower:
Picture
I actually didn't make any other prototypes for this one and I didn't show Carol ahead of time because she said I could do whatever I thought Erin would like best. And Erin loved them! She always keeps stuff I make for her, she's so sweet!

Here's another invite I made for Carol:
(I put generic info on this one for photographing)
Picture
Her instructions were "bright colors".
Here are the other 3 prototypes I made for this order:
Picture
Picture
Picture
The last order came with the instructions "sangria wine red and eggplant purple with matte gold as an accent". Now there's a bride who knows what she wants! Here's what Carol chose:
Picture
And while I did make 3 other prototypes, I only made 'dummy' words for one other one:
Picture
So there we are!
I am so happy that Carol likes my designs and comes to me for her invitation needs! I hope some of the people who get the invites seek me out as well!

Happy Crafting!
0 Comments

My sister is getting married!

1/7/2014

0 Comments

 
My sister, my little sister, my only sister, is engaged! Her boyfriend asked her on her birthday in August and we've been planning ever since! I get to be her Matron of Honor (I'm married, so I'm no longer a maid), and I'm helping out as much as I can with all the plans. 

As my gift to her, I"m making all of her paper goods. Save the Dates, Invitations, Thank You cards, programs, advice cards, the whole nine yards! Plus, I['m throwing a shower for her, so there's all those paper goods, too!

I've been experimenting with different layouts and ideas for the invites, but I ultimately had to make the Save the Date cards first, so last week, I finally sat down and finalized a design. 
Picture
Then I hunted down supplies and spent 3 days in front of Netflix cranking out 100 of these puppies! 
(the following picture was taken in a dim room, so the colors aren't accurate)
Picture
I am very happy with how they came out, and better yet, so is my sister!

Erin's favorite color is Periwinkle and I was able to find the perfect shade of paper to match her dresses! And her flowers are going to be hydrangeas and I found a hydrangea stamp on eBay! It's actually a double stamp. I had to stamp the light blue with one stamp, then wait for it to dry, then stamp in exactly the right place with a separate stamp in a darker periwinkle.
Picture
It took a lot of time, but they are perfect!

I'm thinking of doing the invitations in a similar, simple style. Now I can start working on them...
And the programs...
And the advice cards...
And the thank you cards...
And the shower invitations...

Oh my, I think my head is going to explode now...
0 Comments

Flashback Friday (even though it's Sunday...) #1

5/30/2010

0 Comments

 
I wanted to start a feature called Flashback Friday where I would showcase a project I had done in the past. And I had it all planned out for this last Friday to showcase my wedding paper creations. I had photos, ideas, I was even starting to write out the post in my head.

Then I got sick.

It happens every year at the end of school. My body shuts down, whether from exhaustion, relief, or all those little preschool germs finally getting to me. And every year, I forget about it till I actually get sick! So Friday night and all day Saturday, I was out with my yearly cold and unable to write my Flashback Friday. Now that it's Sunday, I thought about writing something else, but I am so excited about telling the story of my first huge jump into cards and invitations, I decided that this will just have to be Flashback Sunday instead.

~*~*~*~*~

My husband Mike and I were married on June 29, 2007. But this paper creation story starts well before that. When we started making wedding plans in the spring of 2006, we knew we wanted to save money. The first, and most obvious choice was to make all the invitations ourselves. Well, not ourselves, myself. Since I worked a second job at a scrapbooking store (Artsy Tartsy) at the time, I had tons of resources and supplies at my fingertips.

Usually, brides pick out their dresses, their flowers or at least their colors before anything else. I picked out my paper before anything else. No joke! I could not move ahead in any of my planning until I had picked out paper that I loved. And I fell in love with this:
Picture
Chatterbox Nook Collection
It was funky and girly and all of my favorite colors in one. I quickly bought out all we had in stock and asked the owner to order more! I began by making myself a planning book. And how perfect to have my color right on the cover - no need to drag around samples; there were right there with me all the time!
Picture
After pouring over books and magazines dedicated to weddings and invitations and cards, I finally came up with a samples of all the things I was going to make. I measured, cut, inked, and assembled, and with the help of my sister, I finished all our wedding invitations!
Picture
Simple, elegant, and with a touch of personality. But I wasn't done.

I didn't like the tradition of a simple guest book. Too impersonal. After all, I knew who was at my wedding, why did I need all their signatures? So I got an idea from a wedding magazine for reception cards. 4x6 cards that you put on the reception tables for people to write down their well-wishes, advice, and (as in the case of our friends) humor! So that's where I put in more personality and color!
Picture
Way cute, right?

But again, not done.

I was on a creative roll. And I was loving every minute of it! Next on the list was thank you cards.
Picture
And slightly less creative; programs:
Picture
The hardest thing about my wedding day was the fact that I could not have my camera in my hand. Seriously! Everything else went beautifully, there were no major problems. But I was constantly seeing photos I wanted to take. Now, I had done some major research on photographers and I had chosen a husband-wife team who I knew would capture my vision perfectly (and they did), and I had several trusted friends and family members armed with cameras of their own. But I still wanted all the photos I could get. From every perspective. So Mike and I made up these:
Picture
Little business cards with our contact info on them so people could send us their photos. And we took that photo on the front ourselves. For those of you who are confuse; it's a video gamy controller wound around a calla lily (our wedding flowers). I call it "Gamer Romance".

So that about wraps up everything from my wedding! This was the most ambitious, most time-consuming, and most fun project I have ever done. The things I learned from this giant project was:
1) Adhesive is expensive - buy in bulk.
2) ALWAYS use a good quality, SHARP cutter.
3) One step at a time to prevent getting overwhelmed.

Thanks for reading my giant post!
0 Comments

    RSS Feed

    Blogs I read:

    Becky Higgins
    Bits & Pieces
    KWerner Designs
    Jennifer McGuire Ink
    I Could Make That
    Linny's Vault
    Pintester


    Categories

    All
    #30DaysofCreativity
    Baby
    Baby Shower
    Binder
    Calendar
    Cards
    Christmas
    Coupons
    Craft
    Distress Ink
    Etsy
    Fabric
    Family
    Feedbackplease
    Field Trip
    Flashback Friday
    Food
    Gift
    Haul
    Home
    Inspiration
    Internet
    Invites
    Magnets
    Organization
    Paint
    Photos
    Planner
    Project
    Project Life
    School
    Scrapbook
    Special Order
    Special Order
    Storage Solutions
    Thinking Of You
    Tips And Tricks
    Top5friday
    Tutorial
    Wedding


    Archives

    February 2016
    January 2016
    November 2015
    October 2015
    September 2015
    August 2015
    July 2015
    June 2015
    May 2015
    April 2015
    March 2015
    February 2015
    January 2015
    September 2014
    August 2014
    April 2014
    February 2014
    January 2014
    August 2013
    July 2013
    August 2012
    July 2012
    June 2011
    January 2011
    December 2010
    August 2010
    July 2010
    June 2010
    May 2010

Powered by Create your own unique website with customizable templates.