Well, it's September. And we all know that means back to school. But what many people may not realize is that for teachers, September is literally our new year. January is just another month in the middle of the year; September is the real 'new year'. So with a new year comes a need for a new planner: a lesson planner!
For 5 years now, I've designed and printed my own lesson planner. It has helped me to keep track of everything going on in my classroom through the year. I honestly don't know if I could function without it anymore.
For 3 years, I've also designed and sold personalized planners for my fellow teachers at school. They love them just as much as I do! Usually, I sit down with a teacher on one day (let's say Monday) and plan out what she wants her planner pages to look like. Then I go home that night, make the changes, and print the pages. Then the next day (Tuesday) after school, I drop off the planner at Staples or Office Depot to be bound. It used to be that binding a planner would take all of 20-30 minutes; just long enough for me to peruse the latest office supplies or run next door to Michaels. But now, it takes at least a day. So I drop it off on Tuesday after school and pick it up on Wednesday after school. Which means I don't give it to my colleague till Thursday. That's 4 days of turn-around! And that's when I don't have anything else going on that interferes with the drop off and pick up. And it assumes they get the binding right the first time (which they don't always - which adds another 3-4 days on).
I was getting frustrated with this long turn-around time and increasingly incompetent workmanship at the store, so I finally broke down and purchased my own binding machine!
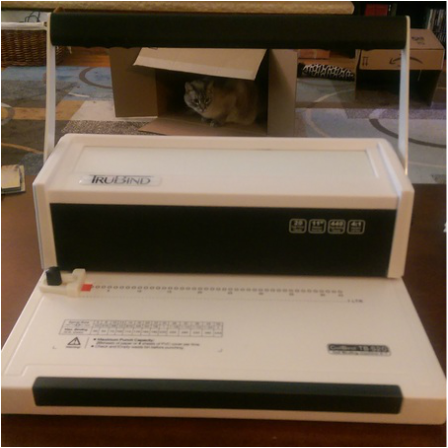
I took this picture immediately after un-boxing it right in my living room. I didn't even bring it down to my workroom! As soon as the box was empty, my cat climbed right in. He loves boxes.
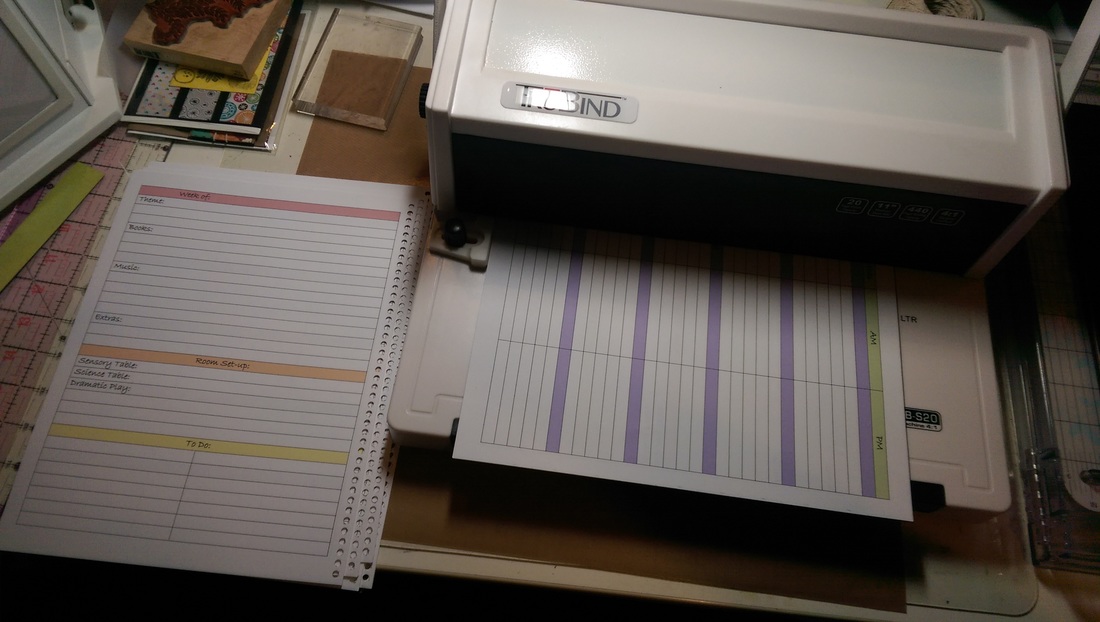
I have had my binding machine for 3 weeks and I've already used it 6 times! I've made several planners for teachers at school (with a less-than-24-hour turn-around!) and a few for online orders.
I have had my binding machine for 3 weeks and I've already used it 6 times! I've made several planners for teachers at school (with a less-than-24-hour turn-around!) and a few for online orders.
Speaking of online orders, I have added physical planners to my Etsy shop! Now that I am in charge of the process from start to finish, I feel confident offering physical planners on a regular basis, not only by special request. So if you are in need of a planner (or know someone who is), please check out my Etsy shop. If you don't see something there that works for your needs, please contact me and we can work out the details for a personalized, printed planner just for you!
Happy New Year to all you teachers!
Happy Planning to all you plannerds!
And Happy Crafting to all!
Happy New Year to all you teachers!
Happy Planning to all you plannerds!
And Happy Crafting to all!
 RSS Feed
