Little Paper Creations
  • Blog
  • About
  • Portfolio
  • Etsy Store
  • Quest for Kisses

Storage Solutions - Wafer Dies

2/24/2015

1 Comment

 
I love binders. I really do. Someday I will write a post sharing all the binders I have at my house and at school. The number is firmly in the double-digits, I assure you.

But today, I want to show you one particular binder.
And I just finished setting it up!
Picture
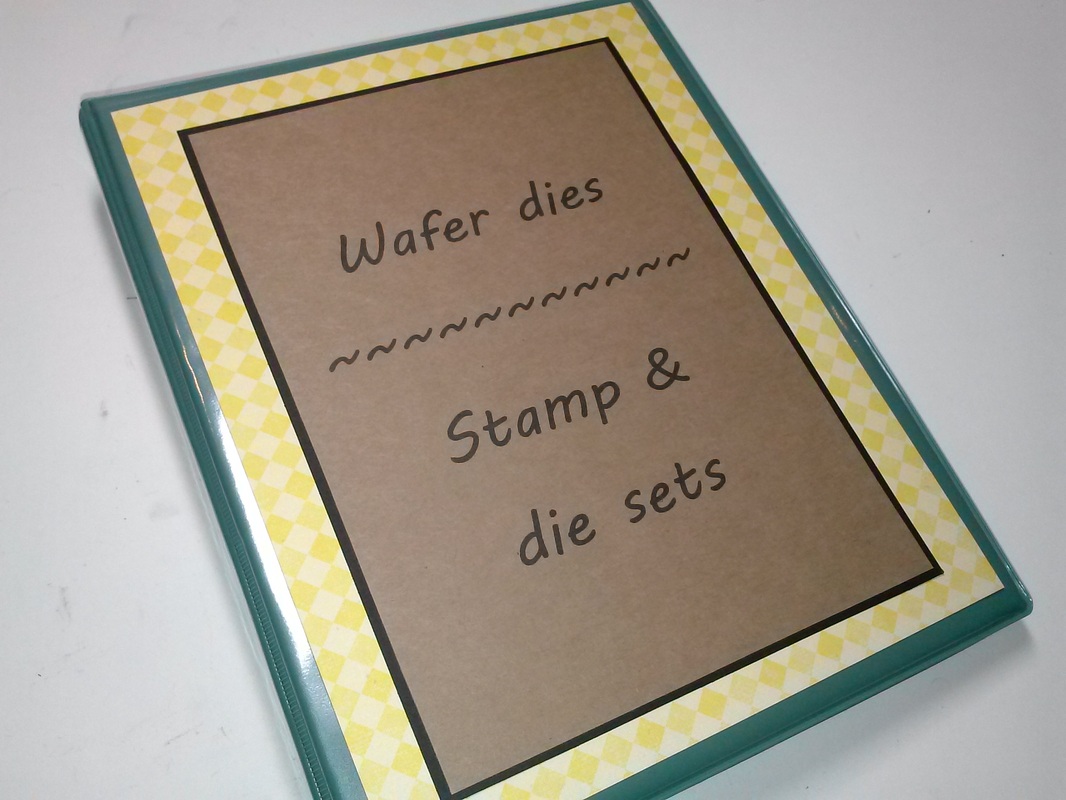
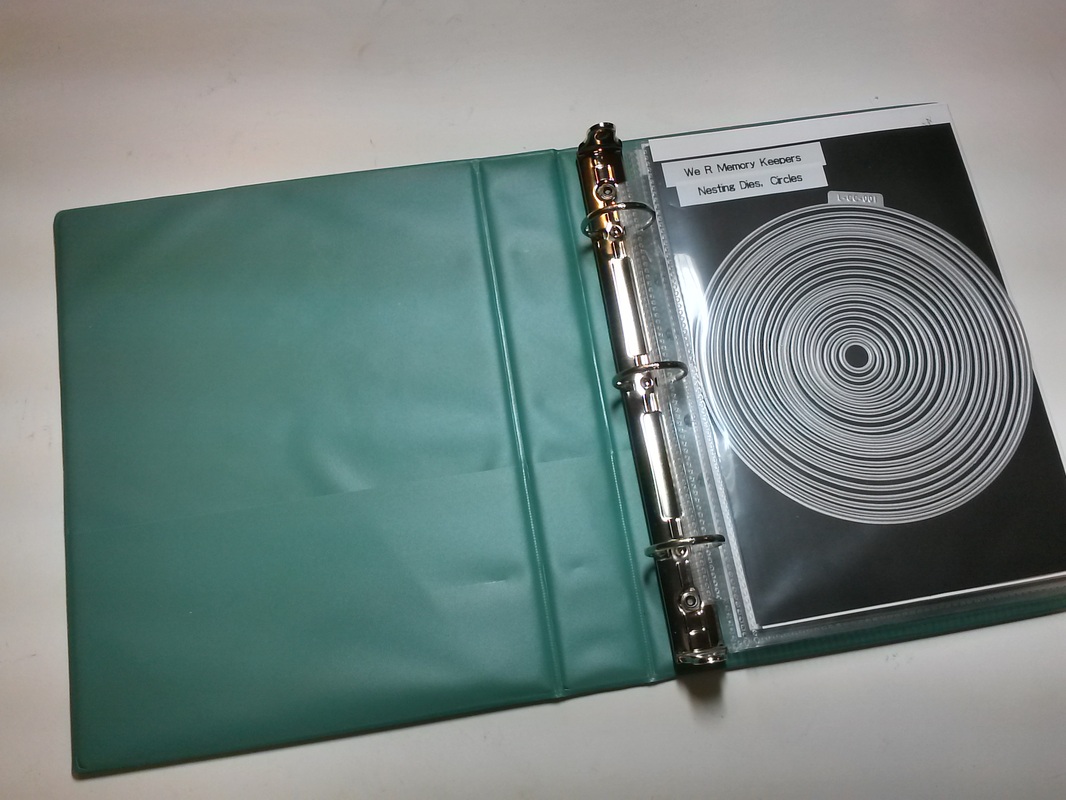
It's my wafer-thin die storage binder!
It's a mini binder, which means it's 8 1/2 x 5 1/2 (half-sheet size), which means it's the perfect size for most dies and stamps!
Picture
As I started collecting more dies, I realized that if I had no way to organize and access them efficiently, I would soon lose track of what I had, or worse, lose the dies themselves! Some of them have very small pieces. Plus, I wanted to be able to keep some stamp and die sets together. I searched online and came across several crafters that use magnetic sheets for die storage and while I loved that idea, I did not love the price of the magnetic sheets that were sold for that purpose. So I did some digging and found magnetic vent covers at my local hardware store!
Picture
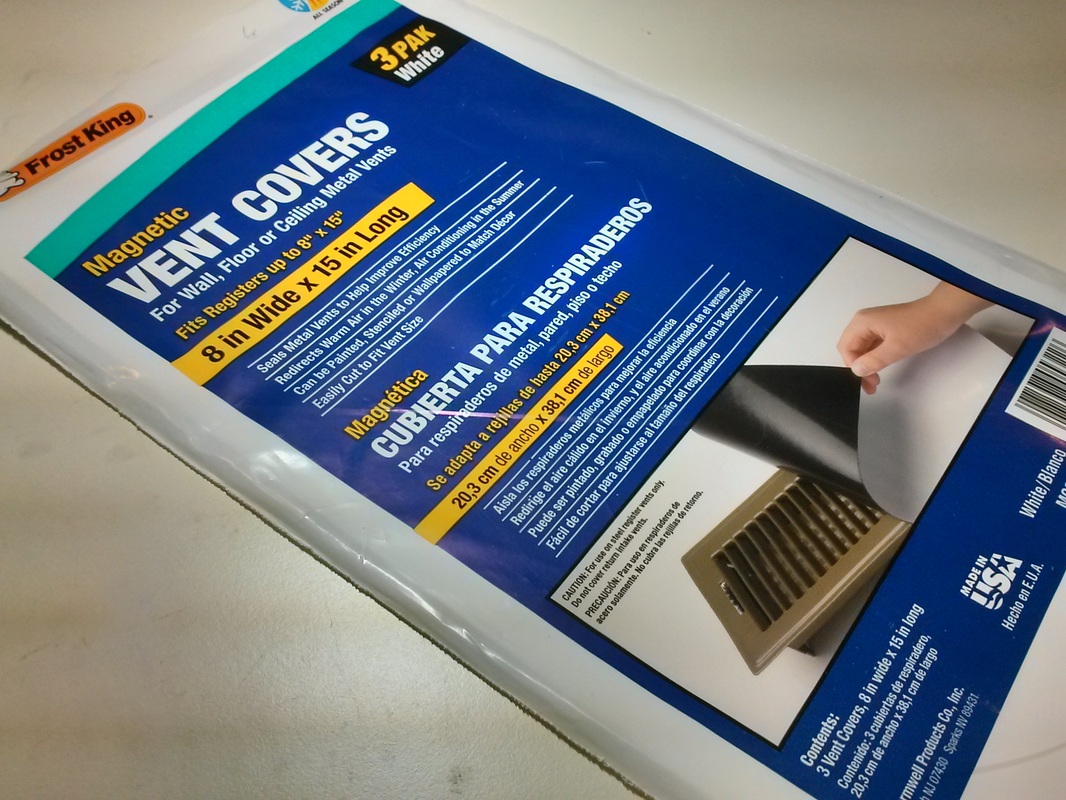
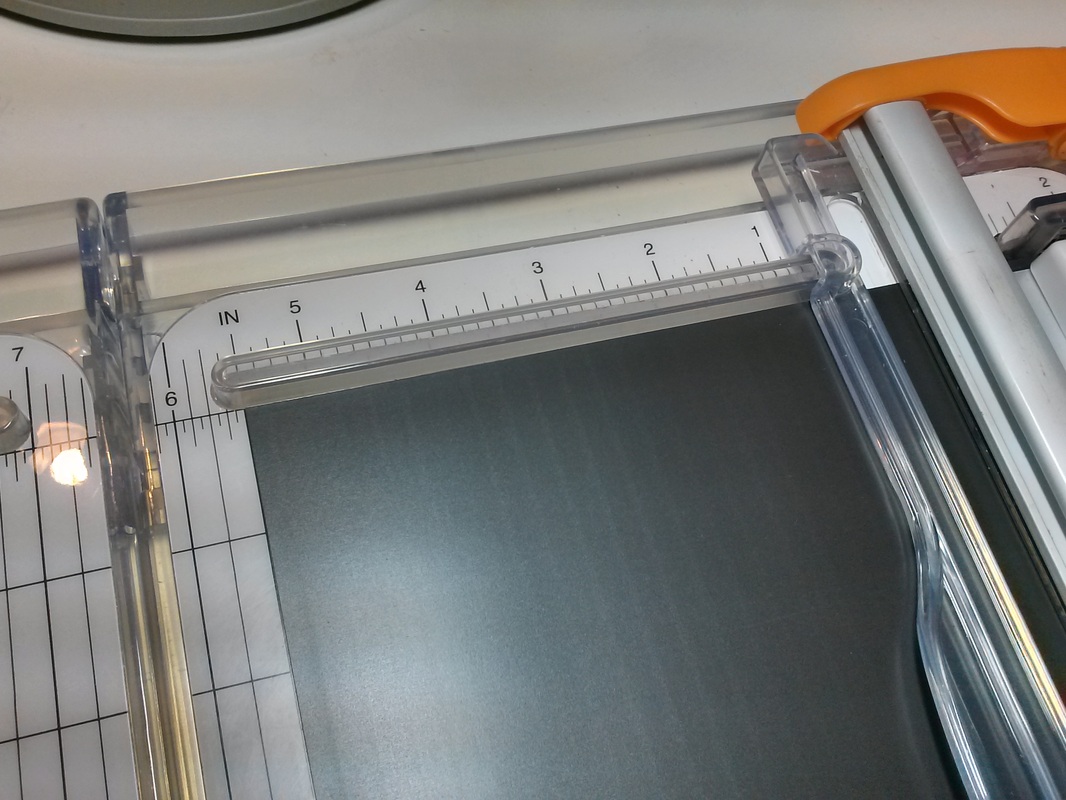
They come in packs of 3 sheets for $4.47. The sheets measure 8x15 inches, so I cut them up. They cut very easily with a paper trimmer.
I was able to get 2 large pieces of 8 x 5 1/2, one medium piece of 5 1/2 x 4, and one small piece of 4 x 2 1/2.

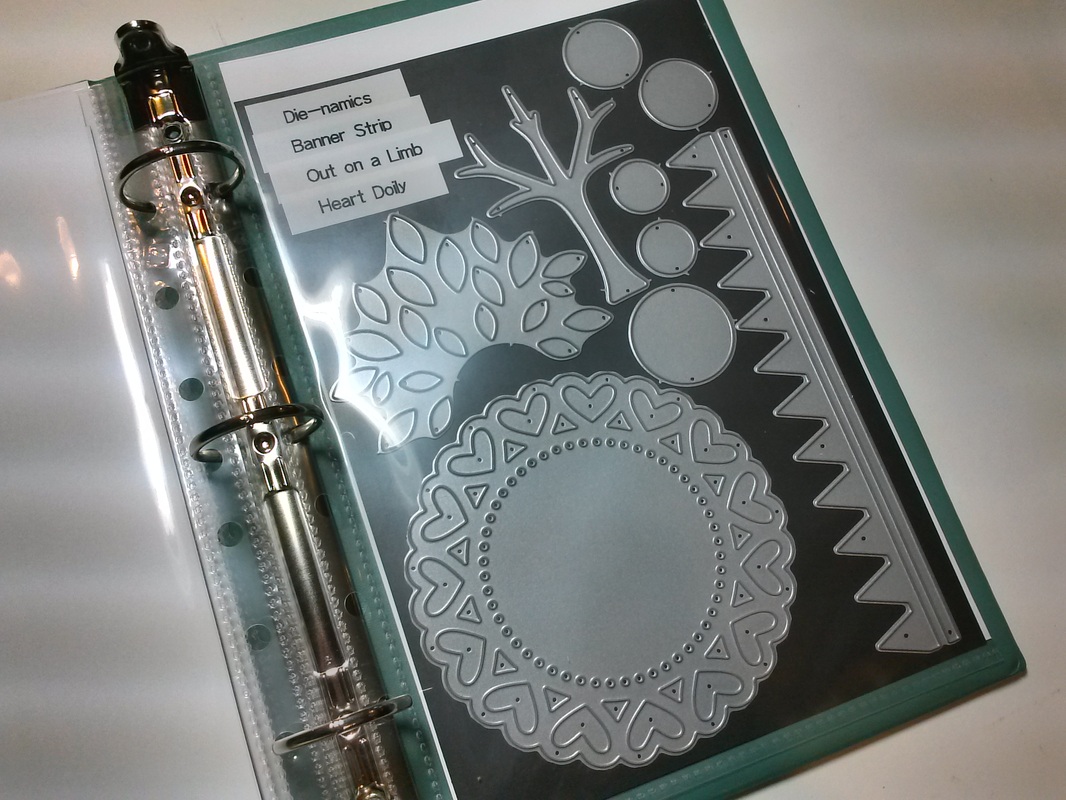
I use the large pieces as full magnet sheets for large sets or multiple sets.
Picture
Picture
Picture
Picture
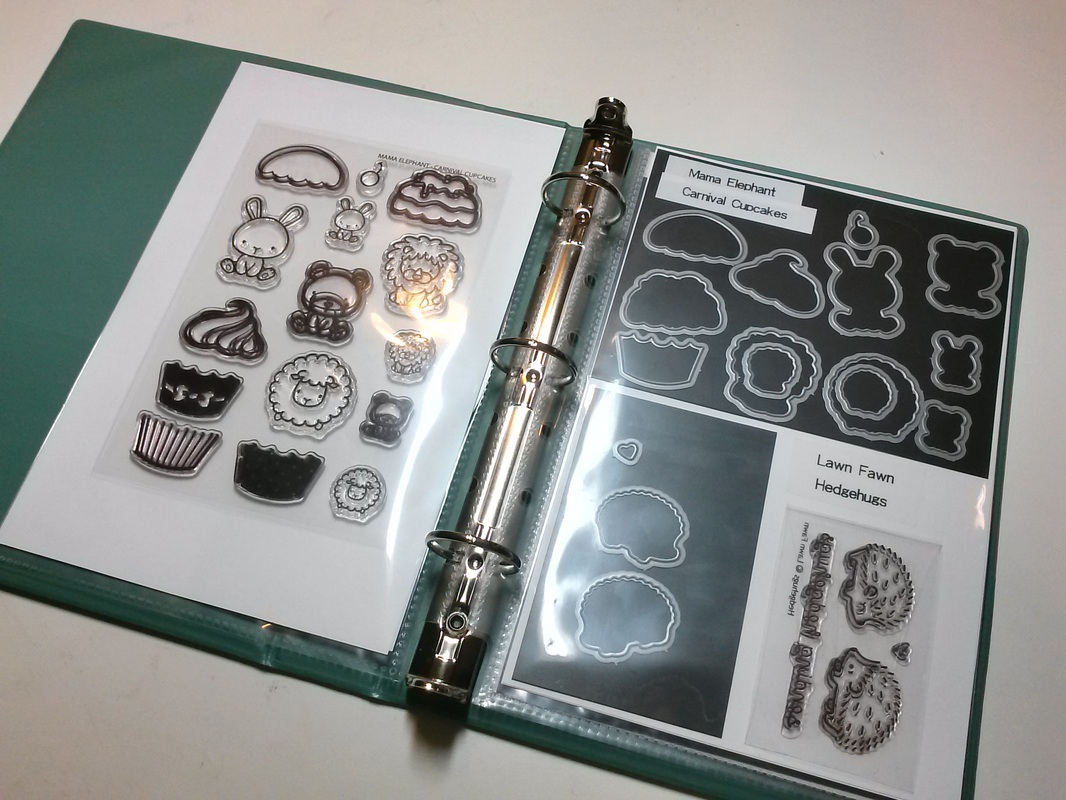
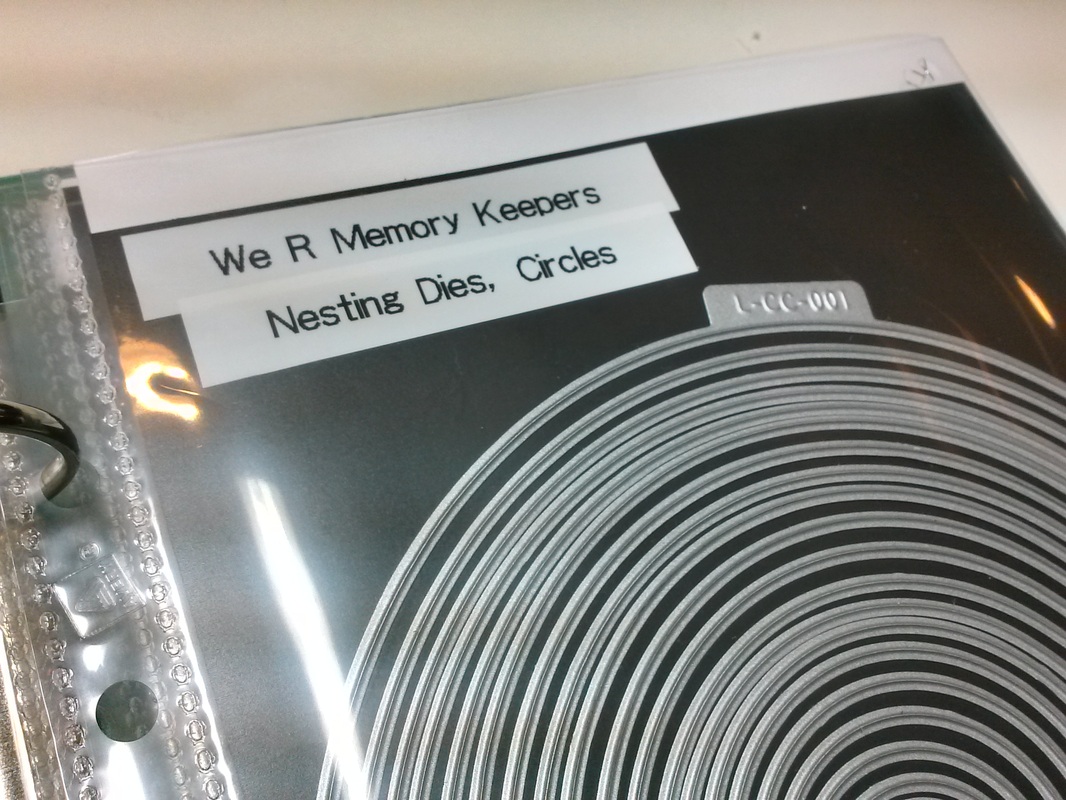
I use the medium and small pieces for sets of small dies.
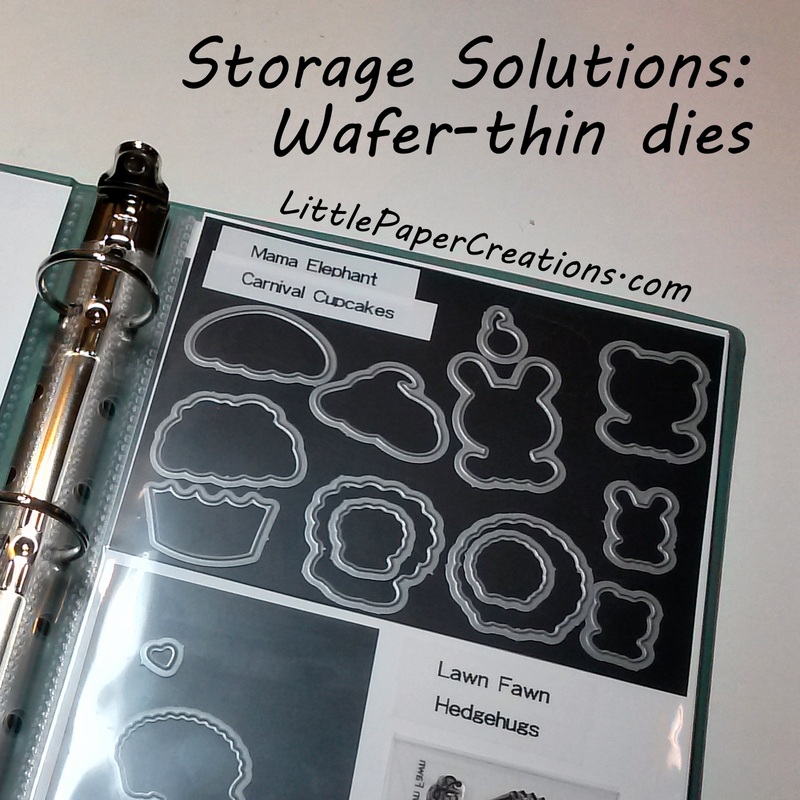
These two sets have matching stamps, so I made sure to store the stamps and dies together. The Hedgehugs stamp set is taped onto the paper next to the dies so they stay in place together and the Carnival Cupcakes stamps just slide into the back of the pocket on the left.
Picture
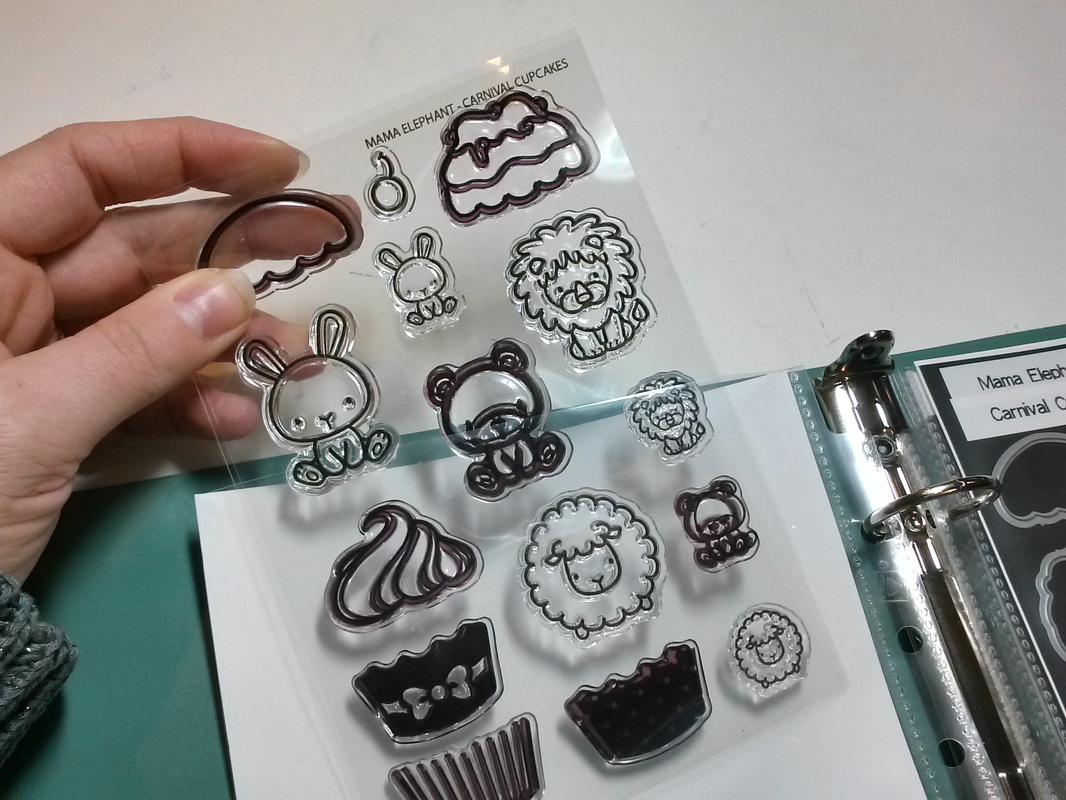
All the magnetic pieces can slide in and out of the pockets easily so I can just take what I need when I want to work on a project.
Picture
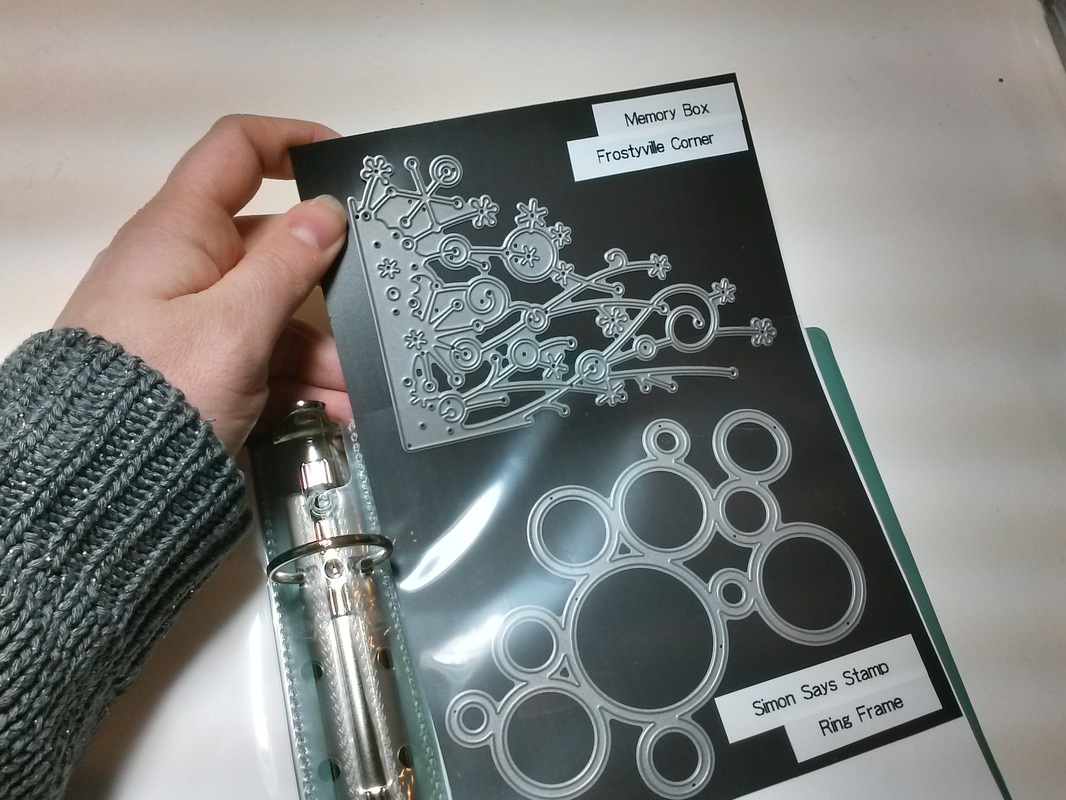
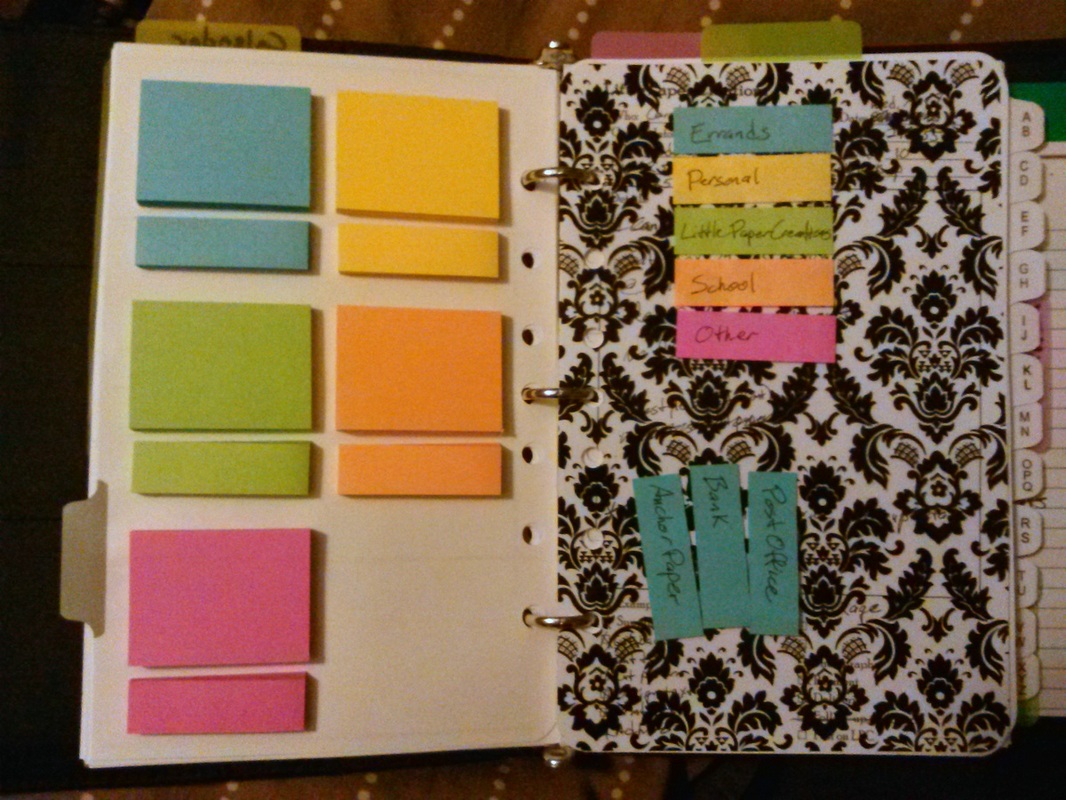
I used my label maker to label each die/set on the magnetic sheets. I didn't want to put the labels on the page protectors because I didn't want to worry about getting everything back exactly where it needed to. And I want to be able to change the order of things when I get new dies. Labeling the magnet sheet keeps it flexible. I make one label for the company and one for the name of the die/set.
Picture
I love having everything in one place and easily accessible!
I love my binders!

Do you use binders in your craft storage? What do you use them for?
If you don't use a binder, how do you organize your dies?

I'll be adding more Storage Solutions posts over the next few months. I know storage and organization are a big topic among crafters (and others) and I hope that my solutions inspire you to get your supplies more organized. Is there something in your craft area (or kitchen, or classroom, or office, etc) that is unorganized? Something that you need a solution for? Let me know and it may be the next Storage Solutions topic!

Happy Crafting!
1 Comment

Top 5 Friday - Tools

8/30/2014

0 Comments

 
This week's top 5 Friday is all about crafting tools.

Since my crafts tend to revolve around paper, my tools are all pretty tame. I don't do a lot of fancy techniques, but the tools I use have to be good quality, they have to work the right way when I need them, and they have to last a long time.

Here's my list:
* Paper Cutter - I'd be lost without this - I can cut a pretty straight line without it, but it saves so much time! I use a rotary trimmer from Fiskars.
* Corner Rounder - When I started Project Life, I bought a cheap corner punch from Michaels (the blue one - you know the one), but it hurt my thumb to use it for more that 2-3 photos in a row, so I researched and tried different models. I've firmly landed on the Creating Keepsakes corner rounder. I'm not even sure if they make these any more - I got mine at a garage sale for $1.00!!!
* Cutter Bee scissors - small, sharp, precise, perfect (and yellow!)
* Heat gun - this is a fairly new tool for me - I've just begun embossing recently, so I have not had to do much research on heat guns. The inexpensive one from Michaels is working just fine right now.
* Tombow adhesive runner - I am in love with this tape runner! I've never found another adhesive that works as well that is as portable, easy to refill, and easy to find as the Tombow one.

Ok, I'm done.
Your turn!
What are your favorite tools for crafting? (Keeping in mind that crafting could mean paper, woodworking, jewelry, yarn, fabric, photography, drawing, painting, anything!)

Happy Crafting!
0 Comments

Planner Peace! (and a freebie!)

8/25/2014

0 Comments


I've always been kind of a plannerd (planner nerd). In high school, I used a simple student planner I got from probably Target to keep track of my assignments. In college, I got the official planner for our college (it had the college logo on the front and important campus events already listed inside) and I used that religiously for years. In fact, that's where my color-coding planner system began and where I first fell in love with post-it notes. I used the highlighting post-its color-coded for classes. The assignment would get written down and 'highlighted' on it's due date, then when I completed it, I would take off the sticky so it didn't stand out anymore.

Once I graduated, I went back to a basic planner on and off for a few years, then switched over to electronic calendars (Google, color-coded, very pretty!), but I never really found a good system to keep track of everything I had to do. I had a place for appointments, sure, but what about my to do list? Where was I supposed to put the note that some time this week I needed to call my grandma or go to a certain store? And when I got to said store, how was I supposed to know what to buy? My list was most likely at home on a sticky note on my desk. 

*sigh* This was not working.

Then last summer, I started finding Facebook groups and blogs and You Tube videos about Filofax and other planners. I was intrigued. Could I function effectively in a filo-type planner?

I had already made my own lesson planner for my preschool teaching, why not make one for my home life as well? So I started putzing. And printing. And tweaking. And reading. And the more I worked and actually used my planner, the better I got at developing a system that worked for me. And I think I've finally achieved "planner peace"!

Picture
Here's what a typical week look like in my planner before anything goes in it. It's very minimal. I put a strip of washi tape down the middle to break each week into 2 parts - appointments and to-dos. 
Picture
(I just realized I used the same washi tape for both of these weeks - one is from May, one is not till October!)

I use the outside edge for appointments - things that happen at a specific time or only on a specific day. Things like holidays, birthdays, work schedules, appointments, and events go here. The inner edge of the pages are for to-dos. I use color-coded post-it flags for my to-dos. This lets me see at a glance what kind of week I'm going to have - heavy on personal stuff, work stuff, errands, craft, etc.
Picture
I keep all my post-its on a divider in my planner and I have a fly-leaf opposite so I can stick re-occurring events there (like going to the bank - I know I'll need to do that again, just not sure when. So I keep it back here).

The nice things about the post-it flags are; 

1) When I'm done with an activity, I can just take it off and throw it away - so satisfying!

2) If I don't get something done on  Monday, I can just move it to Tuesday, or Wednesday, or whenever I have time to finish it on another day. And I don't have to keep re-writing it every day.

3) If there is a repeating event (grocery shopping every Monday or paying the phone bill every month), I can move the post-it to the next instance of that event when I'm done with it this week/month.

I also use the slightly bigger notes for lists of things I need to buy or get from a certain store or person. Or things I need to bring to school the next day. Or any small list that isn't a to-do.

So that's the calendar portion of my planner. I've been using this version of it since April and it's worked really, really well so far. I've made a few minor tweaks, but it's pretty much as you see it here. I'm going to make a video soon walking you through my calendar so those of you who like more visuals can see everything!

And if you've read this far, thanks! I know I can be quite verbose at times. As a reward, here's a free download of my planner pages:
2page_weekly.pdf
File Size: 16 kb
File Type: pdf
Download File

It's for half-size paper (8.5 x 5.5), so cut your paper in half before sending it through your printer.

You can decorate it any way you want! That's the beauty of blank planner pages!

Please let me know if you have any questions or if you want to see more of my planner or if you want clarification on anything. I hope to be sharing more of my planner in the future, so stay tuned!

Happy Crafting!
0 Comments

Top 5 Friday - Colors

8/22/2014

0 Comments

 
New feature!

Each Friday, I will try to post my top 5 picks in different categories. I may add commentary, I may not. I may add links, I may not. I'm hoping my lists will inspire people to come up with their own lists and join in the discussion.

So here's week 1's topic: Colors
Picture
My top 5 colors (in no particular order):

* Mustard Yellow
* Brown
* Maroon
* Rose Pink
* Olive Green

What are your favorite colors?

0 Comments

Quest for Kisses (Hershey's, that is)!

1/9/2011

2 Comments

 
Just before Christmas this year, I asked a simple question: How many kinds of Hershey's Kisses are there? At least I though it was a simple question. I knew of the original flavors, almonds, caramel, some minty ones, and my favorite; Candy Cane. But I knew there had to be others. So I set out to find a comprehensive list. Easier said than done! The Hershey's website only lists current, USA flavors (and not all of them, at that!). Other lists are years old or filled with gaps. Then I found this site: Zoe's Hershey Kiss Collection. Zoe has made it her mission (at only 11 years old!) to taste and collect all the chocolate kisses that Hershey's comes out with. She keeps her site up to date with family and reader tips. So her list is the one I'm going to trust right now.

So how many varieties are there? 57. Yes, that's right. Fifty-seven varieties of Hershey's Kisses! I, like Zoe, want to taste and photograph each and every one of them (because if you truly love chocolate, you should document it, of course!).
Picture
I have made a page on this site devoted to my Quest for Kisses! You'll find it in the menu on the upper right.

If you have any suggestions, corrections, or tips on where (and when) to find certain kisses, please let me know! littlepapercreations@gmail.com or leave a comment!

2 Comments

Oops! Catch-up time!

7/6/2010

0 Comments

 
Wow... um... I've been gone awhile... sorry!

This summer has just been flying by, I'm not sure where all my time is going!

I was doing so well with the 30 Days of Creativity challenge, then I kind of petered out. I have done some more little things, but I didn't keep my momentum from the first half of the month. My hubby really kept his momentum going and ended up making about 20 drawings. Maybe more!

Anyway, here's what I've been up to the last 2 weeks:

I've been completely lost in a series of books that I love: The Sword of Truth series by Terry Goodkind.
Picture
I have read all 11 of these books before, but I was sucked back into the whole series when I mindlessly picked up the first book (Wizard's First Rule) one night on my way to bed. And now I have to finish the whole series.


I've also been working on some little crafty projects.
I made some calendars the other day:
Picture
These will be up in my Etsy store in the next couple days.


And I spent a couple hours one night sketching out an idea instead of sleeping. I had to get this idea out of my head so it didn't disappear: Adult Merit Badges!
Picture
I will be expanding on this idea later, but for now, I just sketched out 8 immediate ideas of what you could get a merit badge for as an adult. Here the list:
* Get Married (or civil union)
* Have a Baby (I'm also thinking ones for adoption, twins/triplets/etc, 2nd/3rd/etc child)
* Buy a house
* No IKEA furniture in your house (that's supposed to be the IKEA guy...)
* Joint Bank Account
* Build or Fix Something Major
* Host a Holiday
* Live by Yourself

That's all I have right now. Any more ideas?
I'm not sure if these will be digital badges, paper badges, iron-on transfers, or what, but this is a project I definitely want to pick up later. I would love to hear any ideas you have about them.

For now, that's all I will leave you with.
Tomorrow I will post my fireworks photos - I have several that I really love!
Thanks for reading!
Happy Creating!
0 Comments

    RSS Feed

    Blogs I read:

    Becky Higgins
    Bits & Pieces
    KWerner Designs
    Jennifer McGuire Ink
    I Could Make That
    Linny's Vault
    Pintester


    Categories

    All
    #30DaysofCreativity
    Baby
    Baby Shower
    Binder
    Calendar
    Cards
    Christmas
    Coupons
    Craft
    Distress Ink
    Etsy
    Fabric
    Family
    Feedbackplease
    Field Trip
    Flashback Friday
    Food
    Gift
    Haul
    Home
    Inspiration
    Internet
    Invites
    Magnets
    Organization
    Paint
    Photos
    Planner
    Project
    Project Life
    School
    Scrapbook
    Special Order
    Special Order
    Storage Solutions
    Thinking Of You
    Tips And Tricks
    Top5friday
    Tutorial
    Wedding


    Archives

    February 2016
    January 2016
    November 2015
    October 2015
    September 2015
    August 2015
    July 2015
    June 2015
    May 2015
    April 2015
    March 2015
    February 2015
    January 2015
    September 2014
    August 2014
    April 2014
    February 2014
    January 2014
    August 2013
    July 2013
    August 2012
    July 2012
    June 2011
    January 2011
    December 2010
    August 2010
    July 2010
    June 2010
    May 2010

Powered by Create your own unique website with customizable templates.