Little Paper Creations
  • Blog
  • About
  • Portfolio
  • Etsy Store
  • Quest for Kisses

Preschool planner

5/5/2015

0 Comments

 
Today is Teacher Appreciation Day!
We all know how much extra effort teachers put into their students and their classrooms each and every day.
We know because we are products of those teacher.
Because our children are products of those teachers.
Because we have friends or relatives who are teachers.
Because we are teachers ourselves and we know how deeply we invest ourselves in every child that comes through our classroom.

Everyone go write a nice note or email to a teacher you know.
Go ahead, I'll wait...

Done? Ok good.

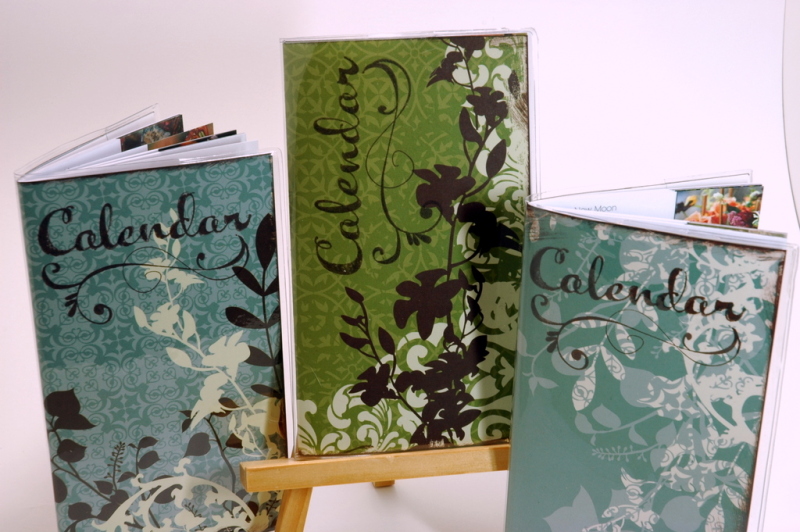
I am a preschool teacher. I have been for 10 years now (10 years? Can it really be 10 years already?!?) And as a preschool teacher, I know how important those early years are. And I know how much energy is needed to get through even a half-day class with those tiny balls of boundless energy. And I know how little time I have during the day to plan and prep and get ready for the next class or the next day. Which is why I also know the vital importance of a really good planner. And that's why I know that most of the pre-made planner out there are crap.

Yeah, I said it. Seriously though, teacher planners are just not made for preschool teachers!!! Especially those of us who teach multiple classes each day. So after years of making do and muddling through with the store-bought teacher planners, I made my own.

Is anyone here surprised? Didn't think so! ^_^
Picture
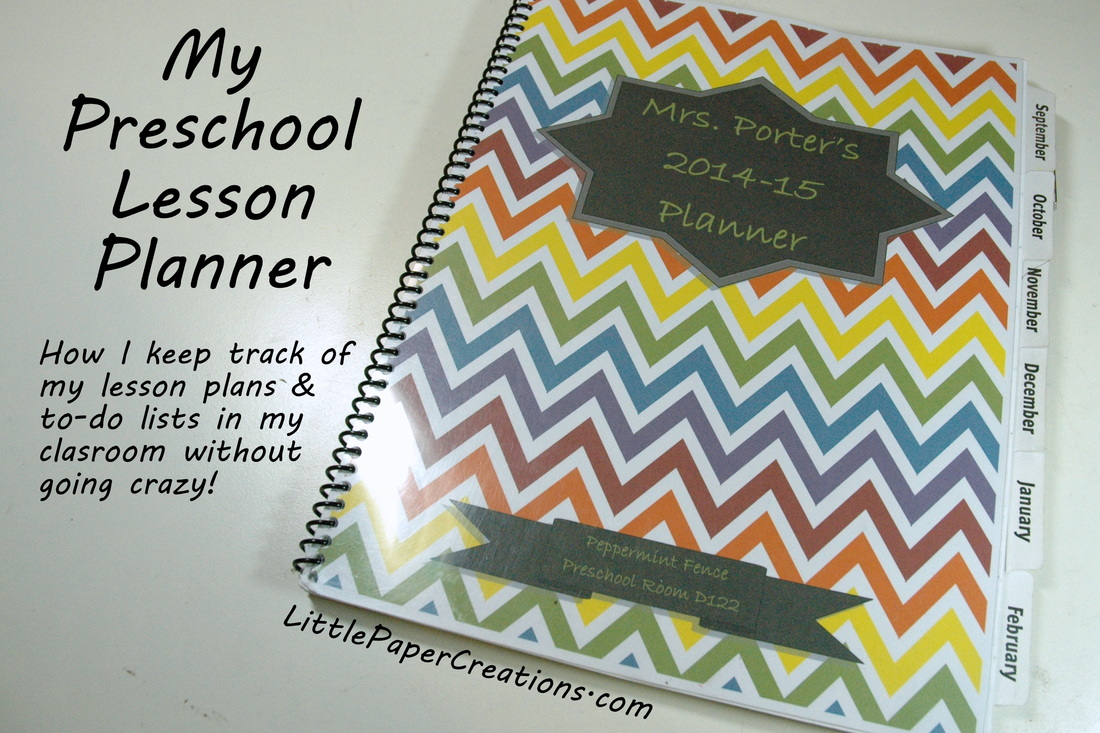
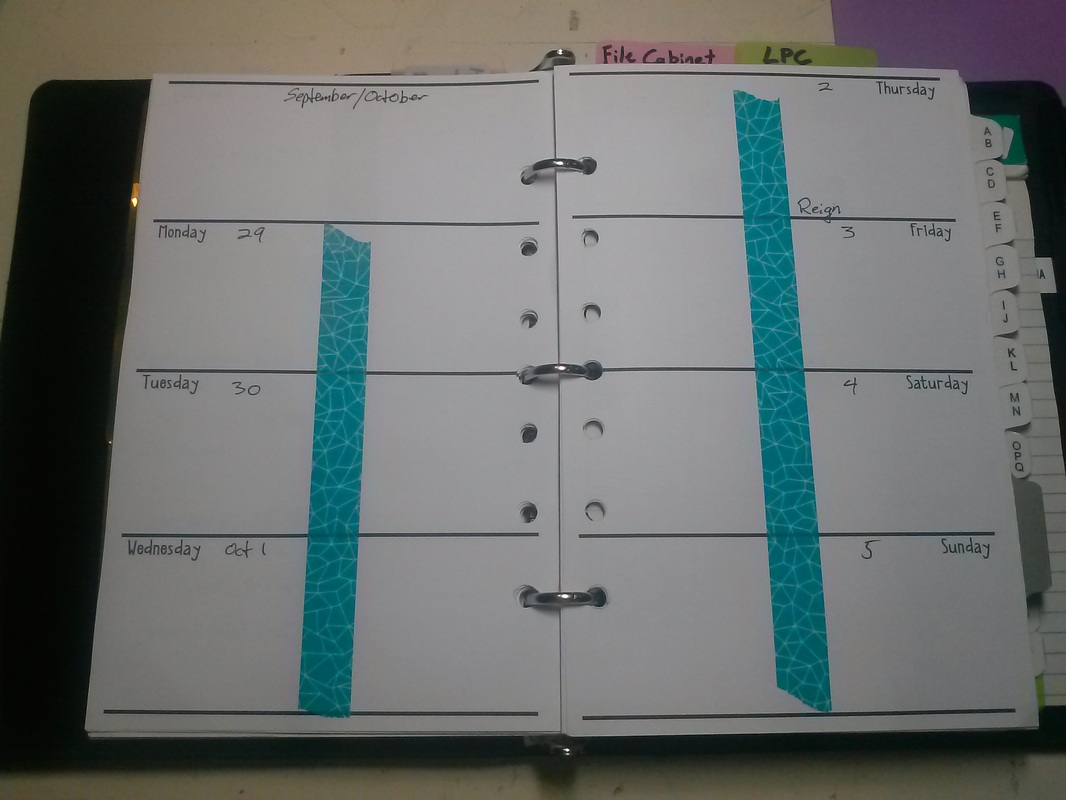
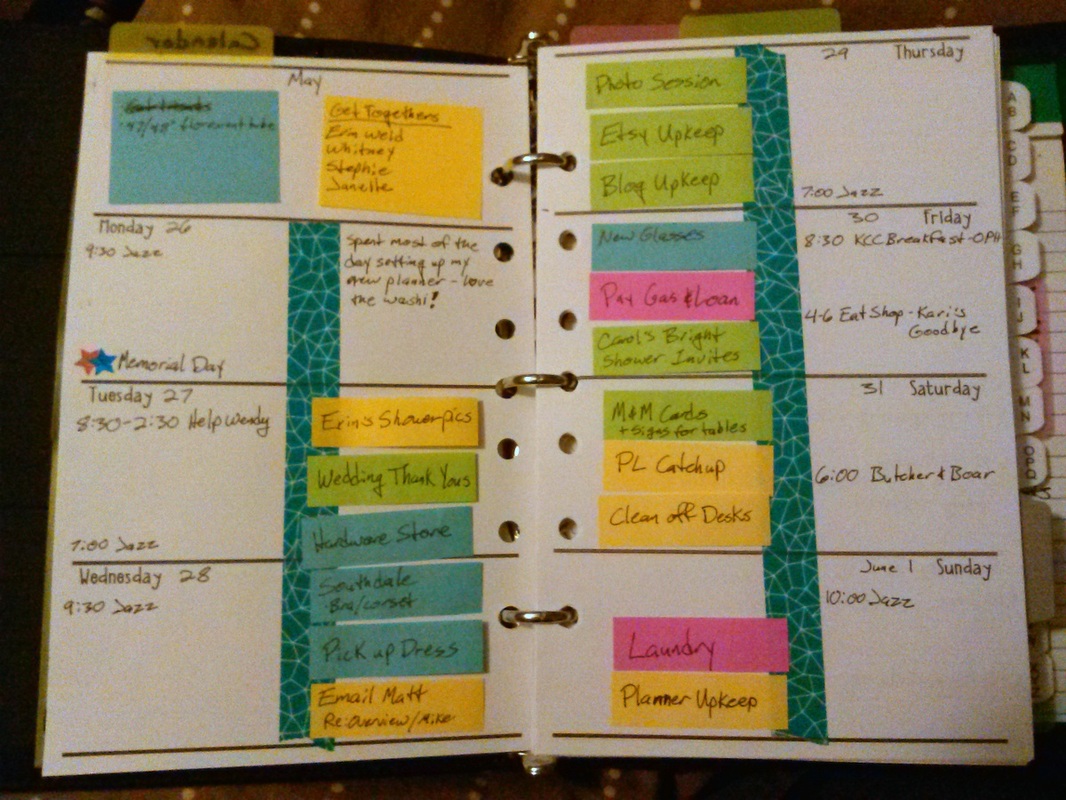
Every year, my planner morphs a little based on what I am teaching and what worked or didn't work the year before. I go back through my previous year's planner and see what kinds of notes I made on a regular basis that maybe need a dedicated space in next year's planner. I also color-code my classes, so I can see at a glance what my week looks like.
Picture
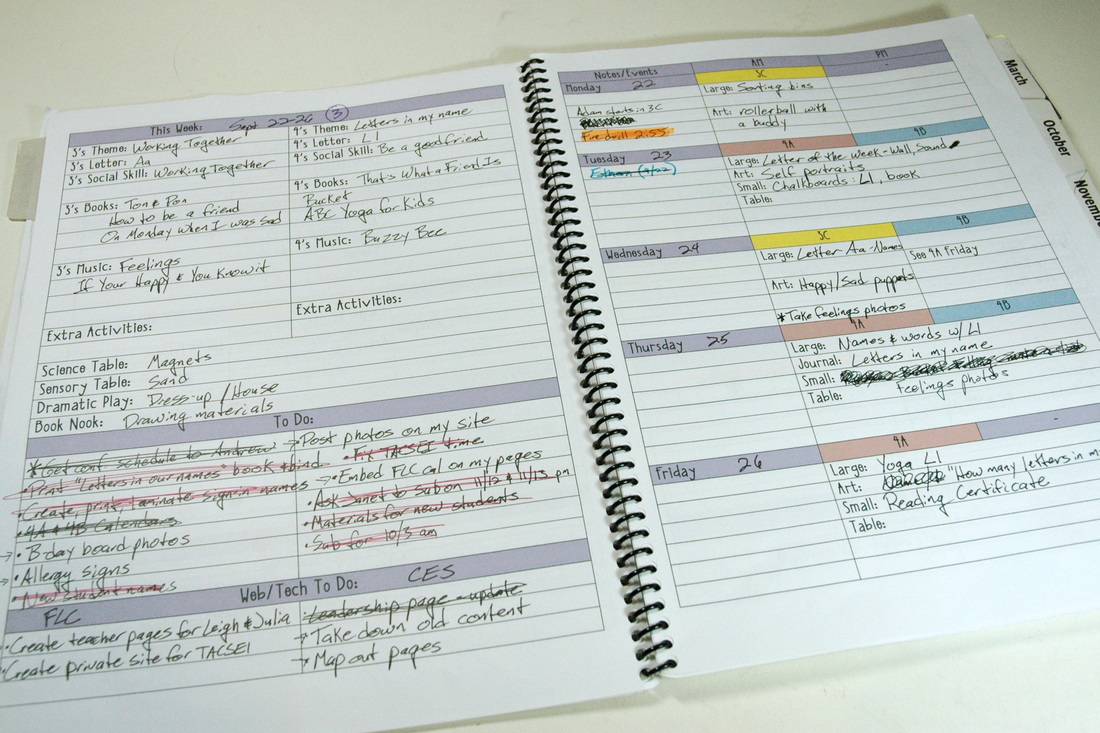
So let's do a quick break-down of what my 2014-15 planner looks like. Above is the weekly layout, in all it's messy-handwriting glory (seriously, I write like a fidgit-y 9-year-old).

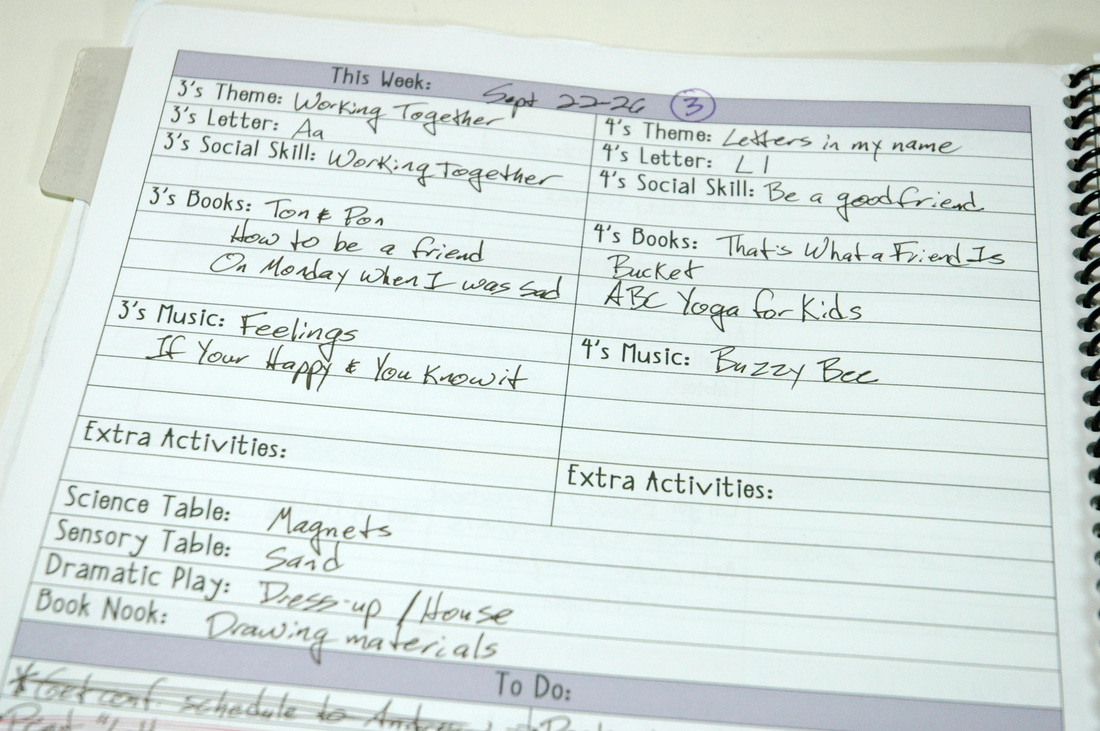
The left-hand page is where I write the weekly themes for each age group and all my whole-room setup information (sensory table, science table, dramatic play center, etc).
Picture
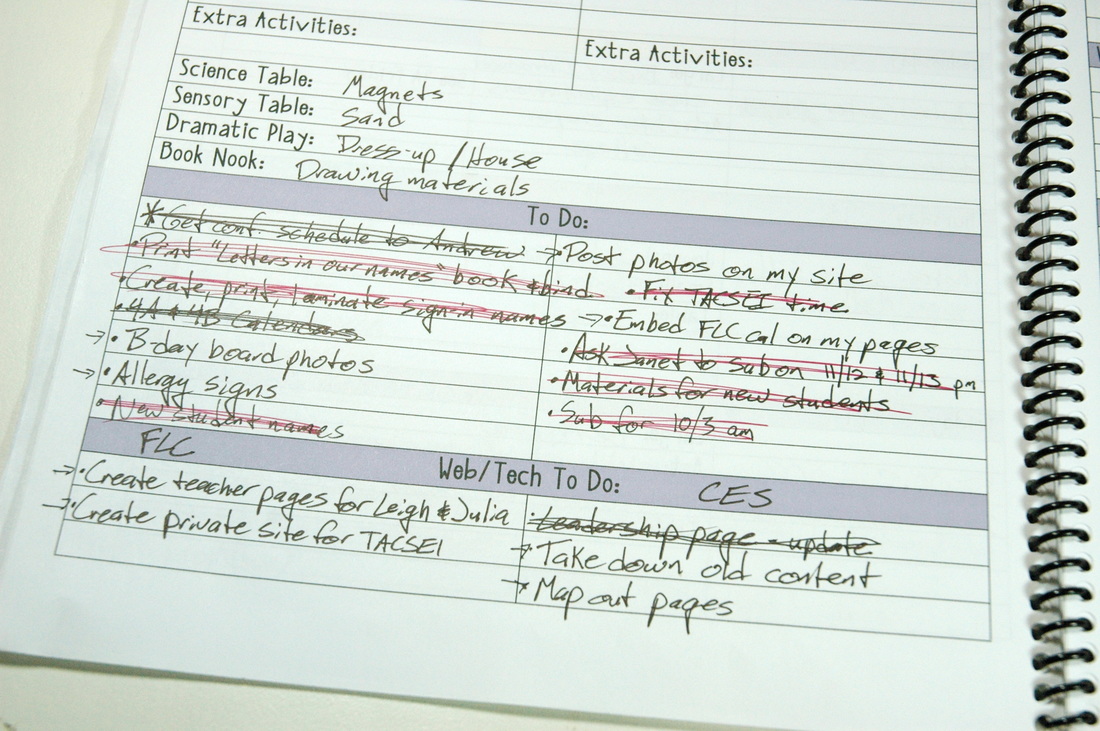
I also keep a running list of To Do items here. And since I'm also in charge of our school website and other tech duties, I keep a small tech section at the bottom.
Picture
The right-hand page is where all the daily planning takes place. I have AM classes and PM classes, so I break the day into 3 sections: Notes/Events (birthdays, fire drills, meetings, special events), AM, and PM. I have certain activities during the day that I need to plan for like what to do at large group, small group, art, or table time. So I put those sections in each class area. Because if I don't have the prompt, I may forget to plan the activity, and there's nothing worse to not know what you're doing in the middle of a transition in a preschool classroom.
Picture
I finish out my planner with a pen loop and monthly tabs. Then I bind it and I'm done!

I love my planner! It helps keep everything organized and in one place so even my assistant and paras can look at it and know what's going on for the day!

I've had quite a few of my co-workers ask about my planner when I take it out at meetings, so I've actually designed some for my coworkers as well! I customize them for each of their unique schedules and planning needs. I've gotten really good feedback from them and even some repeat customers!

I also sell some blank designs in my Etsy shop as well, so if you'd like your very own planner, you can stop by and download a 2-page printable for only $5! And for $8, I'll customize it with the colors, words, and sections you need. And starting at $30, I'll even print out your full (customized!) planner, bind it, and ship it to you!

This planner was designed for preschool, but it would work well for home-schooling, day-care, or nannies also!

Please let me know if you have any questions about my planner or if you have questions about customizing one of your own.

Happy Planning and Happy Crafting!
0 Comments

Planner Peace! (and a freebie!)

8/25/2014

0 Comments


I've always been kind of a plannerd (planner nerd). In high school, I used a simple student planner I got from probably Target to keep track of my assignments. In college, I got the official planner for our college (it had the college logo on the front and important campus events already listed inside) and I used that religiously for years. In fact, that's where my color-coding planner system began and where I first fell in love with post-it notes. I used the highlighting post-its color-coded for classes. The assignment would get written down and 'highlighted' on it's due date, then when I completed it, I would take off the sticky so it didn't stand out anymore.

Once I graduated, I went back to a basic planner on and off for a few years, then switched over to electronic calendars (Google, color-coded, very pretty!), but I never really found a good system to keep track of everything I had to do. I had a place for appointments, sure, but what about my to do list? Where was I supposed to put the note that some time this week I needed to call my grandma or go to a certain store? And when I got to said store, how was I supposed to know what to buy? My list was most likely at home on a sticky note on my desk. 

*sigh* This was not working.

Then last summer, I started finding Facebook groups and blogs and You Tube videos about Filofax and other planners. I was intrigued. Could I function effectively in a filo-type planner?

I had already made my own lesson planner for my preschool teaching, why not make one for my home life as well? So I started putzing. And printing. And tweaking. And reading. And the more I worked and actually used my planner, the better I got at developing a system that worked for me. And I think I've finally achieved "planner peace"!

Picture
Here's what a typical week look like in my planner before anything goes in it. It's very minimal. I put a strip of washi tape down the middle to break each week into 2 parts - appointments and to-dos. 
Picture
(I just realized I used the same washi tape for both of these weeks - one is from May, one is not till October!)

I use the outside edge for appointments - things that happen at a specific time or only on a specific day. Things like holidays, birthdays, work schedules, appointments, and events go here. The inner edge of the pages are for to-dos. I use color-coded post-it flags for my to-dos. This lets me see at a glance what kind of week I'm going to have - heavy on personal stuff, work stuff, errands, craft, etc.
Picture
I keep all my post-its on a divider in my planner and I have a fly-leaf opposite so I can stick re-occurring events there (like going to the bank - I know I'll need to do that again, just not sure when. So I keep it back here).

The nice things about the post-it flags are; 

1) When I'm done with an activity, I can just take it off and throw it away - so satisfying!

2) If I don't get something done on  Monday, I can just move it to Tuesday, or Wednesday, or whenever I have time to finish it on another day. And I don't have to keep re-writing it every day.

3) If there is a repeating event (grocery shopping every Monday or paying the phone bill every month), I can move the post-it to the next instance of that event when I'm done with it this week/month.

I also use the slightly bigger notes for lists of things I need to buy or get from a certain store or person. Or things I need to bring to school the next day. Or any small list that isn't a to-do.

So that's the calendar portion of my planner. I've been using this version of it since April and it's worked really, really well so far. I've made a few minor tweaks, but it's pretty much as you see it here. I'm going to make a video soon walking you through my calendar so those of you who like more visuals can see everything!

And if you've read this far, thanks! I know I can be quite verbose at times. As a reward, here's a free download of my planner pages:
2page_weekly.pdf
File Size: 16 kb
File Type: pdf
Download File

It's for half-size paper (8.5 x 5.5), so cut your paper in half before sending it through your printer.

You can decorate it any way you want! That's the beauty of blank planner pages!

Please let me know if you have any questions or if you want to see more of my planner or if you want clarification on anything. I hope to be sharing more of my planner in the future, so stay tuned!

Happy Crafting!
0 Comments

New (Old?) Cards & Products!

12/12/2010

0 Comments

 
Many years ago (2005), when I had first graduated from college & was beginning the daunting task of job hunting (for a teaching position), I came across a small scrapbooking store near my house named Artsy Tartsy. Being an avid scrapbooker, I was so excited, and on a (rejection letter induced) whim, asked if they were hiring. They were! 
Picture
Picture
And thus began my long journey with Artsy Tarsty. I worked there for 2 years, came back for an additional summer, and filled in on rare occasions in between. But the highlight of my time there was after my local store had closed & the original (much further away) store was all that remained. The owner decided that in addition to supplies, she would also sell finished products & invited me to sell my cards & other creations there! I was delighted & incredibly optimistic about this new business venture. In fact, it's what finally pushed me into starting 'Little Paper Creations'! 

I packed up a bunch of cards, calendar, & magnets and brought them down to the store. 

Picture
Picture
Then I sat back & eagerly awaited the money that was sure to come rolling in. 

Except it didn't. 

For almost 2 years it didn't. In that time I got one check for one set of magnets. That's it. It was depressing. 

Finally I decided I wanted my stuff back. I tried to contact the owner, but I could not get ahold of her! The store had dissappeared! I panicked! My hard work was gone! My money was gone! My product was gone!

Then one day in mid 2010, I came home to a large box sitting on my front step. Miracle of miracles, it was all my cards, calendars & magnets! I was so excited!


When I went thought the product, I realized my style has changed in the last few years. For the better, of course.


I've decided to re-vamp some of the cards & post them to Etsy. Some of the calendars are up there already & the magnets will be up shortly. Keep your eyes open for new (old?) stuff from Little Paper Creations!

0 Comments

Oops! Catch-up time!

7/6/2010

0 Comments

 
Wow... um... I've been gone awhile... sorry!

This summer has just been flying by, I'm not sure where all my time is going!

I was doing so well with the 30 Days of Creativity challenge, then I kind of petered out. I have done some more little things, but I didn't keep my momentum from the first half of the month. My hubby really kept his momentum going and ended up making about 20 drawings. Maybe more!

Anyway, here's what I've been up to the last 2 weeks:

I've been completely lost in a series of books that I love: The Sword of Truth series by Terry Goodkind.
Picture
I have read all 11 of these books before, but I was sucked back into the whole series when I mindlessly picked up the first book (Wizard's First Rule) one night on my way to bed. And now I have to finish the whole series.


I've also been working on some little crafty projects.
I made some calendars the other day:
Picture
These will be up in my Etsy store in the next couple days.


And I spent a couple hours one night sketching out an idea instead of sleeping. I had to get this idea out of my head so it didn't disappear: Adult Merit Badges!
Picture
I will be expanding on this idea later, but for now, I just sketched out 8 immediate ideas of what you could get a merit badge for as an adult. Here the list:
* Get Married (or civil union)
* Have a Baby (I'm also thinking ones for adoption, twins/triplets/etc, 2nd/3rd/etc child)
* Buy a house
* No IKEA furniture in your house (that's supposed to be the IKEA guy...)
* Joint Bank Account
* Build or Fix Something Major
* Host a Holiday
* Live by Yourself

That's all I have right now. Any more ideas?
I'm not sure if these will be digital badges, paper badges, iron-on transfers, or what, but this is a project I definitely want to pick up later. I would love to hear any ideas you have about them.

For now, that's all I will leave you with.
Tomorrow I will post my fireworks photos - I have several that I really love!
Thanks for reading!
Happy Creating!
0 Comments

    RSS Feed

    Blogs I read:

    Becky Higgins
    Bits & Pieces
    KWerner Designs
    Jennifer McGuire Ink
    I Could Make That
    Linny's Vault
    Pintester


    Categories

    All
    #30DaysofCreativity
    Baby
    Baby Shower
    Binder
    Calendar
    Cards
    Christmas
    Coupons
    Craft
    Distress Ink
    Etsy
    Fabric
    Family
    Feedbackplease
    Field Trip
    Flashback Friday
    Food
    Gift
    Haul
    Home
    Inspiration
    Internet
    Invites
    Magnets
    Organization
    Paint
    Photos
    Planner
    Project
    Project Life
    School
    Scrapbook
    Special Order
    Special Order
    Storage Solutions
    Thinking Of You
    Tips And Tricks
    Top5friday
    Tutorial
    Wedding


    Archives

    February 2016
    January 2016
    November 2015
    October 2015
    September 2015
    August 2015
    July 2015
    June 2015
    May 2015
    April 2015
    March 2015
    February 2015
    January 2015
    September 2014
    August 2014
    April 2014
    February 2014
    January 2014
    August 2013
    July 2013
    August 2012
    July 2012
    June 2011
    January 2011
    December 2010
    August 2010
    July 2010
    June 2010
    May 2010

Powered by Create your own unique website with customizable templates.