Little Paper Creations
  • Blog
  • About
  • Portfolio
  • Etsy Store
  • Quest for Kisses

Christmas Cards & a Fun Announcement!

1/5/2016

0 Comments

 
Happy New Year!

I hope everyone had a wonderful holiday season. I had a great time relaxing, hanging out with family and friends, and getting caught up around the house.

And I got my Christmas cards done!
Picture
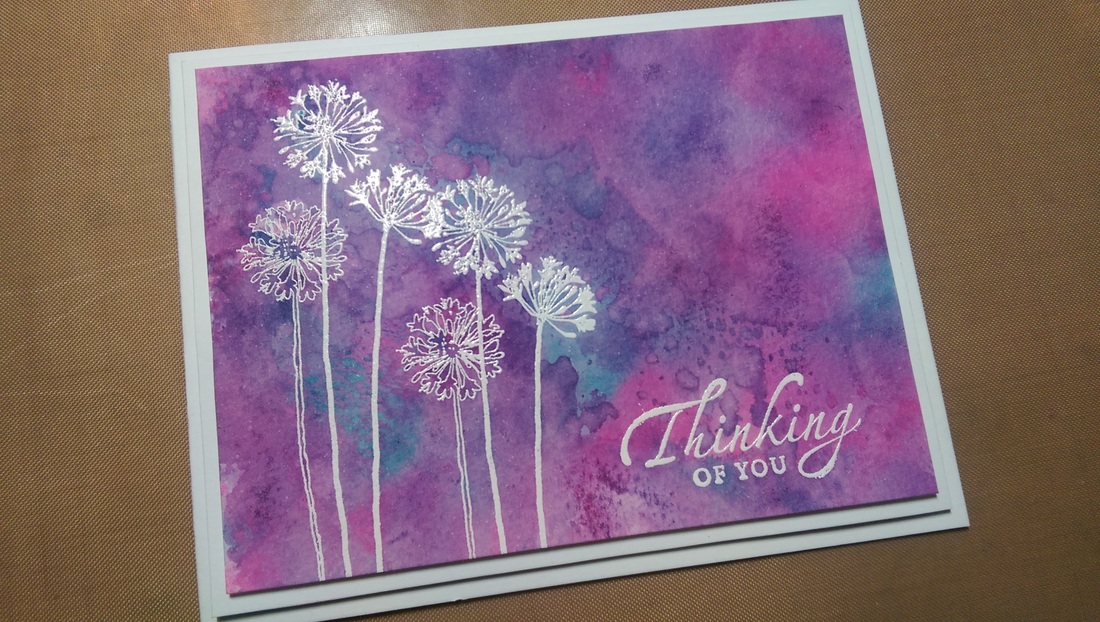
These cards are the most complicated cards I ever made multiples of. There were a bunch of steps and techniques, but I love them! And I loved making them!
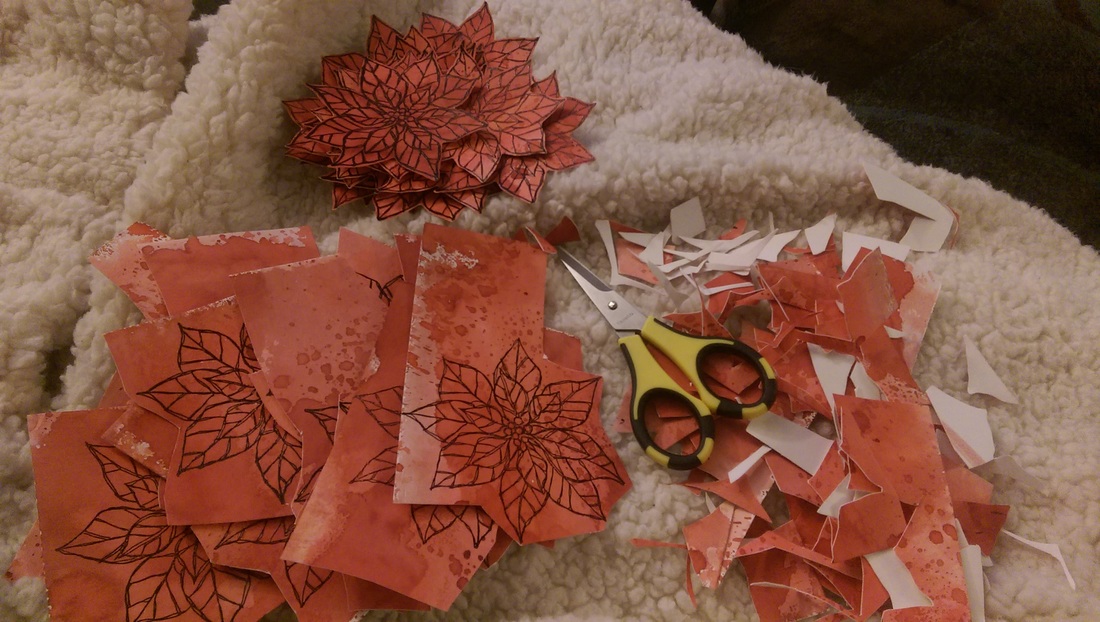
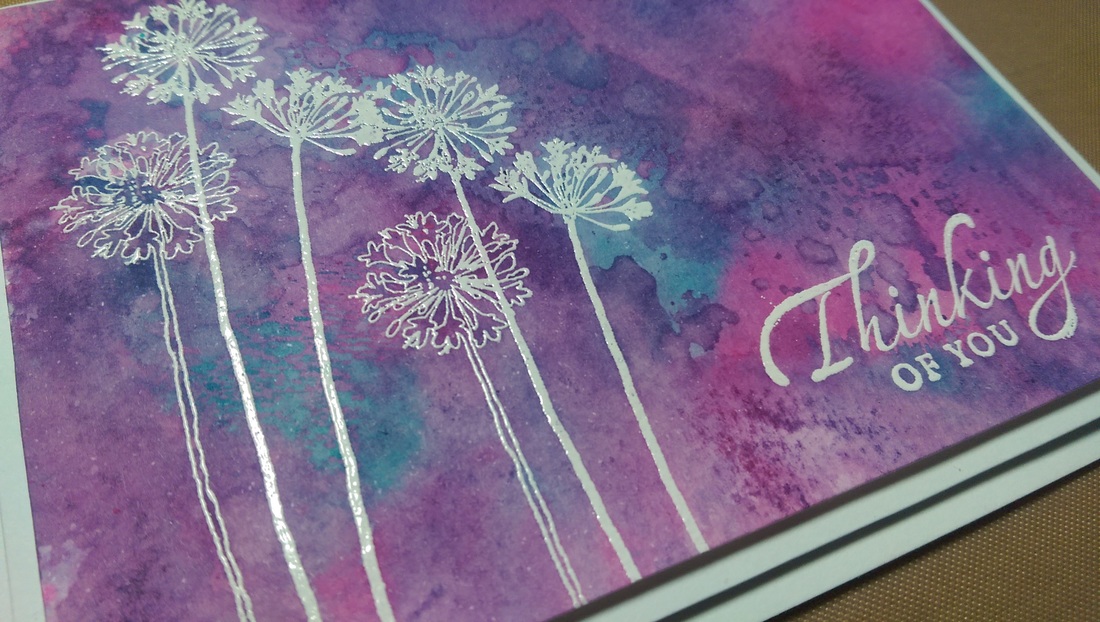
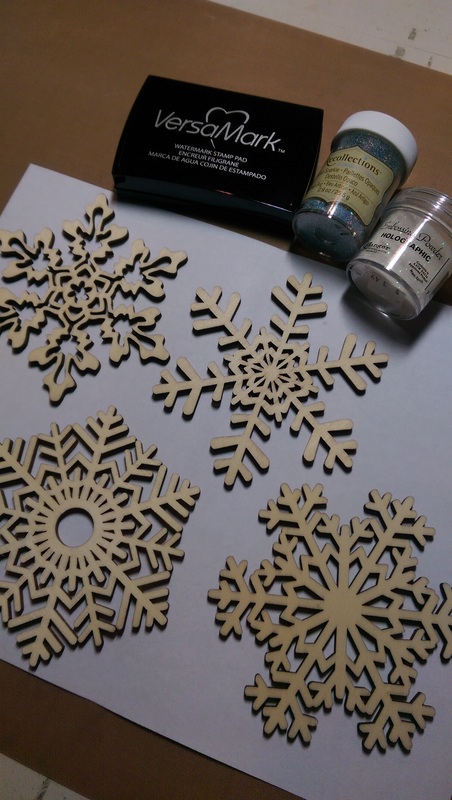
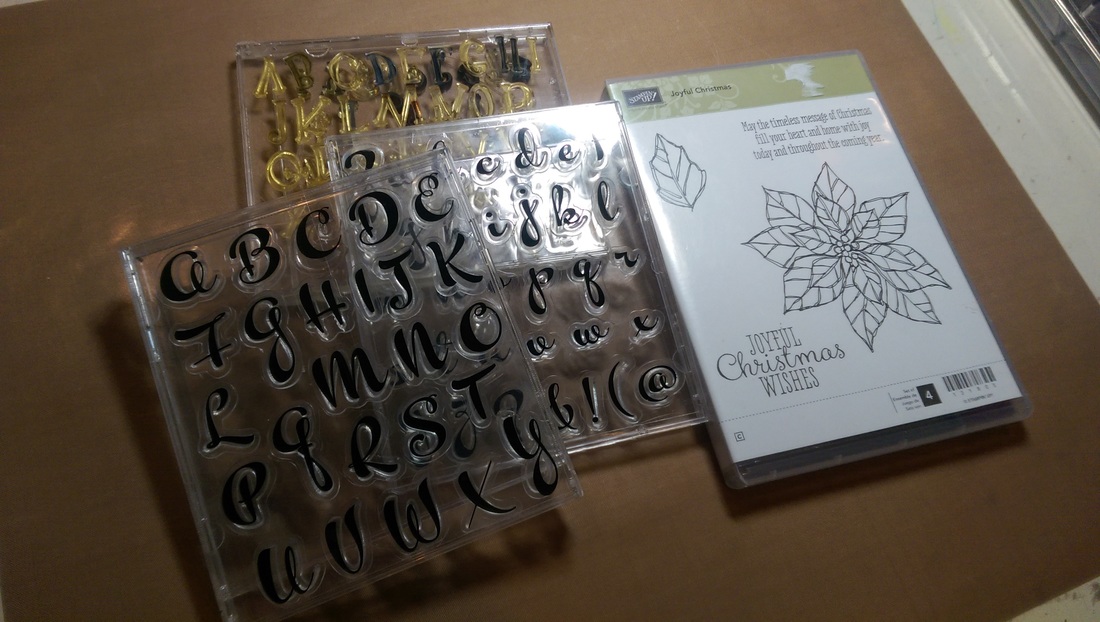
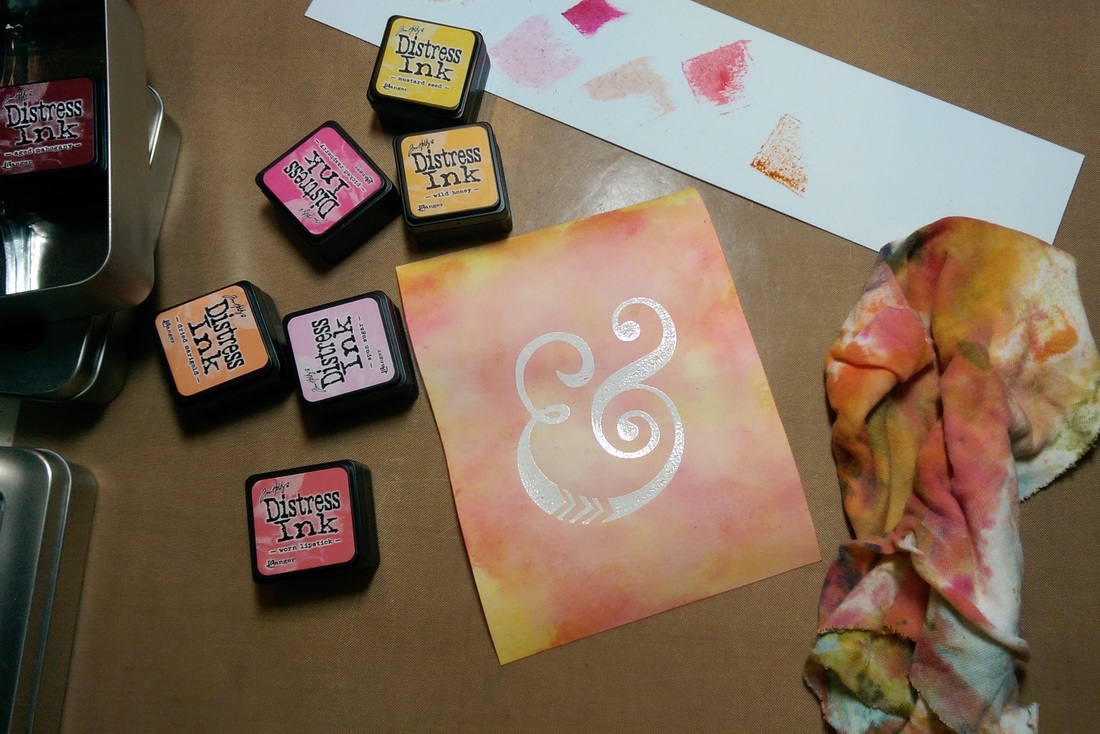
First, I used distress inks to watercolor full sheets of paper using the smooshing technique that I've shared before, then I heat-embossed poinsettias on them.
Picture
Then, because the stamp didn't have a matching die, I had to fussy-cut them all.
Picture
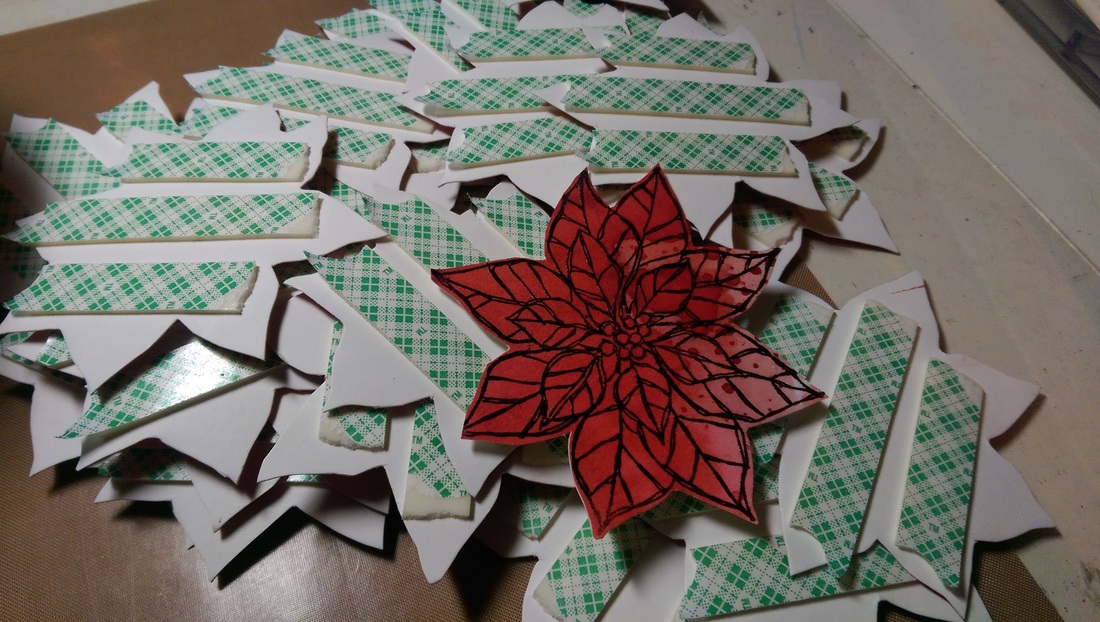
I added foam tape to the backs of all the poinsettias to make them pop off the background.
Picture
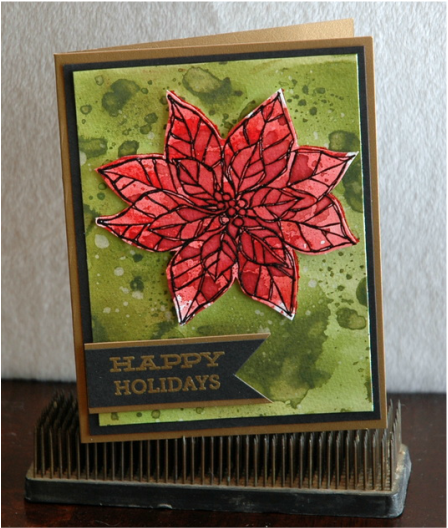
The background of the card was a green water-colored paper, colored with distress inks, just like the poinsettias. I matted the green paper with black cardstock and adhered the whole thing to a gold card base.
Picture
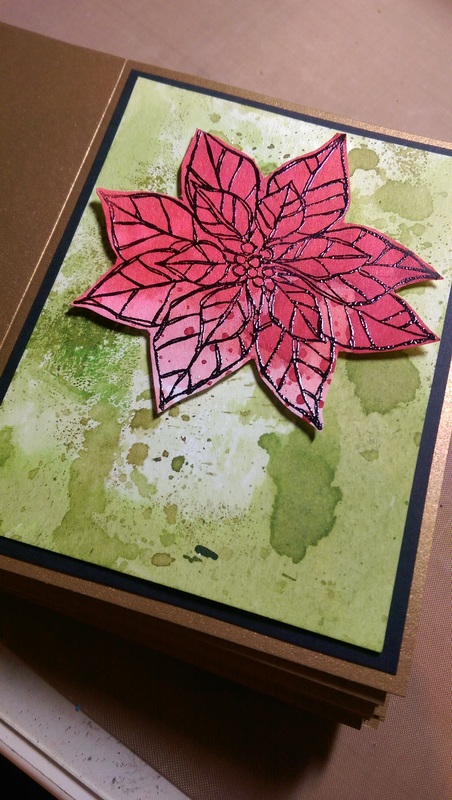
The last part of the card was the sentiment. Gold heat-embossed stamping on black cardstock and matted on gold cardstock.
Picture
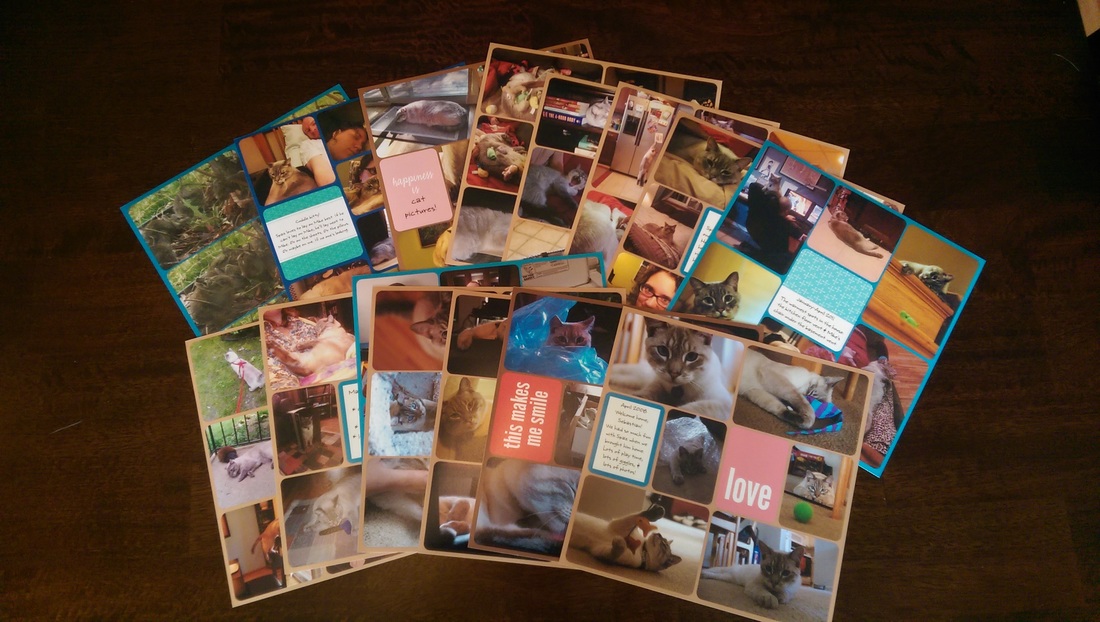
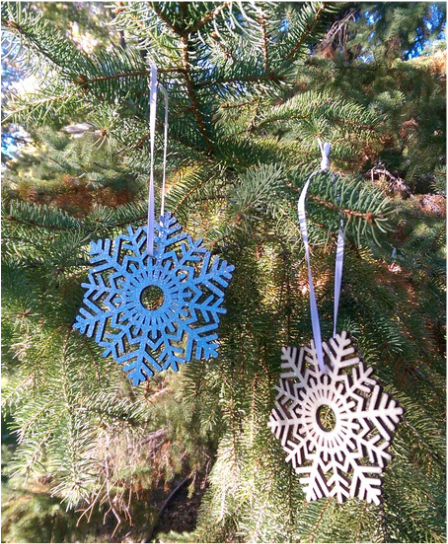
And voila! All done!
Picture
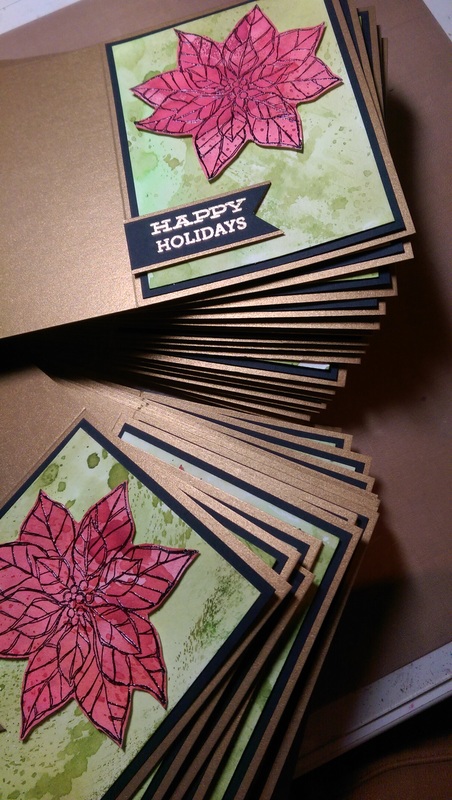
I made 45 cards and I loved making every single one of them! I know these cards were way fussier than I usually make. I know they took me a lot of time and effort to make, but I made them because I may not have a lot of time to make crazy Christmas cards for a while.
And I slipped a little something into each card:
Picture
Happy Holidays from Baby Boy Porter! Making his appearance in May 2016!
That's right! That's my announcement! We're going to have a baby! I'm due in May and we're so excited! This is why I may not be able to do any fancy Christmas cards for a while - I'll be a little busy!

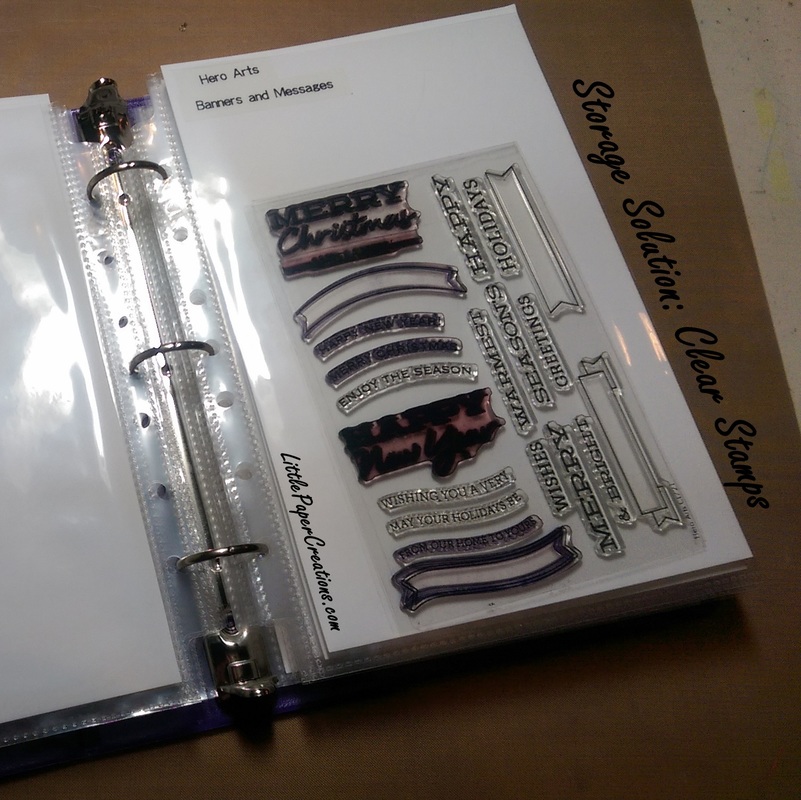
So, my holiday season was great, how was yours?
0 Comments

Rose Sympathy Cards

11/24/2015

0 Comments

 
I have a couple more cards for you today. Some thinking of you cards using a rose background stamp.

The first card I used pink and purple distress inks to create a water-color-like effect on the card.
Picture
Picture
For the second card, I recreated the Mother's Day card I made earlier this year by sponging on the color, then spritzing it with water to blend the colors together.
Picture
Picture
I really like these cards - they could be used for a sympathy card, or a pep-talk card, or any other reason you would be thinking of someone. I hope I get to send these under good circumstances, not sympathy. 

Happy Crafting!
0 Comments

Dandelion Sympathy Cards

11/17/2015

19 Comments

 
I've been making a lot of sympathy cards lately. That makes me sad. A lot of friends have been going through tough times lately and though I can't do anything to fix their problems or make them feel physically better, I can give them a card to let them know I'm thinking of them. So that's what I do.

I had to make another one a couple weeks ago and since I knew I'd likely need more eventually, I made several.
Picture
Picture
I made these cards using the same products. I stamped a dandelion stamp twice and embossed them using white embossing powder. I did the same with the Thinking of You stamp.

I used Distress Ink with both cards but I applied it in different ways. On the first card, I used an ink blender to apply the ink to the paper first, then I spritzed the whole thing with water to let the colors blend together. 

For the second card, I used the smooshing technique that I've used many times before. I started out with a pink, a blue, and a purple, but as the inks smooshed together, the pink and blue blended into purple, so it ended up very, very purple. Which still looks nice, but not exactly what I was going for.

I matted both watercolor pieces with foam tape onto white cardstock, then used foam tape to adhere that onto a white card base.
Picture
Picture
I'm hoping that I can stop making sympathy cards soon. I'm looking forward to getting started on my Christmas cards!!!

What kinds of cards have you been making lately?
Anyone started on Christmas cards yet?

Happy Crafting!
19 Comments

What I've Learned After 4 Years of Project Life - Part 3

11/3/2015

0 Comments

 
Welcome back to my final (for now...) installment of:
Picture
Here are parts 1 and 2

The last 2 weeks I've been sharing what I've learned about physical project life over the last few years. "Physical" meaning paper, photos, ephemera, etc. Things you can actually hold in your hand.

I love physical PL. I really do. I love photos, I love paper, I love moving things around and adding embellishments and cutting things up and adhering them down.

But it just got to be too much. The 12x 12 album seemed too big, the card choices seemed too many, and I ended up sitting at my desk for what seemed like too long.

So before I started my 2015 album, I decided to let myself think for a while. I thought about doing a 6x8 version of PL. I thought about doing digital PL. I thought about using the PL app. I thought about not doing PL at all. I thought for what ended up being 4 months. And I hadn't documented my year at all. I still took photos, I was still saving what little bits of memorabilia I had, but I wasn't doing anything with them. Then in late April, I made a decision.

On April 22, my nephew was born. On April 23, I went to the hospital to visit him, and I took photos (of course!!!). When I got home, I needed to do something with those photos. I didn't want to do something with them, I needed to do something with them. I needed to start documenting my nephew's life. I needed to start documenting my own life again. I needed to play with photos and colors and designs again. And I needed it to be easy and portable and fun. So I downloaded the Project Life app and started playing around.
Picture
It only took minutes before I was hooked!

It took me 10 minutes to make my first page about my visit to the hospital to meet Jason. 10 minutes!!! I immediately went back and pulled photos from the previous 4 months and quickly pulled together page after page. On and off for that first weekend, I worked on my pages and by the time Monday came around again, I was caught up! I felt excited again! I felt like documenting again! Is it as unique as the physical version of PL? No. Is it as customizable? Nope. Does it feed my need to play with papers and photos and cut things and glue things? No way. But is is fast and easy? Yes! Is it fun? Oh yeah! Is it getting me excited about documenting again? Hell Yes!!! And that's exactly what I needed this year.

Plus, I have been able to make theme albums in a snap! I have made a book for my cat. Yes, I have an album for my cat - I have to do something with all those adorable photos!
Picture
I've also made books for my mom, my sister, and my sister's mother-in-law about my nephew Jason. I put together 2-3 pages each month using photos my sister has posted on FB or photos she or mom have sent me of Jason, then I print them out and they slide the pages into their books. I'll also include Jason's pages in my yearbook. That's 4 books with only about 30 minutes of work each month - including printing!

I have not printed any of my own pages for the year yet. I still have to decide if I'm going to print them as individual pages and put them into a 3-ring binder or if I'm going to get them printed in a book. And I still have to decide if I'm going to print them in 12x12 or 8x8. But right now, I don't care. My year is documented.

I've learned that for me, right now, the PL app is the way to go. Easy and fast is the best way for me. Maybe next year, I will go back to physical. I have not gotten rid of any of my supplies. But for now, this is what works.

This is what gets me to document my life.
This is fun!
And that's the point!

Have any of you readers used any of the Project Life systems? Physical, digital, or the app? Did you like it? Did you stick with it? What system is working for you right now?

Happy crafting (and documenting)!
0 Comments

What I've Learned After 4 Years of Project Life - Part 2

10/27/2015

0 Comments

 
Last week, I shared some tips about Project Life that I've learned work for me after 4 years of doing this version of memory keeping. This week, I've got 3 more tips for you - all photo-related.
Picture
4) Print often.

I don't print at home. My printer is great for a lot of things, but photos is not one of them. I send my photos to the CVS down the street. They do a good job and I can usually pick up my photos in about an hour. CVS sends me a lot of coupons for photos. Unfortunately, I usually have to order 50+ photos to qualify for the discount. I used to wait till I had 50+ photos to place an order, just so I could get the discount (which was only a few pennies per print). Even when I did PL weekly, it would be 2-3 months before I had that many photos! By then, I wasn't excited about the photos anymore (I wanted to work on more recent ones), and I was overwhelmed with 50 photos at a time. I just didn't have a large enough chunk of time to put them into my album with cards and ephemera! Way too much at a time. I decided that the discount wasn't worth my sanity. So I began printing every 2-3 weeks (depending on time available, # of photos, and events that happened). I ended up with about 15-20 photos, which is way more manageable.

5) Take a lot of photos.

Take photos of people and events, yes, but don't forget about things. Take a photo of your new shoes, your favorite soda, the book you just finished, the state of your desk or work area. Take photos of the places you go all the time but are not 'special' - the grocery store, the coffee shop, the gym. These photos tell your story too. They tell your story perhaps more than the event photos. They tell who you are on a regular day and that is important. And when I look back on 3 years of PL, I like those every day photos the best.

6) Don't take too many photos.

I know, I just told you to take a lot of photos. What I mean is that while it's good to take a lot of photos of what you do and who you're with, don't let taking photos be the activity that takes over the other activities. Enjoy your life, experience your life, snap a couple shots, then get back out there and do something fun! After all, that's what Project Life is all about - living a good life and recording it! Living it comes first!

Thanks for reading! I hope some of my experiences help you make Project Life work for you. Next week, I'll share my final installment of Project Life where I share why I decided to ditch the physical version and go digital this year!

Happy Crafting!
0 Comments

What I've Learned After 4 Years of Project Life - Part 1

10/20/2015

0 Comments

 
I've been a devoted Project-Lifer for 4 years now. And I've learned so much! I'd like to share some of what I've learned here with you. Be warned - I like to talk about Project Life. A lot. So I'm going to split this post up into multiple parts.

First, a little history:
My first year (2012), I did weekly layouts, I journaled everything, I took photos of everything, I saved all my little extras to put in the book. And I ended up with 2 volumes for one year. That's a bit much.

The second year (2013), I went monthly. I only made 2-3 spreads per month, so I was able to cram the whole year into one book. Barely.

The third year (2014), I became much more zen about the whole thing. I put photos in as I took them, collected less stuff, and I journaled less. I fit a whole year of PL plus an extra project (Me: The Abridged Version) in one book. With a bit of room to spare.

This year (2015), I spent the first 3 months of the year wondering if I even wanted to continue PL. Then I found the PL app and my whole life changed. But that's another post...


So here we go:
Picture

1) Write stuff down - you will forget.

You think you'll remember, because how could you forget that funny thing your husband said or the details about your friend's party or how you felt after the series finale of your favorite show ever!?! But you will forget. Trust me on this. Write it down. Write it anywhere - a journal, a planner, a word document, a post-it note, or directly onto a journaling card. Just make sure all the notes you write down end up in the same place. These are what you will use to fill in your Project Life book. These are the important bits of your life. These are the things you want to remember!

2) Don't worry about separating weeks or months, just let it flow.

To me, the thought of keeping up with a weekly layout is daunting. Filling up a whole spread of photos and ephemera for a week or a month or any amount of time is restricting and nerve-wracking. And trying to keep all my photos in perfect chronological order is anxiety-inducing. So I let it go. *insert Frozen song* When I get my photos printed, I put them in a more-or-less chronological order, then start filling pockets. If I have 2 photos about one event but only one spot left of a page, then the 2 photos go on the next page. No biggie!

3) Don't plan to do something each week or month, you will only get discouraged when you fall behind with it.

My first year, I used the week cards provided in the kit. It was easy to fill them in, even if I was behind, because all I had to do was write in the dates. My second year, I wanted to do a weekly review card to record the things that didn't make in into the photos. I lasted 4 weeks. Then I got depressed about being behind. My third year, I knew I couldn't keep up with a weekly review, or even a monthly review, so I decided to just make a card (any size) to denote a new month. It didn't matter where it went or what size it was or how it was decorated, I just wanted the months shown. I got through March. Then I decided to just go with it. I date enough of my journaling cards that if I really want to know where I am in the year at a certain place in my book, I can just look at my journaling cards.


That's all I have for today, I'll be back with some more Project Life musings next week!

Happy Crafting!
0 Comments

It's Beginning to Look a lot Like... Just Kidding!

10/16/2015

0 Comments

 
I am so not ready for Christmas yet. But I know in the crafting world, Christmas comes early. If you want to sell gifts, make gifts, or make cards, you have to work early. And with it being October already, I needed to get my butt in gear.

So while I was out shopping today, I came across some lovely wooden snowflakes. I thought they looked nice, but they needed a little something more... some sparkle!
Picture
So I brought them home and covered them with glittering embossing powder! That did the trick!
Picture
You can't really see the extent of the sparkle in the photos, but they are shimmery and gorgeous! The one on the left is holographic embossing powder, so the wood color shows through the glitter. The one on the right is a pale, glittery blue. Very icy.
Picture
They really do shine in the light and it's so frustrating that the photos don't show it!

Anyway, I'm going to make more of these and put them up on Etsy. I will also bring them to school to sell, so if you work with me, you'll be seeing them soon!

My next big project is my Christmas cards. I have a lot to make this year!
Have you started working on Christmas/winter projects or gifts yet?

Happy Crafting!
0 Comments

Pin-spiration

10/6/2015

0 Comments

 
I hate to admit it, but I have not made anything crafty in a while.

Like, almost a month...

And it's driving me crazy!

I just haven't had the time! Between school starting up again and working on much-needed chores and projects around the house, I just haven't found time to escape down to my craft room on a regular basis.

I'm afraid at this point that when I do finally find the time to craft, I won't know what to do! So I'm turning to an old friend: Pinterest!

I'm hoping that with a proper infusion of "Pin-spiration", I'll be able to get right to work once I"m able to find an hour or two to craft again (hopefully this weekend!)

If you want to check out what I've been looking at lately, you can check out my card-making boards, my invitation board, my general crafting board, or my whole Pinterest page.

And please, let me know what your username on Pinterest is, I'm always looking for new people to follow for awesome inspiration!

Thanks for stopping by, and Happy Crafting!
0 Comments

Storage Solution: Clear Stamps

9/29/2015

0 Comments

 
A few months ago, I shared with you my solution for wrangling my wafer-thin dies. I have been loving my mini binder idea for my dies, so I thought it would be a perfect solution for my clear stamps as well!
Picture
Supplies: half-size binder, half-size page protectors, white cardstock cut in half, and a label maker. Put it all together and you get a super easy, super accessible storage solution for clear stamps!
Picture
The stamps stay in the page protectors well and slide out easily when I need them. I have each page labeled with the name of the stamp set and the company so I can reference them later if I need to.

The only problem I ran into is that my mini binder is too full! I don't have that many stamp sets, so I thought they would all fit, which they technically do... But it looks like I'll have to get another binder and split them up.
Picture
The binder fits nicely on my hanging file shelf in my craft room right next to my die binder.
Picture
I do still have a few stamp sets that I did not put into the binder. One Stampin' Up set I just bought for Christmas and a couple alphabet sets that I put into CD cases years ago. As I rarely use these stamps, I figured a few in boxes on my shelf is no big deal.

I'm hoping that by having the stamps accessible and visible, I will take them out more often instead of reaching for the ones I always reach for.
Picture
How do you store your clear stamps?

Happy Crafting and Happy Organizing!
0 Comments

The Wedding Card I Nearly Gave Up On

9/22/2015

0 Comments

 
Have you ever had a vision of how something would turn out and you got so excited you couldn't wait to get started and you worked really hard on it and then it didn't turn out anything like what you have envisioned?

If you said no, you're a liar.  ^_^

It happens to me all the time. And most of the time, I scrap it or start over or just walk away. But this time I couldn't. This time I had an out of town wedding that we were leaving for the next day and I had no more time to make another card. So I stuck with it.

The color I had envisioned kept alluding me. I could not get my distress inks to do what I wanted! But I kept adding more layers. I kept trying more colors. I pushed through till I got the result I had set out to get.

And you know what? It felt really, really good when the color finally showed up.
Picture
When I finally got what I wanted, I was too tired to come up with an all new design, so I stuck with the one I made for a previous wedding card and took out some vellum and matching paper to finish up this card.
Picture
I really love this card. It matches the invitations perfectly (which I made - post coming soon!) and there's nothing quite like the triumph of working through crafting adversity. (How's that for dramatic!)
Picture
What do you do when a project doesn't turn out the way you envisioned it? Do you scrap it? Start over? Keep going? Throw it out the window and eat some chocolate?  ^_^

Happy Crafting!
0 Comments
<<Previous
Forward>>

    RSS Feed

    Blogs I read:

    Becky Higgins
    Bits & Pieces
    KWerner Designs
    Jennifer McGuire Ink
    I Could Make That
    Linny's Vault
    Pintester


    Categories

    All
    #30DaysofCreativity
    Baby
    Baby Shower
    Binder
    Calendar
    Cards
    Christmas
    Coupons
    Craft
    Distress Ink
    Etsy
    Fabric
    Family
    Feedbackplease
    Field Trip
    Flashback Friday
    Food
    Gift
    Haul
    Home
    Inspiration
    Internet
    Invites
    Magnets
    Organization
    Paint
    Photos
    Planner
    Project
    Project Life
    School
    Scrapbook
    Special Order
    Special Order
    Storage Solutions
    Thinking Of You
    Tips And Tricks
    Top5friday
    Tutorial
    Wedding


    Archives

    February 2016
    January 2016
    November 2015
    October 2015
    September 2015
    August 2015
    July 2015
    June 2015
    May 2015
    April 2015
    March 2015
    February 2015
    January 2015
    September 2014
    August 2014
    April 2014
    February 2014
    January 2014
    August 2013
    July 2013
    August 2012
    July 2012
    June 2011
    January 2011
    December 2010
    August 2010
    July 2010
    June 2010
    May 2010

Powered by Create your own unique website with customizable templates.