Little Paper Creations
  • Blog
  • About
  • Portfolio
  • Etsy Store
  • Quest for Kisses

Back to School, Back to Planning

9/15/2015

0 Comments

 
Well, it's September. And we all know that means back to school. But what many people may not realize is that for teachers, September is literally our new year. January is just another month in the middle of the year; September is the real 'new year'. So with a new year comes a need for a new planner: a lesson planner!

For 5 years now, I've designed and printed my own lesson planner. It has helped me to keep track of everything going on in my classroom through the year. I honestly don't know if I could function without it anymore.

For 3 years, I've also designed and sold personalized planners for my fellow teachers at school. They love them just as much as I do! Usually, I sit down with a teacher on one day (let's say Monday) and plan out what she wants her planner pages to look like. Then I go home that night, make the changes, and print the pages. Then the next day (Tuesday) after school, I drop off the planner at Staples or Office Depot to be bound. It used to be that binding a planner would take all of 20-30 minutes; just long enough for me to peruse the latest office supplies or run next door to Michaels. But now, it takes at least a day. So I drop it off on Tuesday after school and pick it up on Wednesday after school. Which means I don't give it to my colleague till Thursday. That's 4 days of turn-around! And that's when I don't have anything else going on that interferes with the drop off and pick up. And it assumes they get the binding right the first time (which they don't always - which adds another 3-4 days on).

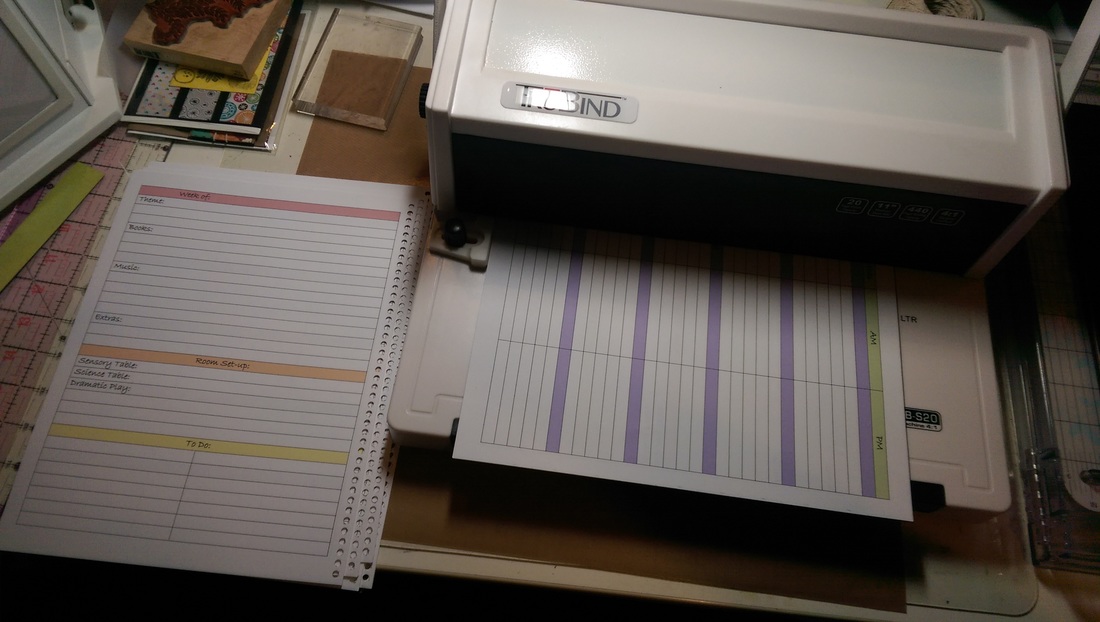
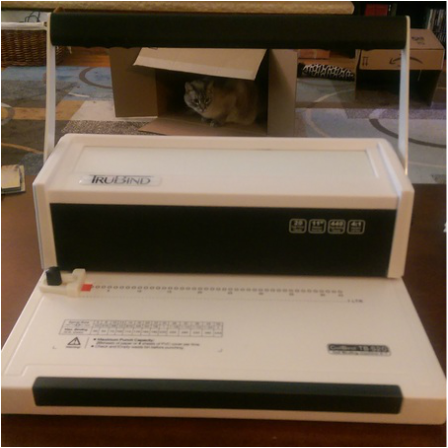
I was getting frustrated with this long turn-around time and increasingly incompetent workmanship at the store, so I finally broke down and purchased my own binding machine!
Picture
I took this picture immediately after un-boxing it right in my living room. I didn't even bring it down to my workroom! As soon as the box was empty, my cat climbed right in. He loves boxes.

I have had my binding machine for 3 weeks and I've already used it 6 times! I've made several planners for teachers at school (with a less-than-24-hour turn-around!) and a few for online orders.
Picture
Speaking of online orders, I have added physical planners to my Etsy shop! Now that I am in charge of the process from start to finish, I feel confident offering physical planners on a regular basis, not only by special request. So if you are in need of a planner (or know someone who is), please check out my Etsy shop. If you don't see something there that works for your needs, please contact me and we can work out the details for a personalized, printed planner just for you!

Happy New Year to all you teachers!
Happy Planning to all you plannerds!
And Happy Crafting to all!
0 Comments

Watercolor Purple Sympathy Card

9/8/2015

27 Comments

 
Thanks for visiting again, I've got another card to share with you today.

Unfortunately, someone close to my family passed away recently and we do not live nearby, so I felt it was important to send a card to the person most affected.

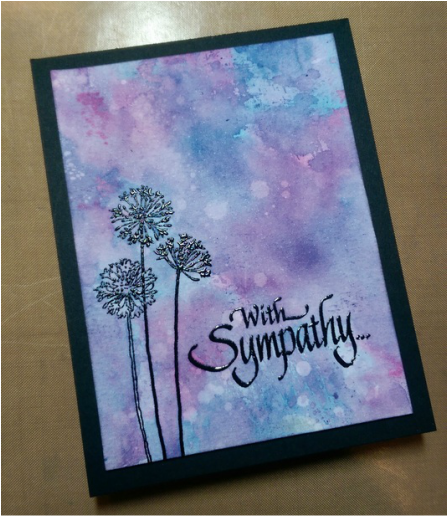
I used Versamark ink and black embossing powder to create the sentiment and floral detail on the card first. Then I used distress ink to make a watercolor background.
Picture
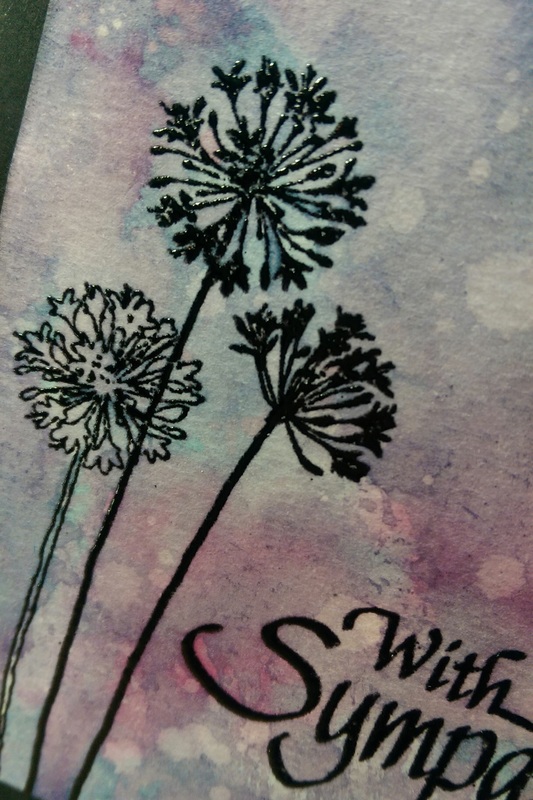
Here's a closeup of the embossed flowers.
Picture
I trimmed down the background, added it to a black card base with some foam adhesive for dimension, and the card was done.

The hardest part of this card was to figure out what to say on the inside. I always have trouble writing in cards. Sometimes, I feel like nothing I say will be the right thing to say. I have to remind myself that it doesn't matter what I say, as long as I mean it.

Does anyone else have trouble writing on the inside of a card? Or do you have any go-to phrases that I can learn from? Please share!

Happy Crafting!
27 Comments

Storage Solution: Recipes

9/1/2015

0 Comments

 
Like any good crafter, I jumped on PInterest early. I loved having craft ideas at my fingertips. Then I started finding non crafty things. Like recipes. And pretty soon I had a bunch of recipes stored up to try out, but what good were they on my computer? I don' have a computer in the kitchen, so I had to print them. But what to do with a bunch of printed recipes? Put them in a binder!
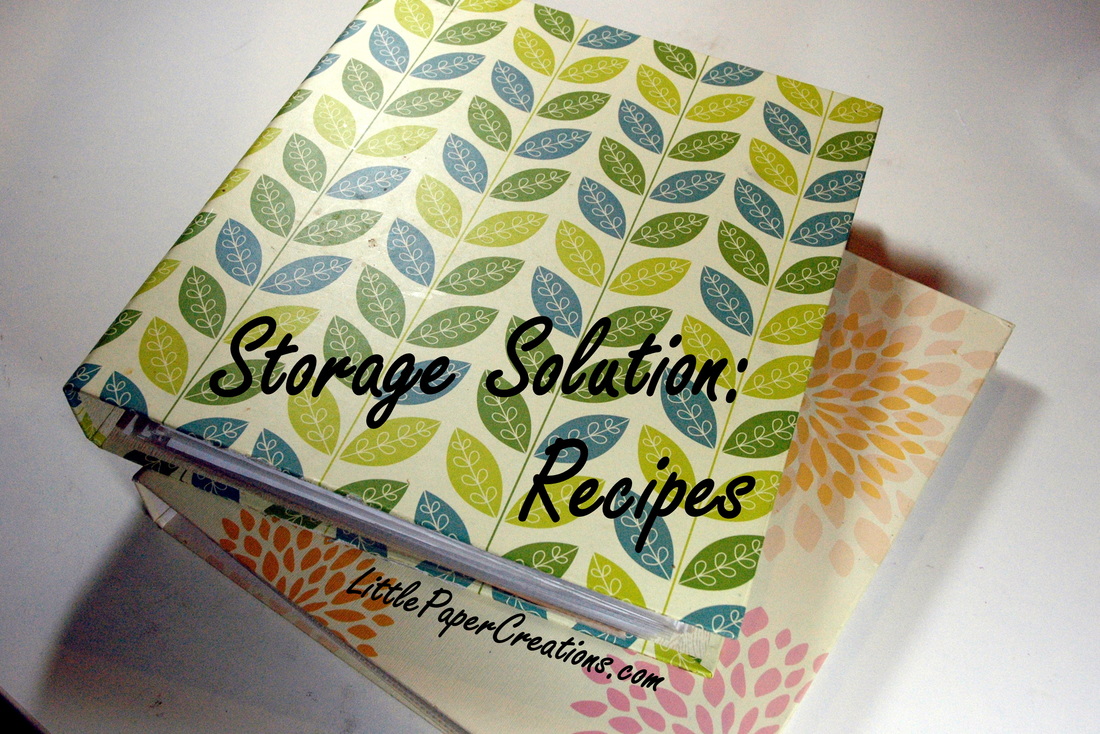
Here's my recipe binder:
Picture
I actually have 2 binders now. One for sweets and one fore everything else. I have a lot of sweets recipes...

Moving on...

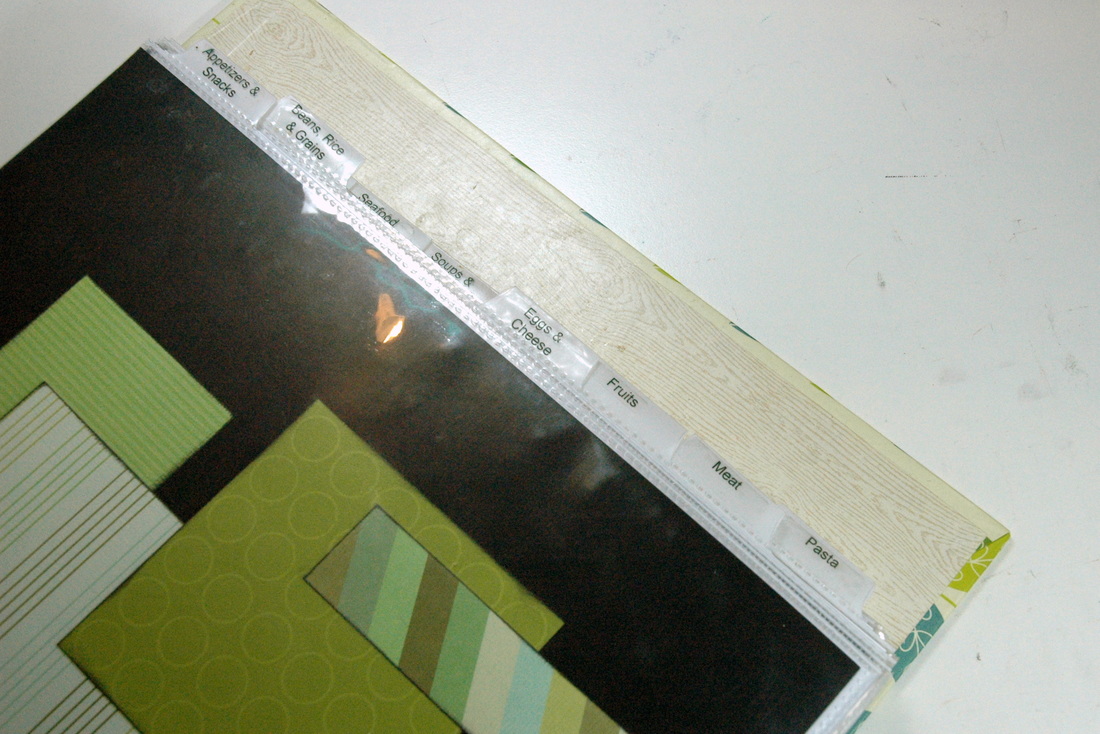
I sorted my recipes into different categories, then used some tabbed page protectors and my label maker to label the categories.
Picture
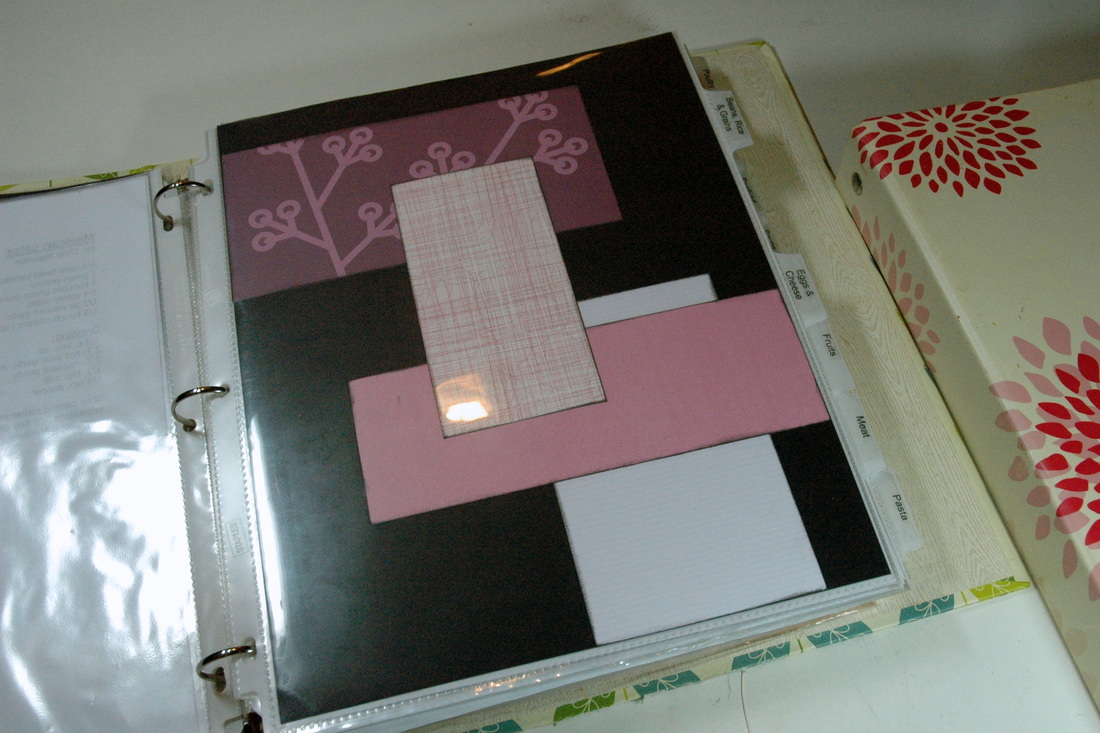
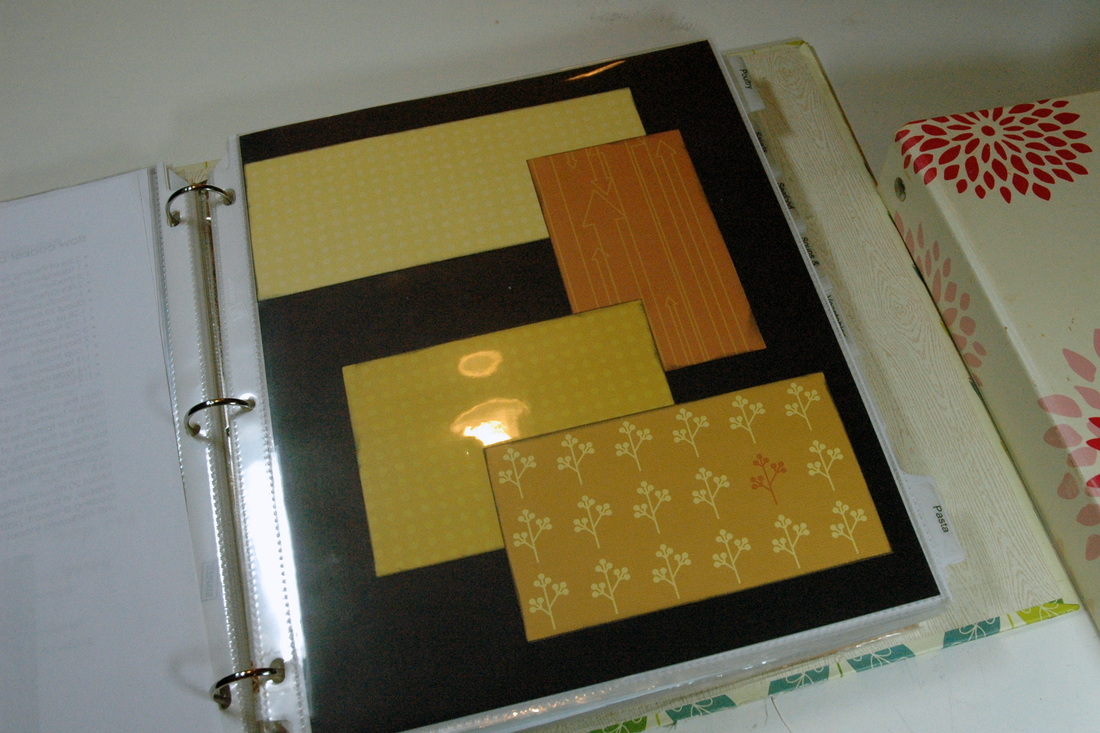
I wanted to decorate the tabbed page protectors, but I didn't have a lot of time or money, so I dug into my stash and came up with a whole set of old K.I. Memories paper. I used one color on each page, cut out randomly-sized rectangles and adhered them onto some black cardstock. I love that I was able to use so much of the paper that I had been hoarding for so long.
Picture
Picture
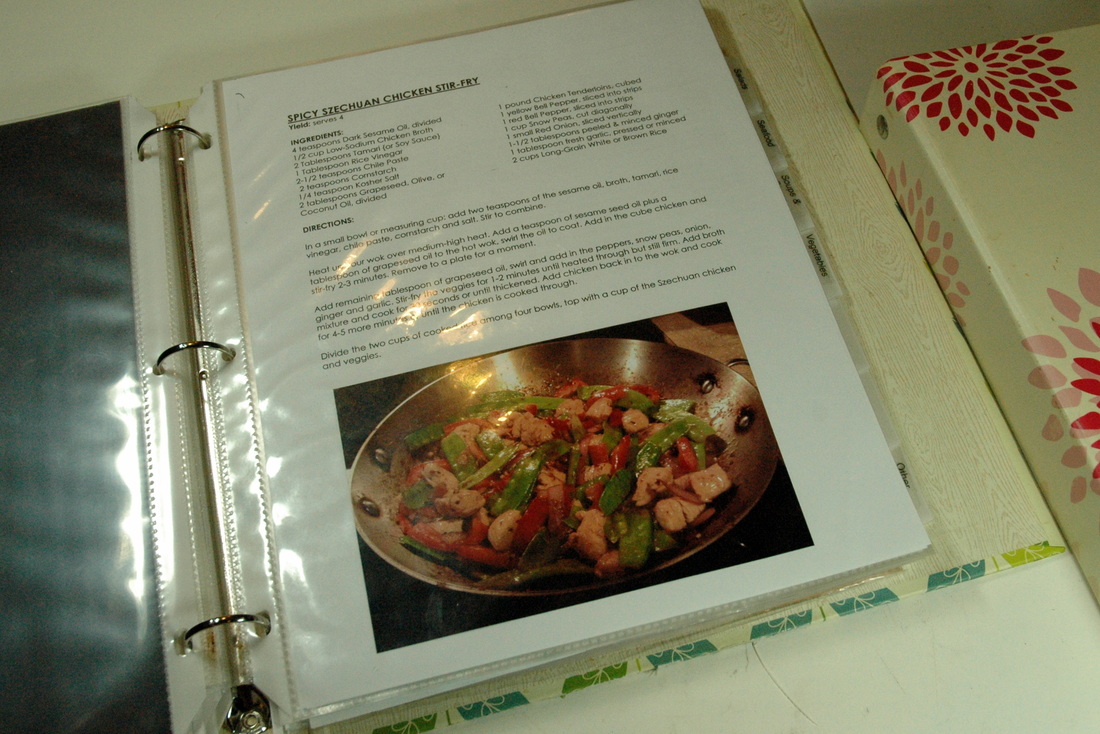
Once the title pages were done, I started sliding in my recipes. I try to take a photo of each recipe when I make it so I can see what the dish looks like when I'm flipping through.
Picture
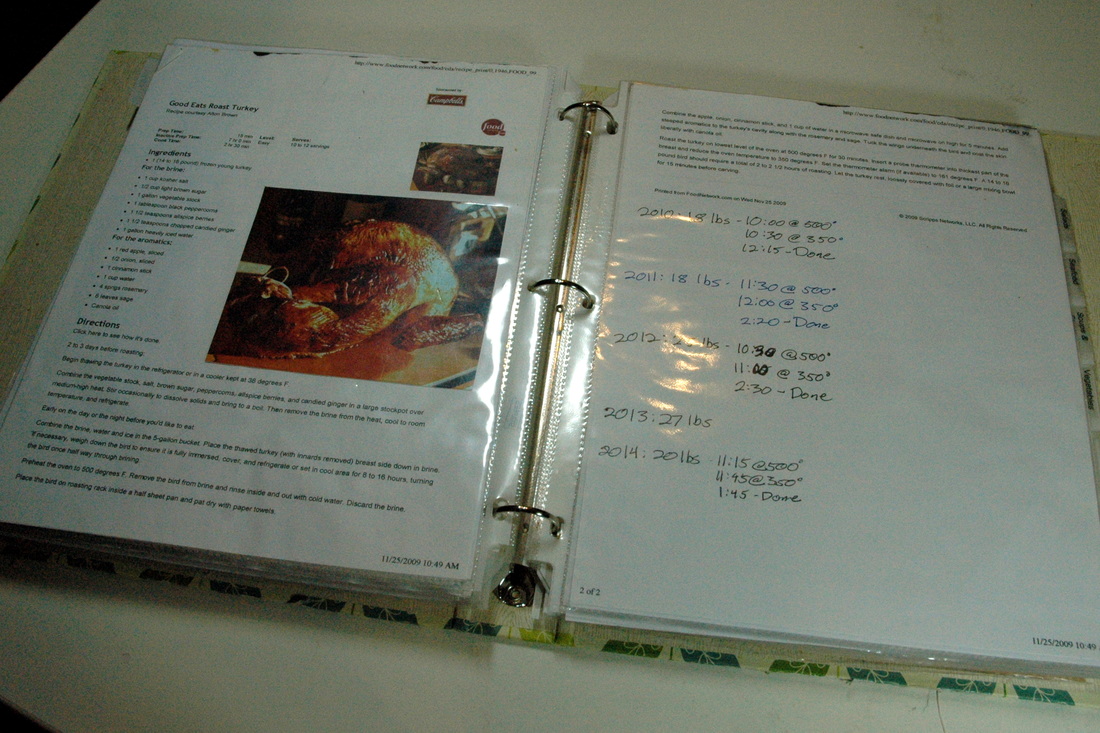
Sometimes, I make notes on my pages so I can keep track of what has worked or what to try. Here is my Thanksgiving turkey recipe with notes on how big the turkey was each year and how long it took to make. That way I can plan the timeline each Thanksgiving.
Picture
When I get a new recipe, I put it in the front of the binder till I actually make the recipe, then if I like it, it gets a page protector. If not - trash! There is no special order to the recipes within the categories - none of them are big enough that I cannot find what I need.

How do you store your recipes?

Happy Crafting (and cooking!)
0 Comments

Outdoorsy Wedding Card

8/25/2015

0 Comments

 
August 2015 will forever be known in our house as "The August of Insanity!" Of the 5 weekends (technically) in August, 1 was full of birthday celebrations for my mom and sister and 3 were full of weddings. Yes 3. And one hasn't even happened yet! At least I had one August weekend off. Though I used that weekend for dress shopping for the weddings...

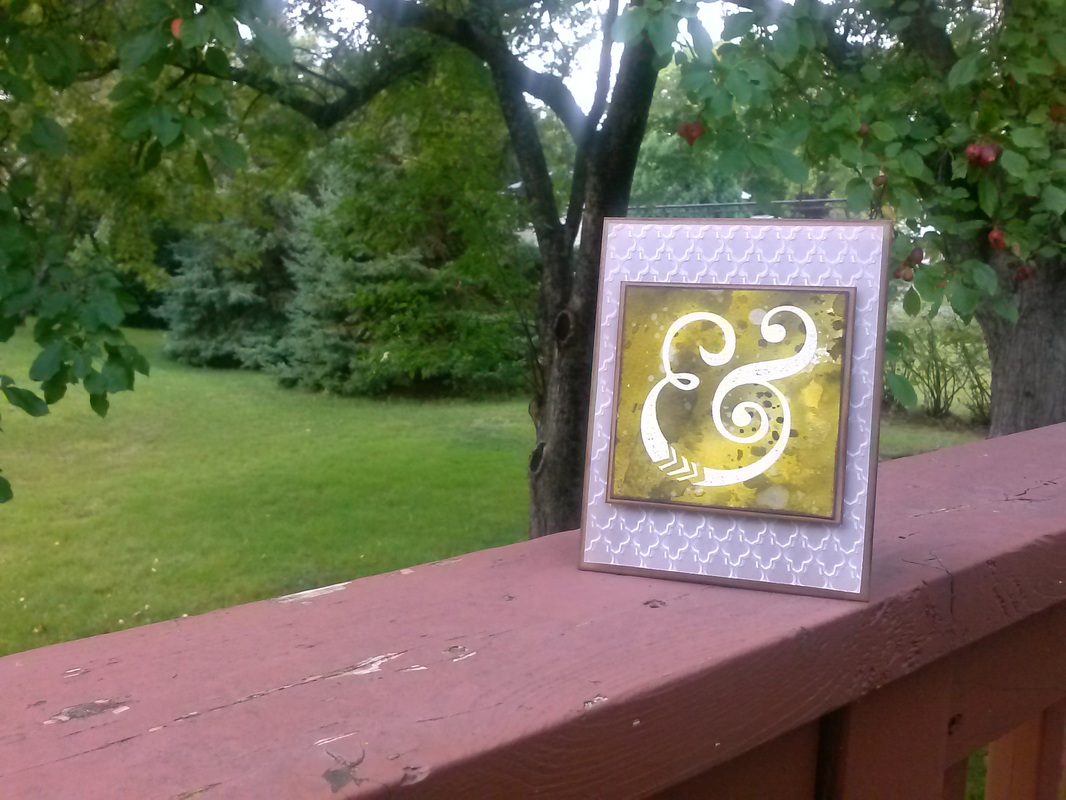
With so many events coming up, I knew I would have to make some cards. Here is the first on I made: a wedding card for the first wedding.
Picture
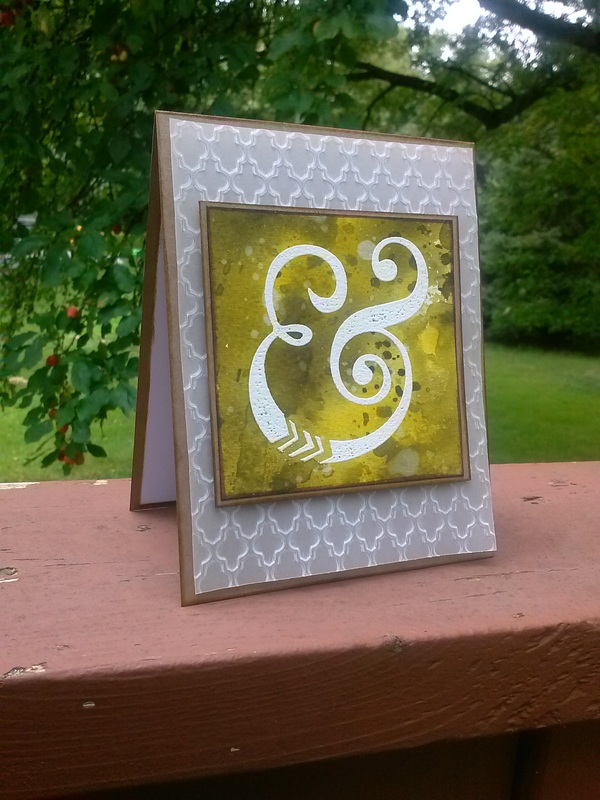
I know it doesn't look like a traditional wedding card, but the couple that were married are very outdoors-y, so I thought I should go with a lightly 'camo' look. I white heat embossed the large ampersand, then used distress inks and my favorite 'smooshing' technique to create the center piece. The piece behind it is dry embossed vellum. I love how it turned out! All the softness of vellum, but with a unique texture.
Picture
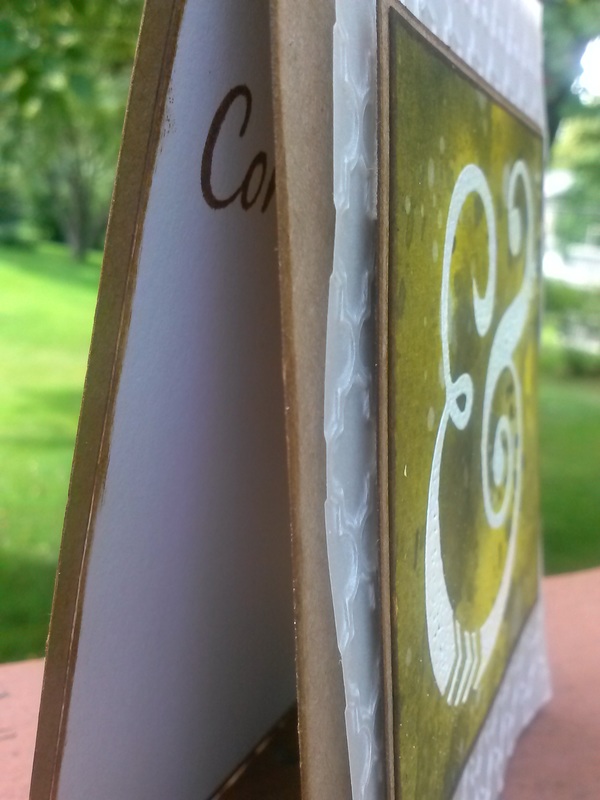
I mounted both layers with foam tape onto a top-folding kraft cardstock base. A quick "Congratulations" stamp on the inside, and the card was complete!
Picture
I really like how it turned out, I think I'm going to use this design for some more wedding cards! It's super customizable, so I can use the wedding colors for each couple.

Happy Crafting!
0 Comments

Thinking of You Pastel Card

8/19/2015

0 Comments

 
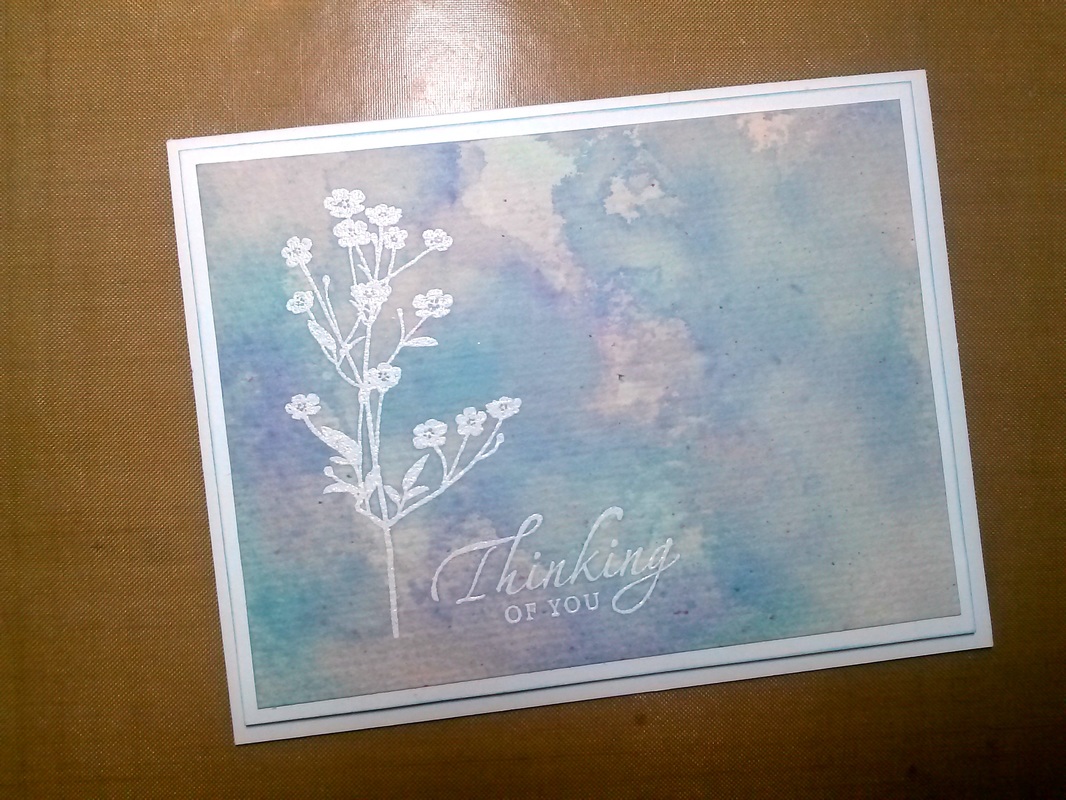
In keeping with my goal of sending a card to friends who have gone through an illness or a surgery, I made another card for a friend who had knee surgery this summer.
Picture
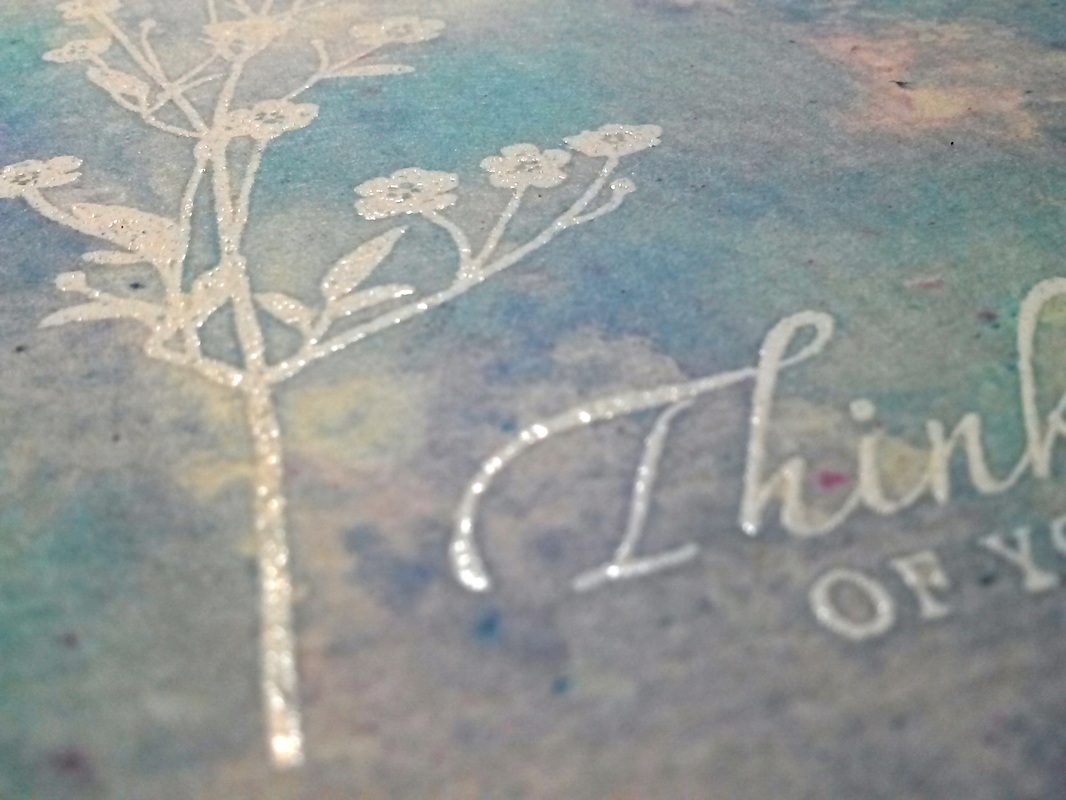
I stepped out of my comfort color zone and used pastels for this card. I usually lean toward bright, bold colors, but I wanted to try something new for this card. I really like how it turned out! It's soft and colorful without being overwhelming. The white embossing matches nicely without popping off the page like it does with brighter colors.
Picture
I used the Sprigs stamp set from Penny Black and the Sincere Sentiments set from Stampin' Up. The background was made with Distress Inks using my smooshing technique.

Although I like making and sending cards to my friends, I'm hoping that I don't have to make any more "Thinking of You" cards - I hope everyone stays healthy and strong! I do get to make some wedding cards soon, so I will share those when I can.

Happy Crafting!
0 Comments

Sunflower Wedding Invitations

8/11/2015

1 Comment

 
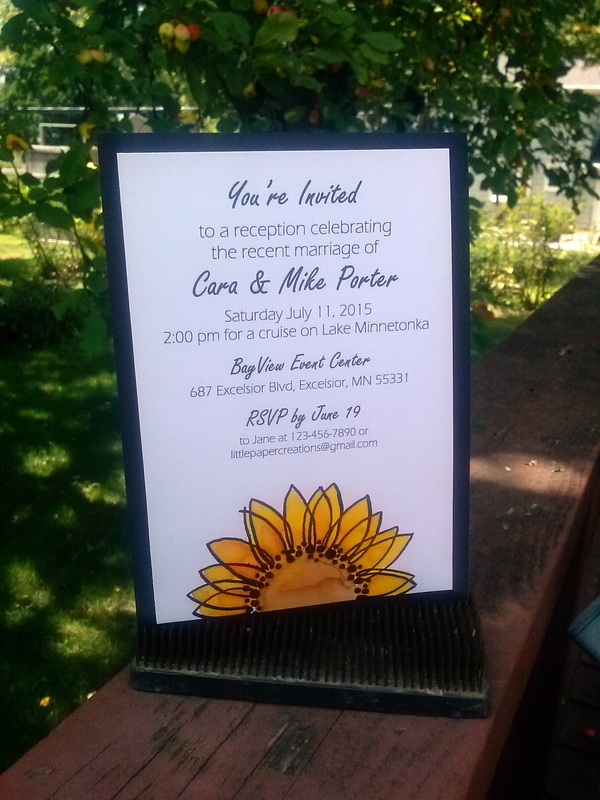
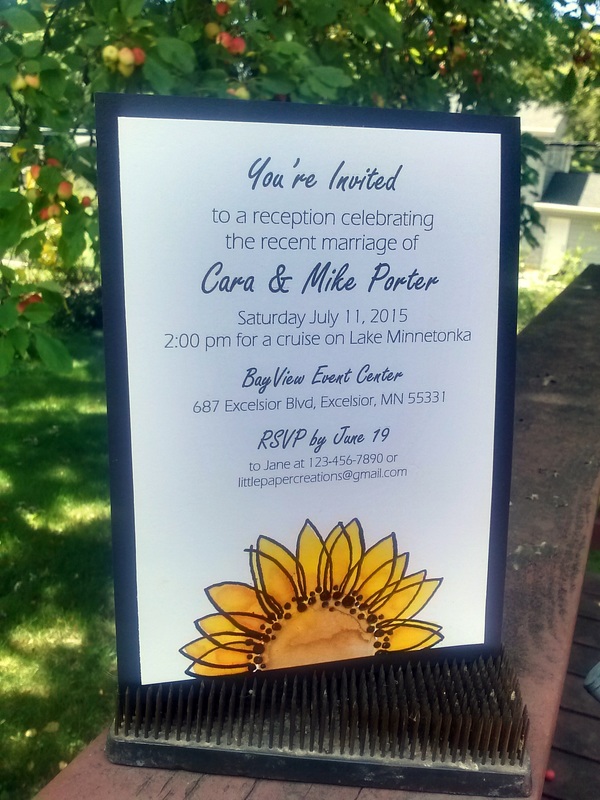
A wedding doesn't always have to be a big, expensive, extravagant event. One of my brides, Marie, chose to do a small destination wedding and have a local reception a few months later. Her mother (who is a friend of my parents) contacted me last spring about making the invitations for the local reception. Of course I jumped at the chance!

Marie had sunflowers at her wedding, so I wanted to find a way to incorporate those into the design of the invitation without getting too 'theme-y'. Is that a word? It is now!

The mother of the bride and I settled on this design; bold and elegant, but simple and fun. I love it!

(Names and contact info have been changed on the invitation to insure privacy)
Picture
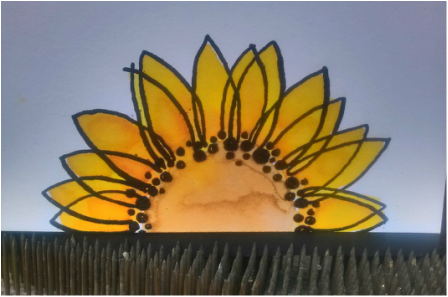
As you should know by now, I'm slightly obsessed with distress inks. I was so excited to be able to incorporate them into this project to create a soft watercolor look. I heat embossed the sunflower stamp with black embossing powder, then used the distress inks and a paintbrush to paint the sunflower with bright yellows and oranges.
Picture
A few things I learned from this project:

1) Watercolor paper is really the best thing to use with any technique that uses water. Unfortunately, I haven't found a watercolor paper that goes through the printer and shows the printing well, so I used a heavy cardstock. It worked well and they looked great, but I'd love to find a 'printable' watercolor paper.

2) Along those lines - don't overwork the colors. I had to be careful with my brush to avoid the paper from pilling with the amount of water I was using, which was good because the more I messed with the colors, the less I liked the outcome. Less is more!

3) If you are using black embossing powder, do yourself a HUGE favor and use an anti-static powder tool. For some reason, black embossing powder sticks to EVERYTHING!!! Another option is to use black ink and clear embossing powder.

4) If everything is not dry before you start to assemble, it will smear and you will have to do it over. Ask me how I know...
Picture
Congratulations to Marie and Matt on their wedding, their reception, and beginning their life together!

Happy Crafting!
1 Comment

Thinking of You Bold Blues Card

8/4/2015

0 Comments

 
I'm not very good about sending out cards.
Ironic, I know.
I've made a resolution to at least send cards when someone is sick, recovering from surgery, or experiences a loss. I think those are the times when a handmade card is most appreciated.

Several of my friends had surgeries this summer (I already talked about one here), and I made some cards to wish them a speedy recovery.
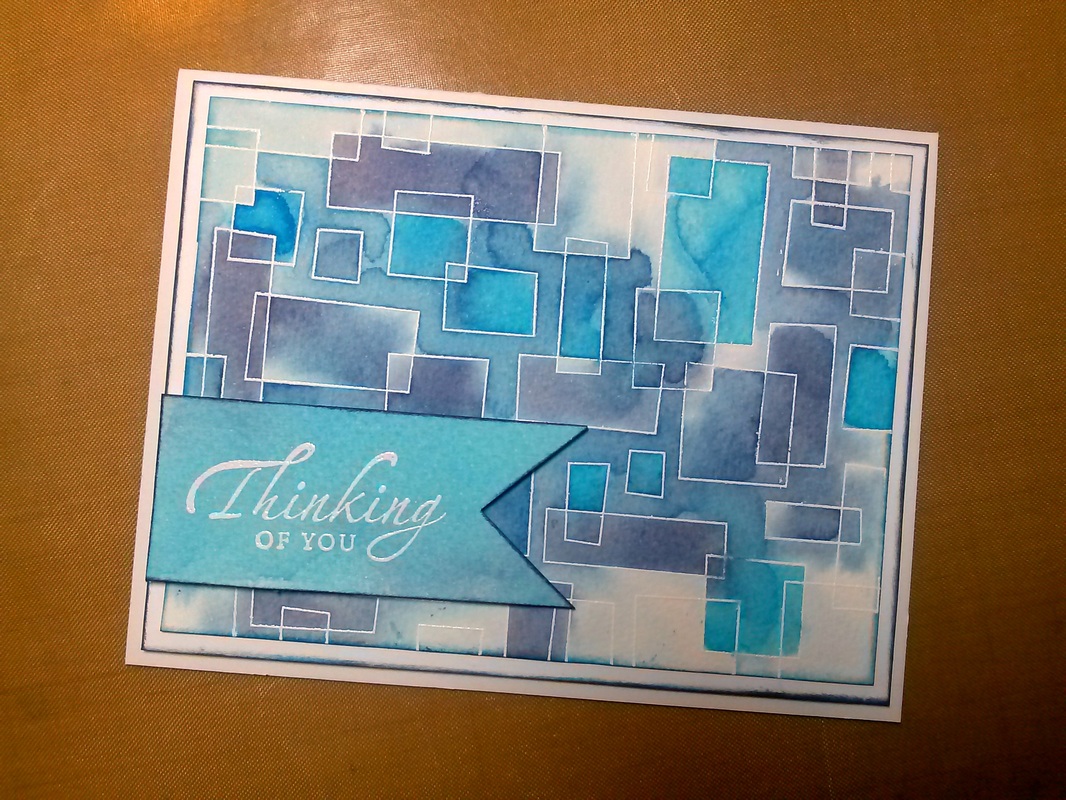
Picture
This card went to a co-worker who had knee surgery in June.
She is also a card maker, so I felt a little pressure while making this card. I'm very pleased at how it came out - I was experimenting with techniques and colors and it all came together! I love it when that happens!
Picture
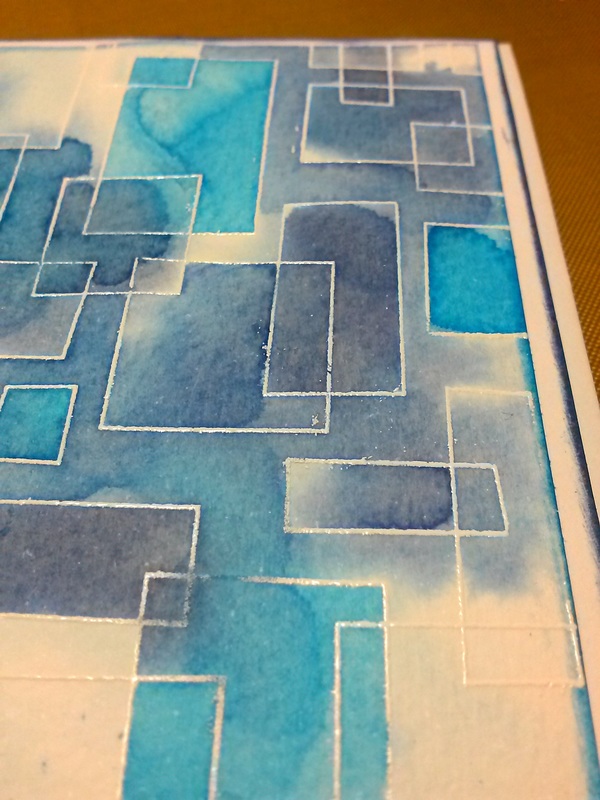
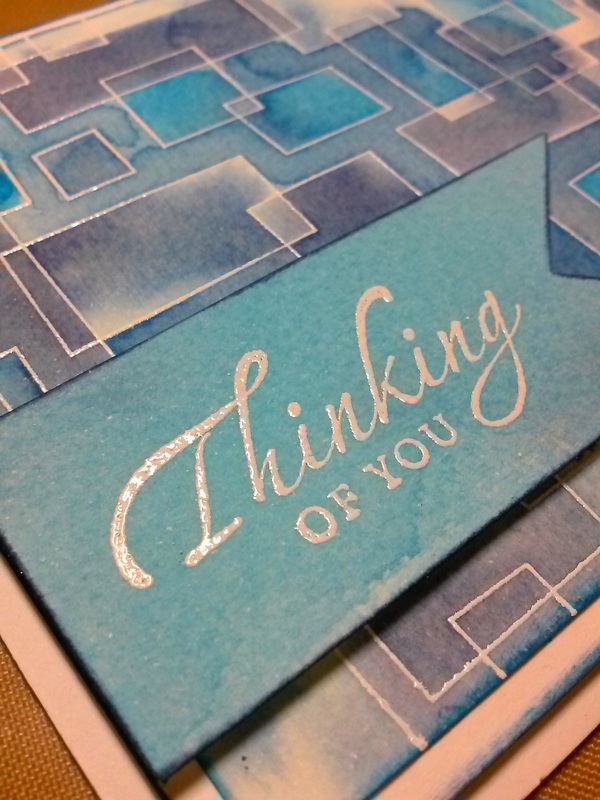
I used my newest background stamp with white embossing powder to create the background, then I took out some distress inks to color it in. I wet the paper first, then used a brush to pick up some ink and drop it onto the paper. I let the color go where it wanted to, adding more color and water as I went. It looked muddy while I was making it, but it dried beautifully! I love distress inks!
Picture
The friend I made this card for is also a card-maker, so there was a little bit of pressure to make this card a good one. I know she appreciated it, but I always like to present my best work.

Have you sent out any cards this summer? If not, you should! It feels great to drop a card in the mail and know that you will soon brighten another person's day.

What? You don't have any cards on hand to send? You can grab some of mine at my Etsy shop! (Remember, if you are local, contact me for a code for free shipping - I will hand-deliver your order!)

Happy Crafting!
0 Comments

Storage Solutions: Tool Carousel

7/28/2015

0 Comments

 
Crafters have lots of tools, and I am certainly no exception. I've spent many years being frustrated with options for storing those tools. If they were out on my desk, they were often taking up way too much room, but if they were neatly sorted into bins, I would never use them!

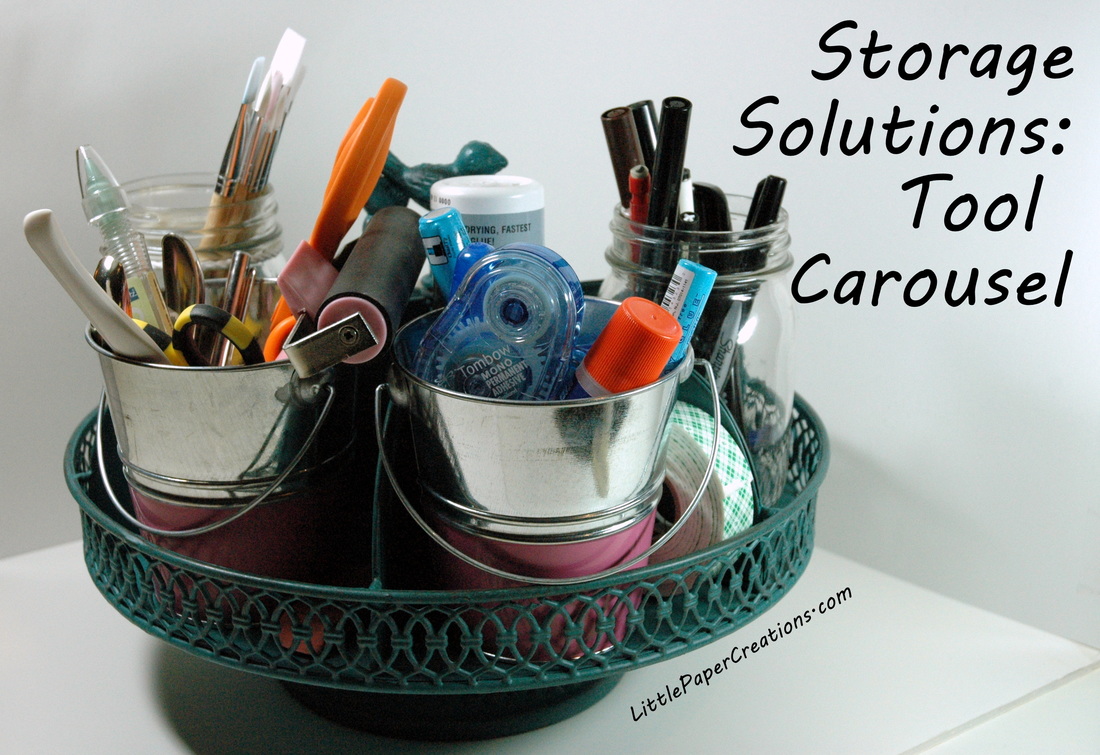
Then one day, I was browsing Michaels (like you do), and I found this amazing and adorable lazy Susan/carousel thing!
Picture
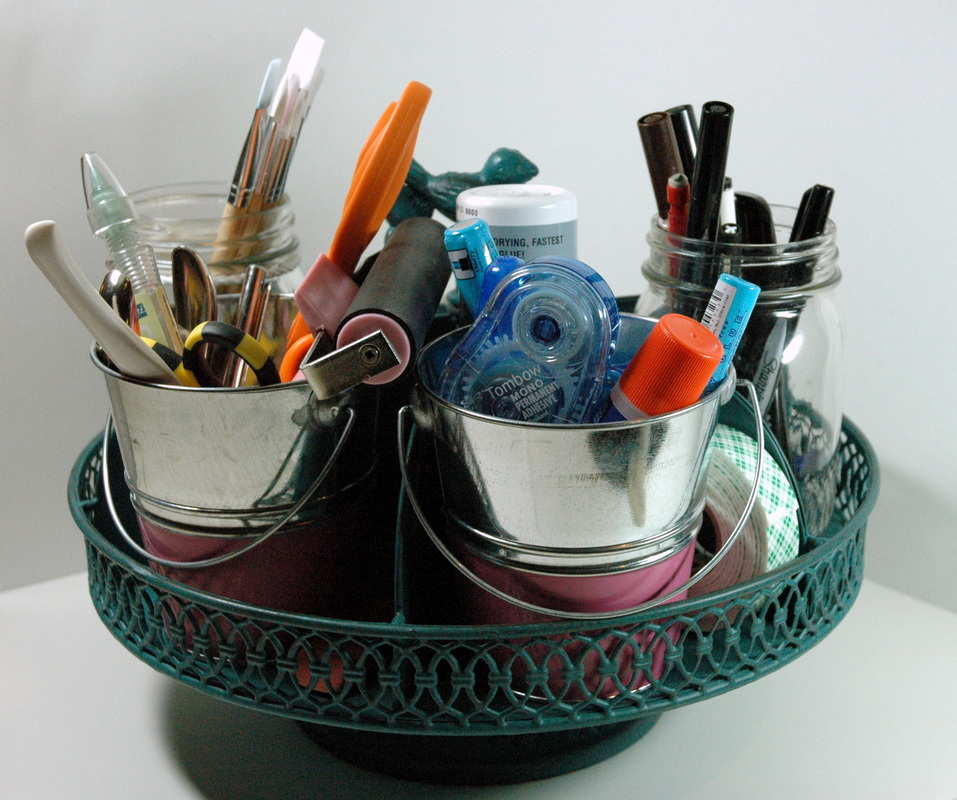
I immediately brought it home and started playing. I have collected many little buckets and jars over the years, so I just popped some of them onto the carousel and started organizing.

One bucket holds all the adhesive I use on a regular basis; tape runners, glue pens, liquid adhesive, and a small roll of foam tape. Specialized adhesive (like glue dots and my sticker maker) are in bins on my shelf - if I need them, I know where to find them.

Another bucket holds all my crafting tools. Several scissors, a bone folder, hole punch, poke tool, Quik-stix, X-acto knife, tweezers, and a brayer. These are tools I reach for very frequently. Again, the tools that I don't use often or that have a very specific purpose (like eyelet setter or a stapler) are in bins on my shelf.
Picture
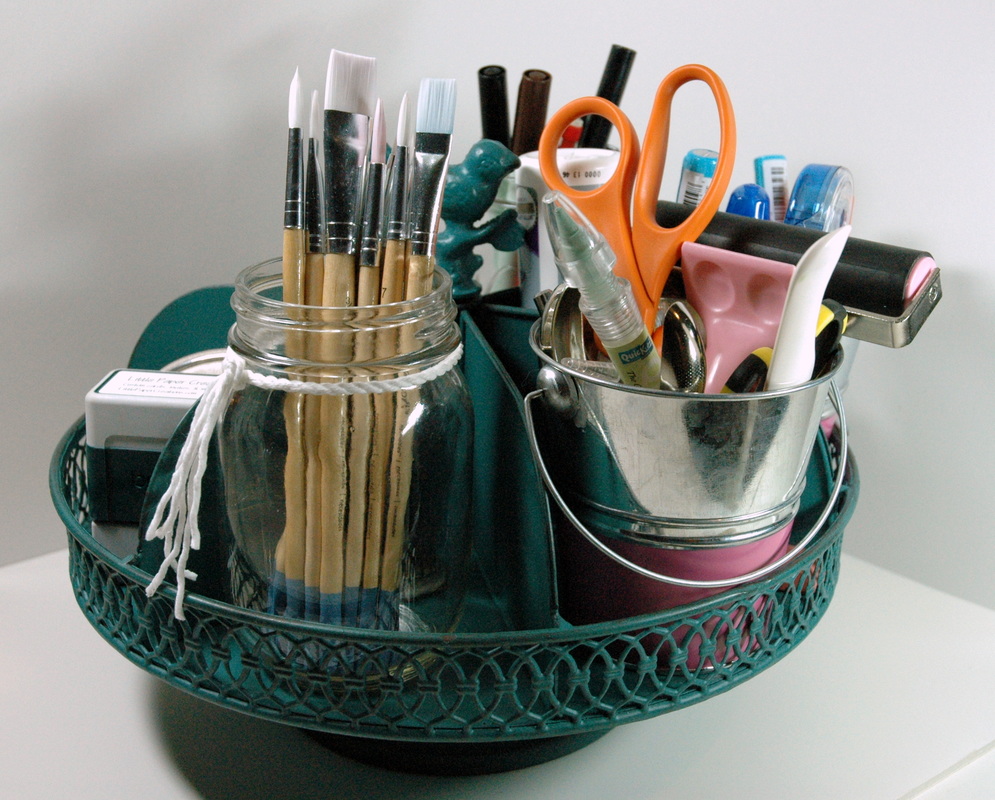
Turning the carousel a bit, I get to my paint brushes. I put them in a small mason jar so they'd stand up straight. I know I'm not supposed to store wet brushes pointing up like this (the water can seep down and rot the wood from the inside), but I only put them in here when they are dry. I let them dry on their sides on my desk. I just don't want the brush tips to get bent if I put them into the jar pointing down.

I also have a mason jar with pens and markers. I don't have a lot of markers, so I only need the one jar.
Picture
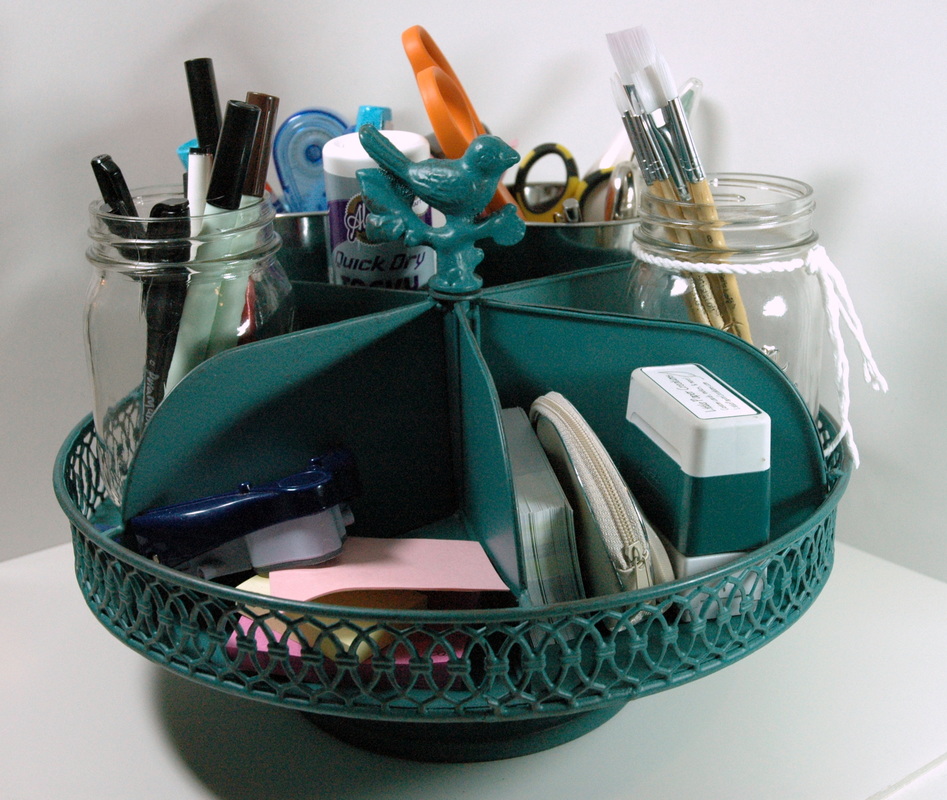
The back of the carousel holds some misc items that I use regularly, but have never found a good place for. My branding stamp, some post-it notes, my CM corner rounder, some business cards, and my small lenses for my phone camera.
Picture
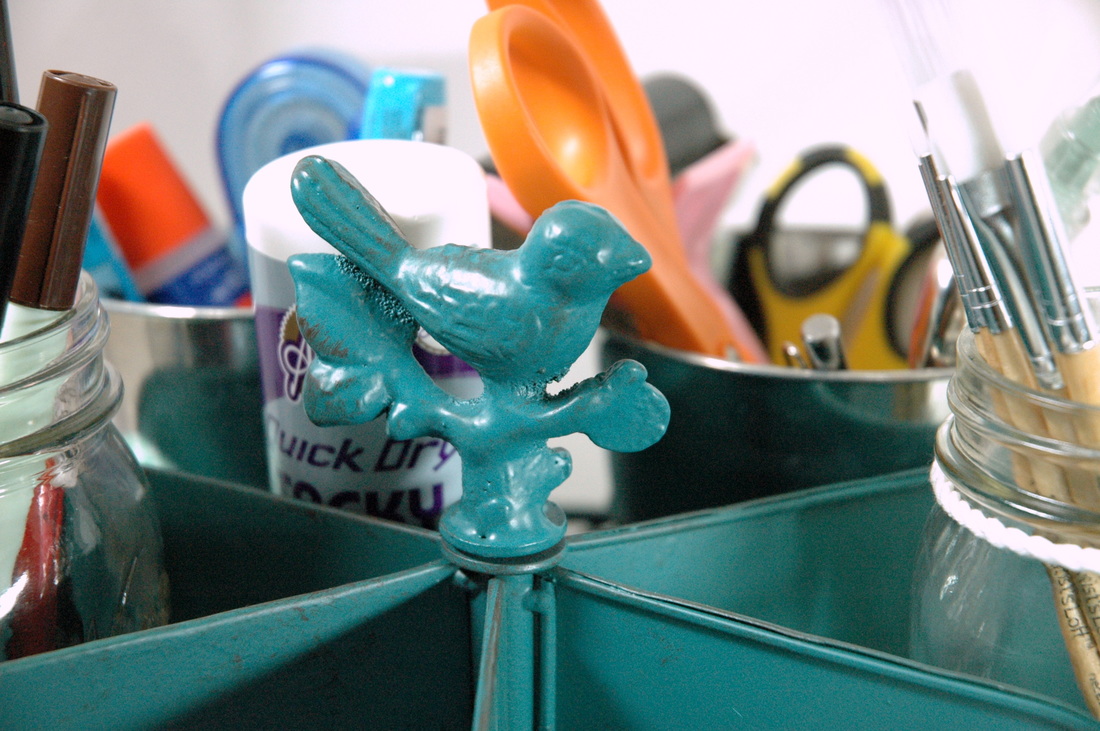
I love this carousel! I love the color and the little birdy in the middle, even if I don't see him that often because he's hiding behind all my tools.
Picture
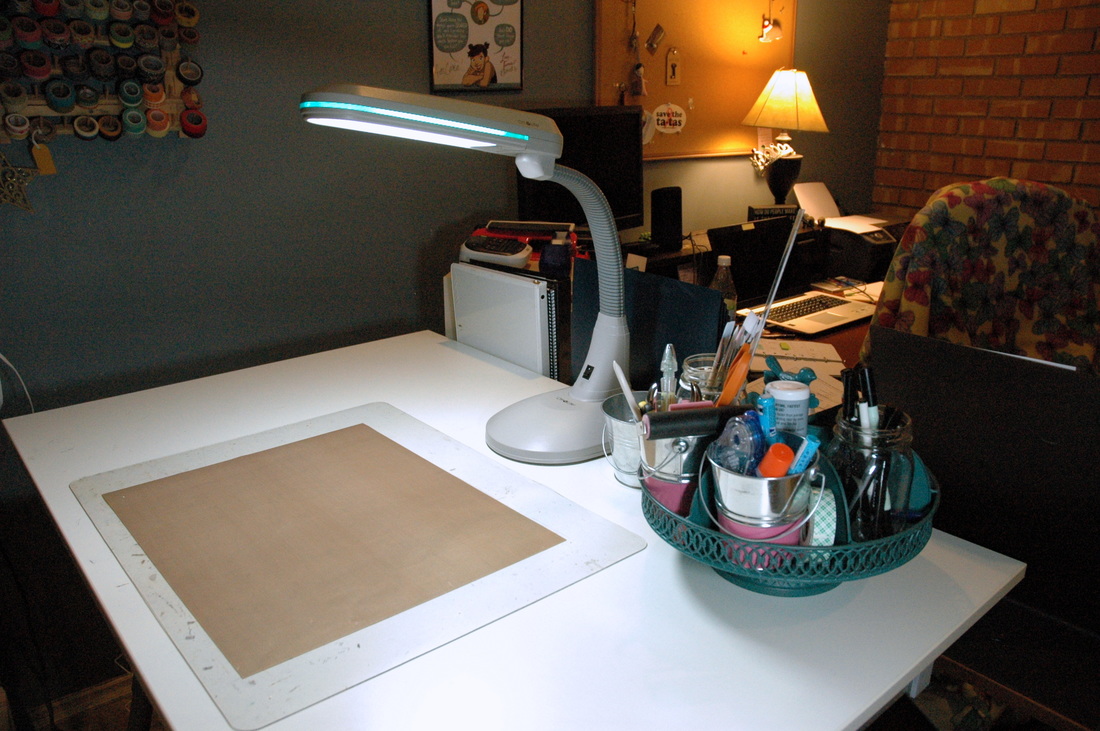
It holds a ton, but because it's raised off the desk on a small foot, it doesn't take up that much real-estate. Check out how clean my crafting desk is! What you don't see is the pile of work that got put on the floor for this photo. :-)
Picture
I got the carousel at Michaels, the buckets at Target, and the mason jars from my local grocery store.

So how do you store your tools? Is it working for you?

Happy Crafting (and organizing)!
0 Comments

My Favorite You-Tubers: Card Makers

7/21/2015

0 Comments

 
I watch a lot of You Tube videos. I like to have them on in the background while I make dinner or while I'm crafting. I follow mostly card-makers, but there's a few other types of channels thrown in there, too. I thought I'd do a small series on the people/companies that I follow so maybe you can get some inspiration from them just like I do!

This post is all about individual people who make cards (not 'company' channels). I follow a lot of card makers, but these 5 are my favorites - I watch their videos first, and I re-watch their videos often.

First up is my favorite card-maker and the person I get most of my inpiration from: Kristina Werner. She is a master of distress inks and she's so good at breaking down techniques to make them easy to replicate or modify to fit my own needs. I also love to see the photos and videos of her cats that she occasionally posts (mostly on Instagram).

Kristina's You-Tube Channel: Kristina Werner
Kristina's Blog:  kwernerdesign.com
And below is one of my favorite videos of hers; distress inking!
Next on my list is another long-time favorite: Jennifer McGuire. Jennifer's videos are always so well made and calming. She's great at explaining her techniques and she always tests out products before recommending them. She's also really good at making videos that show how to make quick and easy sets of cards, rather than just one card. She uses a lot of different products, but always says what a suitable substitution would be for those of us that don't have every product under the sun. :-)

Jennifer's You-Tube Channel: Jennifer McGuire
Jennifer's Blog:  jennifermcguireink.com
And below is one of my favorite videos of hers; multiple cards using stencils and ink.
Tracy is a newer follow for me, I just found her a few months ago, but I love her style and her simple cards. She uses simple tools and materials and finds different ways to re-use them to get unique-looking cards.

Tracy's You Tube Channel: Tracy Mae
Tracy's Blog: tracymae.com
And below is a recent video I enjoyed; using word stamps to make patterned paper.
Laurel is another new follow for me. She loves to get messy! Lots of water, lots of sprays, lots of ink, and lots of fun! She's great at just experimenting with colors and techniques and working with whatever comes out. I love watching her videos because I'm always inspired to go get messy and create something fun!

Laurel's You Tube Channel: Laurel's Crafts
Laurel's Blog: laurelbeard.org
And below is a recent video where she uses distress inks directly on the paper and stamps over it with water!
And last, but certainly not least, is Catherine Pooler. I debated whether or not to put Catherine on this list or my next one (all about crafting company You Tube channels) because she runs Stamp Nation, a card-making website/store/community. I decided to pt her on this list because she does all the videos, it's not a design team.

I like Catherine's videos because she is so upbeat all the time and she uses simple products or shares simple alternatives. She also tries different techniques with old materials and usually does it a few times to see how different things effect the technique (more or less water, more or less ink, etc).

Catherine's You Tube Channel: Catherine Pooler
Catherine's Blog: catherinepooler.com
Stamp Nation Website: thestampnation.com
And below is a video where she uses distress ink and simple dies and stamps.
I hope you check out some of these fabulous artists and find some new inspiration! Let me know in the comments or on Facebook if you follow any of these card-makers or if you follow any others that I should check out.

Happy Crafting!
0 Comments

Thinking of You (Inspired by a Shoe!)

7/14/2015

0 Comments

 
Picture
I'm not sure if I've ever mentioned it here or not, but I Jazzercise. It's so much fun, and an excellent form of exercise. I've made good friends and lost some lbs all while having a blast dancing and sweating away.

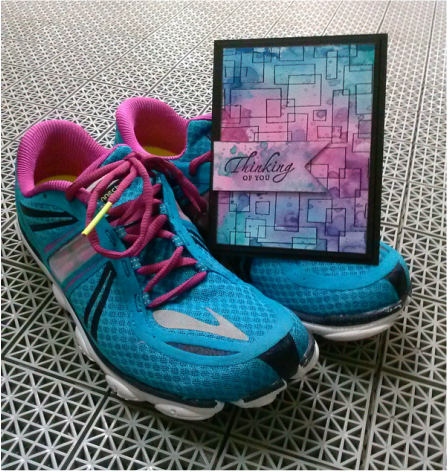
One of my Jazz friends had shoulder surgery recently, so I wanted to make her a get well card. I wasn't sure what colors she liked, but I know we have matching shoes at Jazzercise, so that's where I drew inspiration from when I made her card.
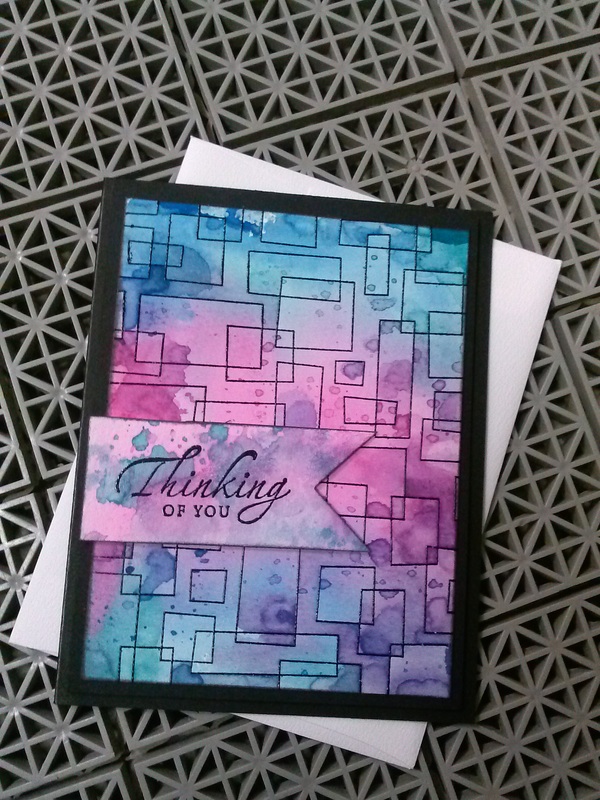
I love the bright, fun colors! I used the smooshing technique that I wrote about a few weeks ago, but instead of putting the ink colors down in a grid pattern, I put them down in blocks of color. The result was less busy looking that my normal smooshing backgrounds, which let the background stamp really show well. I also used 2 of the new sentiments on the card. "Thinking of You" on the outside, and "Get Well Soon" on the inside.
The geometric background and the sentiment are embossed with black embossing powder. The background is matted on black cardstock and mounted onto a black card base using foam adhesive. The sentiment flag is also mounded using foam adhesive.

I wish my Jazz friend a speedy recovery and hope she returns to full Jazz strength soon!

Happy Crafting!
Picture
0 Comments
<<Previous
Forward>>

    RSS Feed

    Blogs I read:

    Becky Higgins
    Bits & Pieces
    KWerner Designs
    Jennifer McGuire Ink
    I Could Make That
    Linny's Vault
    Pintester


    Categories

    All
    #30DaysofCreativity
    Baby
    Baby Shower
    Binder
    Calendar
    Cards
    Christmas
    Coupons
    Craft
    Distress Ink
    Etsy
    Fabric
    Family
    Feedbackplease
    Field Trip
    Flashback Friday
    Food
    Gift
    Haul
    Home
    Inspiration
    Internet
    Invites
    Magnets
    Organization
    Paint
    Photos
    Planner
    Project
    Project Life
    School
    Scrapbook
    Special Order
    Special Order
    Storage Solutions
    Thinking Of You
    Tips And Tricks
    Top5friday
    Tutorial
    Wedding


    Archives

    February 2016
    January 2016
    November 2015
    October 2015
    September 2015
    August 2015
    July 2015
    June 2015
    May 2015
    April 2015
    March 2015
    February 2015
    January 2015
    September 2014
    August 2014
    April 2014
    February 2014
    January 2014
    August 2013
    July 2013
    August 2012
    July 2012
    June 2011
    January 2011
    December 2010
    August 2010
    July 2010
    June 2010
    May 2010

Powered by Create your own unique website with customizable templates.