Happy Crafting!
I'm always up for trying a new craft, so when a co-worker asked me if I'd ever made a banner, I said no, but I'd love to try! 
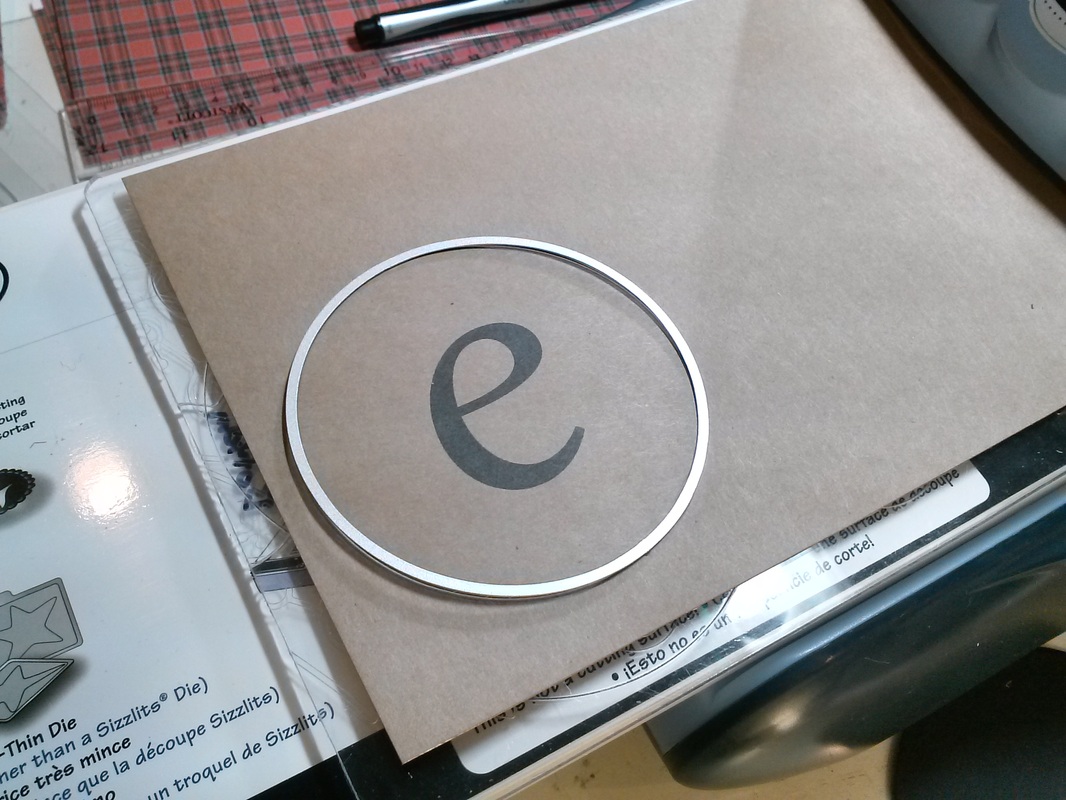
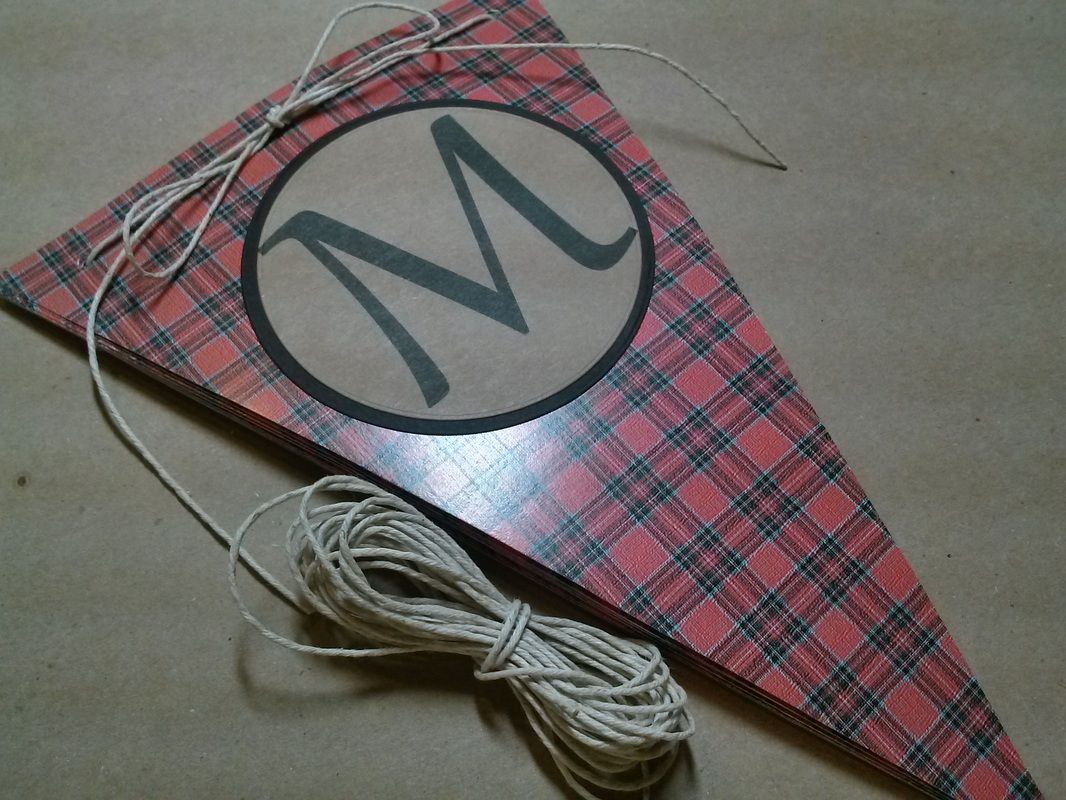
Since I have a new die-cut machine, I thought I'd try out some die-cutting with the banner. I printed the letters on cardstock and used a circle die to cut them out. 
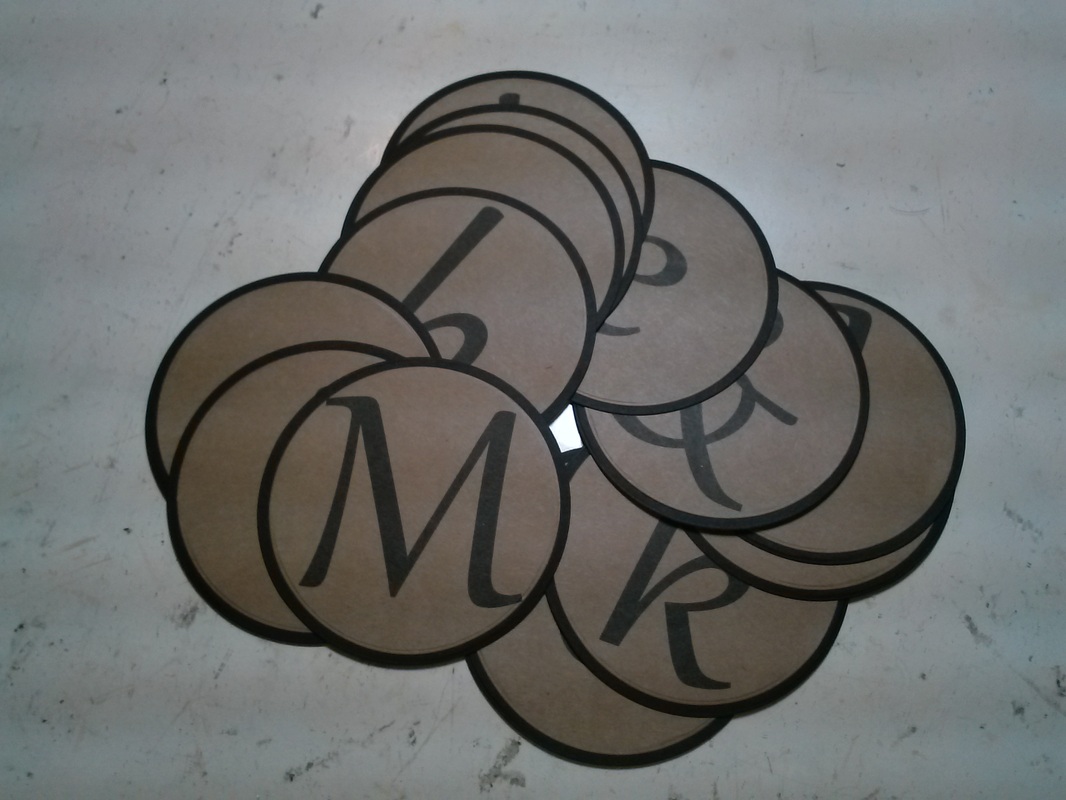
After they were cut out, I matted the letters on black cardstock cut from the next largest circle die. 
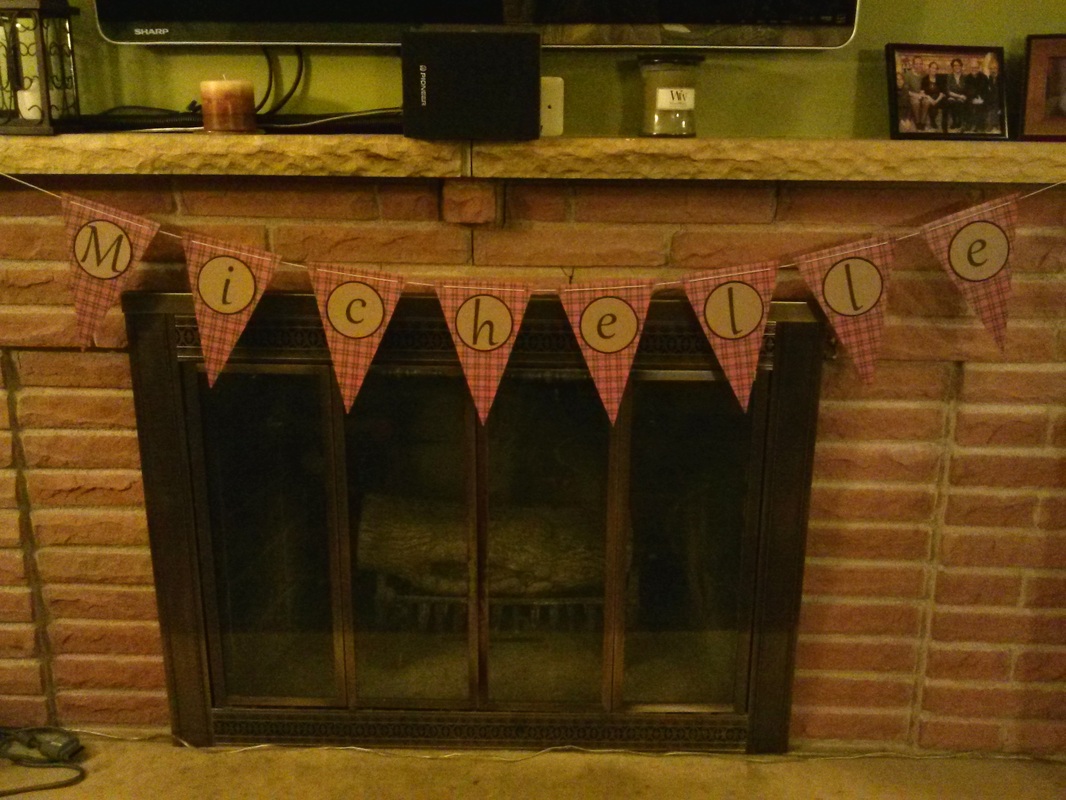
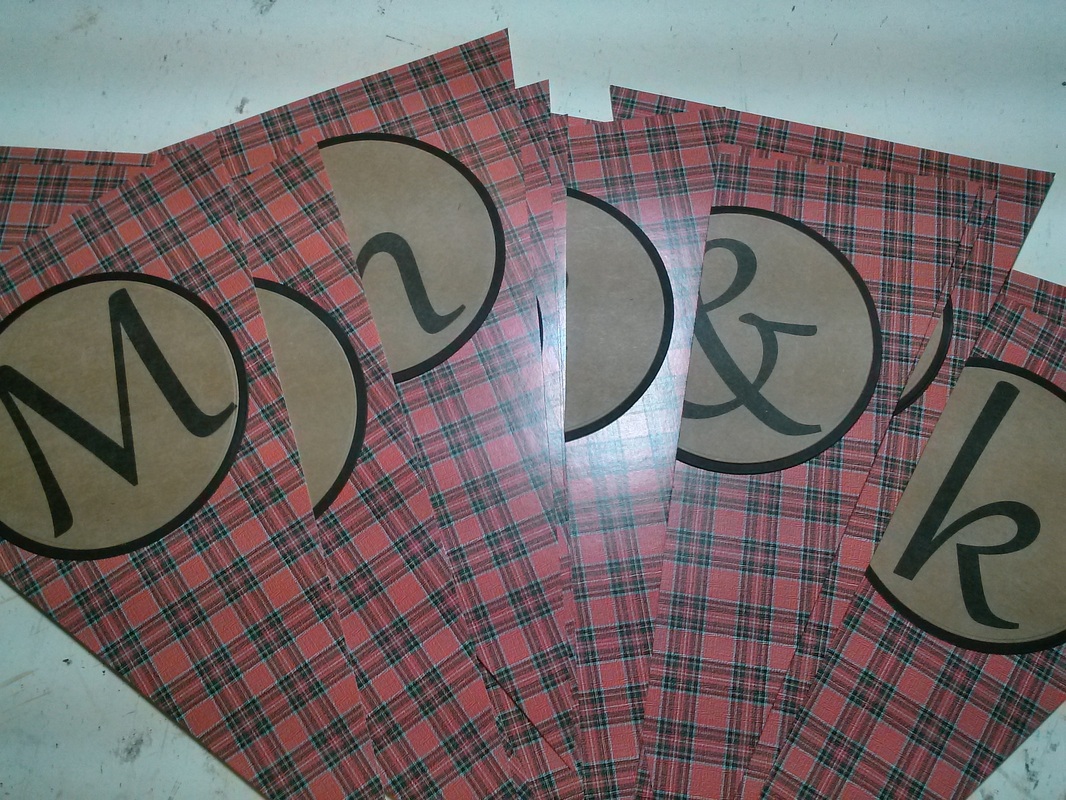
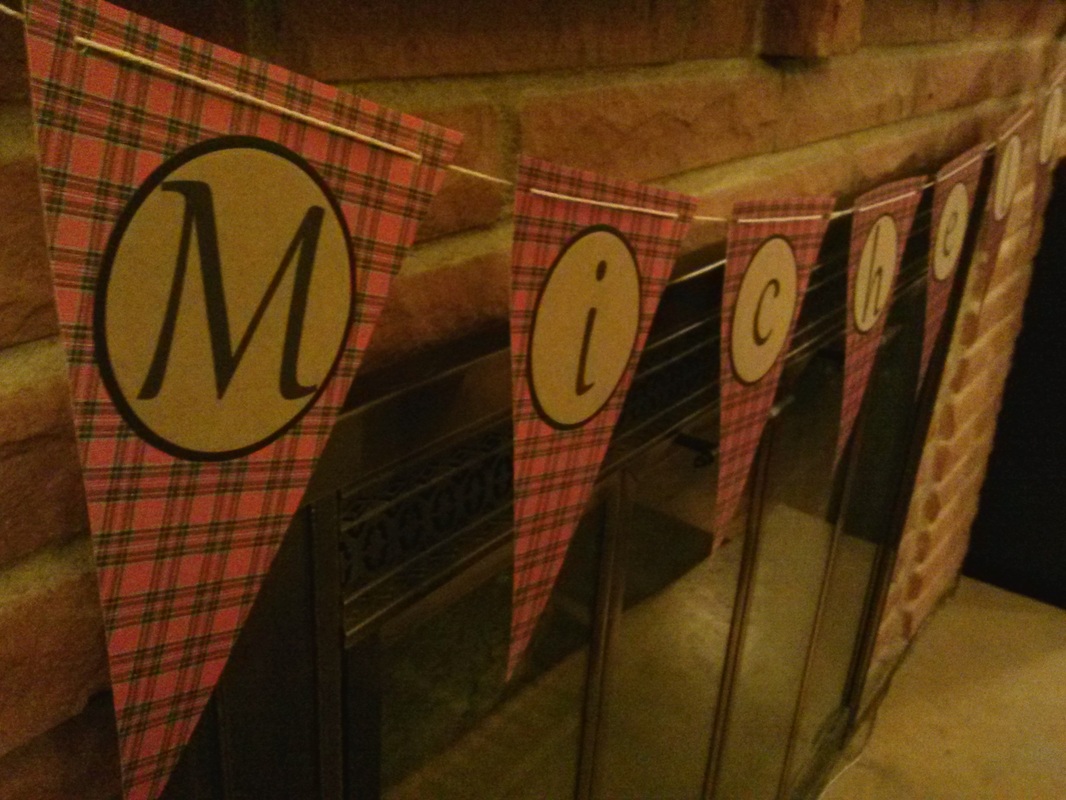
I popped the letters on the triangles I had cut from some fun plaid paper, and the banner was done! I really like how it came out! I love trying new things!
Happy Crafting!
0 Comments
I teach preschool. I teach a lot of preschool. I have 56 students, so when I give gifts or cards, I have to give a lot. I usually make Valentine's Day pretty easy. I stamp a pun-ny valentine sentiment on a piece of red cardstock, sign it, and add some bubbles. Easy! Done! But this year, I have a die-cut machine. And new dies. And apparently only half a brain. Because this year, I hand-made each valentine. Now don't get me wrong, I'm not completely crazy so they are not overly complicated. But it's still more than I normally do. Die-cut hedgehog and stamped sentiment from Lawn Fawn. Die-cut heart from school. Bubbles from Michaels. Do you give Valentine cards? How many do you give?
Do you make them or buy them? Happy Crafting! Have you ever seen a tool or a piece of clothing or a decor item that you really like, you really wanted, but you were too afraid to commit to? "Will I really use it as much as I say I will?" "Will it just end up collecting dust like that other tool/skirt/lamp?" "Is this just a fad that I'm going to forget about in a few months?" "What if I can't use/wear/display it right and I hate it?" Yeah, I'm sure you've been there. Most recently for me (because let's face it, I do this ALL THE TIME!), it was the Big Shot die-cutting machine. I've been watching a lot of videos of card-makers lately and all of them seem to use their die-cut machines almost constantly. I wanted one. But did I need it? Would I really use it as much as they did? Was die-cutting really my style? I researched brands and styles and all the millions of dies. I found more videos on different techniques that did seem more my style. And when Thanksgiving rolled around and it was time to send my family my Christmas wish list, I bit the bullet and put down "Big Shot die-cutting machine" and a whole list of dies from different websites. And lo-and-behold, on Christmas Eve, there under the tree was a rather large, Big-Shot-shaped box! My sister had come through for me! It was mine! But wait, no one got me dies!? So I've spent the last few weeks buying and trying dies and techniques. Because I want to get good at this. I want to use it. I don't want it to collect dust or be forgotten. And most of all, I don't want it to be a waste of money! I've made a few thing with my new dies. Nothing fancy, just playing around. They have glue marks and small rips and off-centered designs and inking gone wrong. But they are a start. A very fun start! So a big thank you to my sister for taking the leap and buying me a new toy to play with. Your next birthday card is going to be very fancy. :-)
Happy Crafting! I love photos. If you haven't figured that out by now, there's something wrong with you. I love to make things out of photos, not just scrapbooks, so I started making personalized photos magnets! They are pretty easy to make, all you need is some small photos, some strong, clear glue (I use Aileen's Clear Gel Tacky Glue), some flat marbles, and some small magnets. Start by selecting or finding the photos you want to make into magnets. You have to be aware of the size of your marbles because if the photo doesn't fit inside it, it will look wrong. I usually make a collage in Picasa and get it printed as a 4x6 so each of my photos are 2x2. My marbles are about 1.25x1.25, so the center of the photos fits nicely. I've written about making collages in Picasa before - it's very easy! I've also used photos from photo booths, greeting cards, Christmas cards, or even just some fun scrapbooking paper! You can cut out your photos one of 3 ways; 1) Use a circle punch. This is what I do - I happen to have a circle punch that perfectly matches the marbles I buy, so it works perfectly. 2) Trace around the marble and cut out with scissors. 3) Glue the marble down, then cut around the edges once the glue is dry. When your photos are ready, glue them onto the marbles! It takes some getting used to how much glue you need, but more is better - you can always wipe away extra, They may need a lot of drying time, depending on the glue you use (ps, hot glue will not work to adhere the marbles to the photos- it dries too fast and warps the photos. but it works great to adhere the magnets to the backs!), so keep an eye on them while they dry. My photos sometimes like to slide off the marbles while they are drying. When they are dry, glue a magnet on the back. More drying. Time to use your new magnet! I've made these mostly for myself, but I did make a couple sets as Christmas gifts last year. I got photos off Facebook and Flickr and made magnets from those. That's the great thing about these small magnets, you don't need great photos! My Mom asked me to make Christmas cards for her and Dad to send out this year. Which is great, except she never gave me any ideas on what they wanted or how many or by when. So I thought it was one of those "oh yeah, it'd be nice" sort of things where you're not really serious, you're just being nice. So when she asked me if her cards were done (right before Thanksgiving), I kinda freaked! But of course I got them done! I used a style very similar to the one I had made for myself several years ago. Different papers and a little simpler, but the idea was the same, so it was easy to pull them together. I made 30 for Mom and Dad and I have a few left over, so if you'd like one, you can head over to my Etsy site and get one for yourself!
Happy Crafting! As I've said before, one of my favorite projects of the year is making my Christmas cards for friends and family. In the past, I've worked mainly with patterned paper and some simple stamping. Last year (2013), I branched out and did some coloring. This year (2014), I feel like I've gone off the deep end, but I love how they turned out! I didn't use any patterned paper at all! I did heat embossing. I've been experimenting with heat embossing for a few months and I like it! I was inspired by Kristina Werner and Jennifer McGuire. They do a lot of stamping and embossing and I've been obsessed with their YouTube videos lately. I browsed Pinterest (of course!), watched videos, and experimented with several colors and designs till I came up with my prototype! I embossed a piece of kraft cardstock with white embossing powder using a Hero Arts stamp I got at Michaels and rounded the corners. Then I said them all out and put some Stickles in the middle of the snowflakes for a pop of color. After the base element was done, I heat embossed a greeting with red tinsel embossing powder onto a white flag and adhered that to the snowflake base with some foam adhesive. Then I adhered the whole thing to a piece of heavy-weight white cardstock for the base of my card (and I got a new crop-o-dile to round the corners!). A quick stamped greeting inside and they were ready to go! I made 60 cards this year, but I ended up only sending about 45, so I have some extras for sale in my Etsy shop! If you'd like one or some of these cards for a loved one, go grab them up!
It was challenging to do such a large project with such new materials, but I had a lot of fun and I feel very comfortable with embossing powder now. Though I have yet to figure out a good way to get it off my craft room floor... Any suggestions? :-) Happy Crafting! Sometimes, life moves too fast for us to pull out a camera and capture it. Today, I'm going to share some ways I incorporate journaling instead of (or in addition to) photos in Project Life. Every once in a while, Caribou Coffee has a BOGO promotion. I usually go alone, so there's no one to share the BOGO with. Lately, I've been passing on the free drink to the person behind me in line. I obviously don't take pictures of random people in coffee shops, so there's no photos for this story, But it is a story that I wanted to document. I saved the receipt, wrote the story, and put it onto a decorated 4x6 card. I love trying new food. I try to get a photo of any new creations I make, and of course they end up in my PL book (and in my recipe book), but it's so boring to keep writing "I tried a new recipe, it was good" every time I make something new. So I started printing out a miniature recipe card to put in my book. I rate the dish with stars so when I look back, I know if I liked it or not, but I don't have to write anything else. Sometimes I just have so much fun doing something, I forget to document it. That, or my friends get really tired of me snapping photos all the time. Or both... So when I go out to eat at a new or fun place, I grab their business card. It makes a nice supplement to my journaling about the event. Sometimes, there are stories that need to be told but don't need to be remembered or read every time you look through your book. Or maybe you don't want to share this information with everyone who ever opens your book. I had a very difficult day and wanted to write about it, but I didn't want to have to re-read it every time I looked back, so I made a folded journal card, decorated the front, and wrote on the inside. The story is told, and I can choose when to read it again. So there you have it - some of the ways I use or supplement journaling in my Project Life book. I hope this inspires you to tell your story.
Just because you don't have a photo, doesn't mean life didn't happen. Happy Crafting! My mom has a group of really close girl friends from college. There are 8 of them. It can be quite intense when they are all together. The great thing about having a bunch of friends like that is that there is always something to celebrate! Most of their kids are around marriage and baby-having age, so there are lots of showers to plan and attend. They all take turns hosting bridal and baby showers for each others' kids. Whenever my mom hosts, she comes to me for the invitations (DUH!), and now one of her friends has also started coming to me first for her invitations, too! This summer alone, I've made 3 sets of invites for Carol; one set for my sister's bridal shower, one set for another daughter of 'The Girls' (it sounds like a cult!), and one set for her daughter's friend. I've really enjoyed making all these invites because it gave me a break from the pile of periwinkle products I had to make for my sister's wedding this summer (another post later - I'm still recovering and taking photos). When I make invites as a commission for someone, I find out what theme, colors, or preferences they have in place for the event so I have a direction. Next, I create 3-5 prototypes using different papers and designs and send photos of these to the buyer. Once they choose a design (or tweak/combine one), I get crafting! Here's the invite I made for Carol for my sister's shower: I actually didn't make any other prototypes for this one and I didn't show Carol ahead of time because she said I could do whatever I thought Erin would like best. And Erin loved them! She always keeps stuff I make for her, she's so sweet! Here's another invite I made for Carol: (I put generic info on this one for photographing) Her instructions were "bright colors". Here are the other 3 prototypes I made for this order: The last order came with the instructions "sangria wine red and eggplant purple with matte gold as an accent". Now there's a bride who knows what she wants! Here's what Carol chose: And while I did make 3 other prototypes, I only made 'dummy' words for one other one: So there we are!
I am so happy that Carol likes my designs and comes to me for her invitation needs! I hope some of the people who get the invites seek me out as well! Happy Crafting! This week's top 5 Friday is all about crafting tools.
Since my crafts tend to revolve around paper, my tools are all pretty tame. I don't do a lot of fancy techniques, but the tools I use have to be good quality, they have to work the right way when I need them, and they have to last a long time. Here's my list: * Paper Cutter - I'd be lost without this - I can cut a pretty straight line without it, but it saves so much time! I use a rotary trimmer from Fiskars. * Corner Rounder - When I started Project Life, I bought a cheap corner punch from Michaels (the blue one - you know the one), but it hurt my thumb to use it for more that 2-3 photos in a row, so I researched and tried different models. I've firmly landed on the Creating Keepsakes corner rounder. I'm not even sure if they make these any more - I got mine at a garage sale for $1.00!!! * Cutter Bee scissors - small, sharp, precise, perfect (and yellow!) * Heat gun - this is a fairly new tool for me - I've just begun embossing recently, so I have not had to do much research on heat guns. The inexpensive one from Michaels is working just fine right now. * Tombow adhesive runner - I am in love with this tape runner! I've never found another adhesive that works as well that is as portable, easy to refill, and easy to find as the Tombow one. Ok, I'm done. Your turn! What are your favorite tools for crafting? (Keeping in mind that crafting could mean paper, woodworking, jewelry, yarn, fabric, photography, drawing, painting, anything!) Happy Crafting! I've always been kind of a plannerd (planner nerd). In high school, I used a simple student planner I got from probably Target to keep track of my assignments. In college, I got the official planner for our college (it had the college logo on the front and important campus events already listed inside) and I used that religiously for years. In fact, that's where my color-coding planner system began and where I first fell in love with post-it notes. I used the highlighting post-its color-coded for classes. The assignment would get written down and 'highlighted' on it's due date, then when I completed it, I would take off the sticky so it didn't stand out anymore. Here's what a typical week look like in my planner before anything goes in it. It's very minimal. I put a strip of washi tape down the middle to break each week into 2 parts - appointments and to-dos. (I just realized I used the same washi tape for both of these weeks - one is from May, one is not till October!) I use the outside edge for appointments - things that happen at a specific time or only on a specific day. Things like holidays, birthdays, work schedules, appointments, and events go here. The inner edge of the pages are for to-dos. I use color-coded post-it flags for my to-dos. This lets me see at a glance what kind of week I'm going to have - heavy on personal stuff, work stuff, errands, craft, etc. I keep all my post-its on a divider in my planner and I have a fly-leaf opposite so I can stick re-occurring events there (like going to the bank - I know I'll need to do that again, just not sure when. So I keep it back here). The nice things about the post-it flags are; 1) When I'm done with an activity, I can just take it off and throw it away - so satisfying! 2) If I don't get something done on Monday, I can just move it to Tuesday, or Wednesday, or whenever I have time to finish it on another day. And I don't have to keep re-writing it every day. 3) If there is a repeating event (grocery shopping every Monday or paying the phone bill every month), I can move the post-it to the next instance of that event when I'm done with it this week/month. I also use the slightly bigger notes for lists of things I need to buy or get from a certain store or person. Or things I need to bring to school the next day. Or any small list that isn't a to-do. So that's the calendar portion of my planner. I've been using this version of it since April and it's worked really, really well so far. I've made a few minor tweaks, but it's pretty much as you see it here. I'm going to make a video soon walking you through my calendar so those of you who like more visuals can see everything! And if you've read this far, thanks! I know I can be quite verbose at times. As a reward, here's a free download of my planner pages:
It's for half-size paper (8.5 x 5.5), so cut your paper in half before sending it through your printer.
You can decorate it any way you want! That's the beauty of blank planner pages! Please let me know if you have any questions or if you want to see more of my planner or if you want clarification on anything. I hope to be sharing more of my planner in the future, so stay tuned! Happy Crafting! |
Blogs I read:
Becky Higgins Bits & Pieces KWerner Designs Jennifer McGuire Ink I Could Make That Linny's Vault Pintester Categories
All
Archives
February 2016
|